Engine turning, also known as damascening, jeweling, krayling, or swirling, is a quintessential example of high-quality auto metalworking.
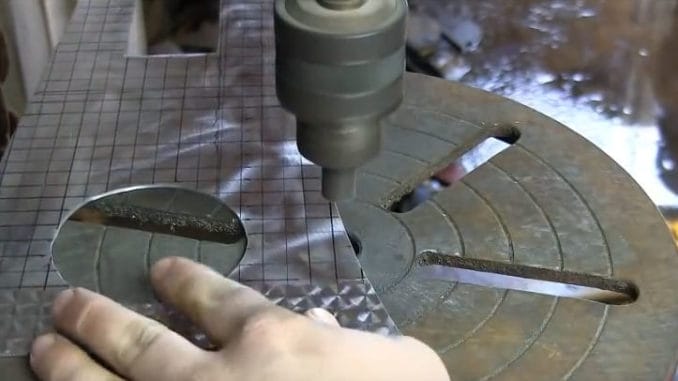
Engine turning is a process of inscribing geometric patterns onto metal surfaces as a finish. In this how-to, we look at how to execute this process using a few specific tools properly.
Step #1: Preparation
First things first, before beginning the engine turning process, put on safety goggles to protect your eyes. You will be working with a drill press, so it’s also a good idea to wear safety gloves to protect your hands from sharp metal edges.
The surface of the metal piece that you are going to work on should be completely clean, smooth, and flat. Using a flat piece of metal will ensure better results, but if you are using a curved piece, flatten it before you engine turn it, then reshape it after the process is complete.
For engine turning, you will need two different abrasive cylinders: a 1/2 inch diameter abrasive cylinder and a one-inch diameter abrasive cylinder with a mandrel kit. To set up the 1/2 inch abrasive cylinder, first cut the roll into two-inch lengths.
Insert one of the pieces into a drill press chuck directly, leaving only a one-inch extension beyond the end of the chuck. To set up the one-inch abrasive cylinder, screw the threaded end of the mandrel into the cylinder, and tighten it with the jamb nut.
Then, insert the mandrel into the drill press chuck. When using the drill press, the ideal range of rpm is between 900 and 1400. It is always best to start slow and speed up as needed.
You will want to use a lubricant consisting of 25 parts water and one part motor or machine oil for engine turning. Use this lubricant after every spin to avoid metal discoloration or abrasive cylinder deterioration. Now that you have prepared, it’s time to get started.
Step #2: Execution
To begin executing the engine turning process, you must establish a spin pattern. In other words, decide which types of overlapping swirls and patterns you want to create as a result of engine turning.
This can be whatever you want; be sure to practice some scrap metal pieces first. After deciding your pattern, note the length of time the abrasive was applied to the metal and how much pressure was used.
The abrasive should be consistently applied to the metal for that same amount of time with the same amount of pressure throughout the process. Avoid over-applying pressure as that can cause the end of the abrasive roll to mushroom out and result in inconsistent pattern sizes.
Steadily work from left to right and overlap each next row with about 50% the area of the previous row. You can overlap from left to right as well as right to left. Once the pattern is completed, apply a clear coat to enhance and strengthen the abrasion resistance.
Always make sure that your drill press is securely attached to a smooth and flat surface, and use a sturdy ruler as a guide while you’re engine turning. Never scribe the metal surface in the areas you want to spin, and never use permanent markers to lay out patterns or guides.
Instead, use tape or a lead pencil. Auto parts, like dashboards or firewalls, should be cut from pre-spun sheets that have square corners. This way, it will be must more easy to keep patterns consistent and clear. Lastly, dress the abrasive cylinder ever six or so spins with 220 sandpaper to remove any particle buildup or debris.
Follow these rules, and you will be able to engine turn like a professional.
Video: Engine Turning 101
Engine Turning Kits
If you want to try engine turning yourself, Eastwood offers 1″ and 1/2″ kits that can be used with any drill press.
Each of Eastwood’s kits contains two abrasive synthetic rolls and a mandrel. You cut the rolls down into six 2″ plugs. Chuck the roll and the mandrel into a drill press, lower the roll and move the metal. Repeat. Patterns are only limited by your imagination and patience.
Source: Eastwood
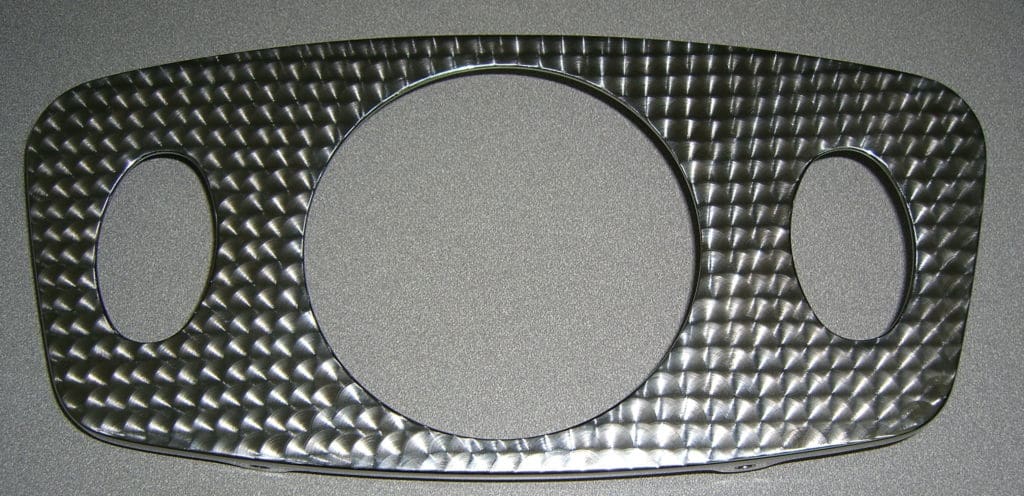
Freestyle to CNC Precision Engine Turning
Mark Presling demonstrates engine turning that is easily carried out in the home shop using simple materials and several different methods from freestyle to CNC precision…


