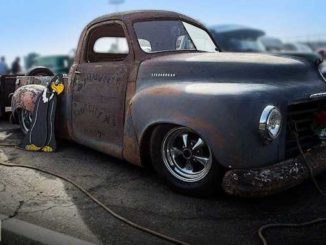
Hot rods, customs, and restored classic cars are more popular than ever, and that popularity has driven up the cost of projects, original parts, and finished cars, making hot-rodding more expensive than ever.
But there’s hope for the hot rodder on a limited budget: Build Your Own Hot Rod!
Also popular with visitors to this page:
The resources presented here are intended to help facilitate your hot rod project from inspiration and planning to building and customization — all without breaking the bank.
There’s no getting around the fact that a vehicle build or restoration is a big, expensive, time-consuming job. There are many parts of the job that rely on one another, which can really make it hard to know where to start, let alone what steps to do, and in what order.
Estimated reading time: 21 minutes
Table of Contents
- Choosing a Project
- Do It Yourself or Pay a Professional
- Planning
- Finding Parts
- What’s the best way to set things up for a successful build?
- Disassembly
- Chassis/Suspension [Rolling Chassis]
- Engine/Transmission [Drivetrain]
- Bodywork
- Mock-Up
- Wiring
- Paint
- Interior
- Final Assembly
- Make It Legal
It all starts with a project vehicle…
Choosing a Project
Project vehicle choice can be determined by many different factors. If you already have your project, jump to the next section.
In some cases, the project choice has been made for you — perhaps a vehicle that’s been in the family for a time is prime for restoration. Or maybe the type of vehicle has been determined, but the actual project has yet to be purchased and brought home.
Project Vehicle Considerations
When hunting for a project vehicle, several items should be considered.
Purchase Price of the Project Vehicle
Arguably, the type of project vehicle is limited by your budget — certain popular models or body styles can demand a high price — even for a very rough project vehicle.
If you’re not set on a particular body style or model, you may want to consider a body style or model that is not as in such high demand, a four-door model, for example. Often, a more complete less-in-demand vehicle can be had for a better deal than an incomplete or rough high-demand vehicle.
There are several resources available that can provide guidelines to current market prices for classic and collector vehicles in various states of condition.
Condition of the Project Vehicle
Whether you are working on a restoration, custom car, or a hot rod project, it is desirable and cost-efficient to purchase as complete a vehicle as possible. The value of completeness can hardly be understated, although not always acquirable.
For restoration projects, missing parts, even minor brackets, and trim can be costly and time-consuming to track down.
For hot rod projects, parts not needed can be sold to recover the initial investment. Although, if you are planning a hot rod project, an incomplete vehicle at a lower price may be worth considering.
If considering an incomplete vehicle, an evaluation should be made to determine the impact of the missing items. For example, missing, worn, or damaged drive train components will not have as much an effect on a hot rod project as it would for a restoration project. Consider the cost and availability of the missing items deciding on the purchase price.
It should also be noted that a running project vehicle can be exercised while planning the next phase(s) of the project. If it runs and is safe to drive, why not enjoy it for a while?
- How To Assess an Unfinished Project
- How To Check If Your Amazing Barn Find Actually Runs
- How To Do A Field Assessment When Buying a Classic Car
Availability of Replacement Parts
Certain models/years have more aftermarket/reproduction parts available than others. The availability of parts could affect the cost and time required to complete a project. Be mindful of this as you are planning your project. Start research and looking for parts early. There’s more info below to help you determine the availability of parts for a particular project.
Project Vehicles For Sale
Search unfinished project vehicles, salvage cars and trucks, motorcycles, and potential part donors. Select a Make below to browse project vehicles for sale from our own stash, eBay Motors, and other sources assembled on one page…
Rather shop locally? We’ve found a number of fantastic project vehicles on our local Craigslist, as well as the vehicles section on Facebook Marketplace.
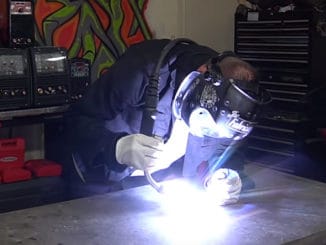
Do It Yourself or Pay a Professional
The question of doing the work yourself or paying a professional shop is always a big one.
For many, the fun of a project vehicle is in performing work themselves, but for others, the time involved and skills required answers the DIY or Pro question. In a lot of cases, however, even the most seasoned builder sends out particular parts of a project that require specialized skills and/or equipment.
If you choose to have a professional shop do even part of the work, do some research before committing to the job — have a written understanding as to what is work to be done and the costs involved. Know what you’re getting into.
When it comes to an automobile build project of any size or type, it’s not beyond the realms of possibilities of things that are simply unforeseen by both parties. It’s the nature of these kinds of projects, just like remodeling a house, once the walls are opened up, anything is possible. The key if and when this situation arises is that both parties agree on how it should be handle.
If your choosing to do it yourself, or even some of it yourself, we commend you. Here are some resources to get you off to a solid start:
DIY Guides and How-To Articles
Keeping costs under control
- How To Build Your Project Car On A Budget
- 10 Hot Rod Budget Build Alternatives: Buy This, Not That
- 15 Hot Rod Budget Build Alternatives: Do This, Not That
- Top 5 Tips For Building Your Traditional Hot Rod On A Budget
- More budget build resources…
Universal and DIY Customization Kits
Here’s a secret: your local hot rod shop does a lot of what they do with kits. They are affordable, universal, and often less expensive solutions than custom fabrication, especially if budget and skillset are in question, and/or paying pros is being considered.
There are certainly more kits available, some certainly more practical, so do your research, but these kits available from Amazon should give you a clear idea of the boost several well placed kits can give your build — They save time and money.
Planning
Before you start tearing things apart, it is a good idea to put some sort of plan together. Initially, we’ll go over more general things, and get into the actual build process and sequence below.
Proper planning can ease the frustration factor encountered in any project, as well as reduce the time required to complete a project. Take your time and think things through. Lets get into your workspace, and then tools.
Workspace and Storage Areas
Your workspace can range from a carport to a multi-stall, heated garage with a lift. The bigger and better equipped the workspace, the easier and more comfortable the work will be. But even if you’re in Garage Mahal, some of the exceptional rides that have come out of limited workspaces built with basic tools should not be discounted.
Auto Repair Lift and Bay Rentals and Other Garage Spaces
We explain all of your options for space to work on your car — from DIY auto shops and garages to more unconventional alternatives.
Availability of storage space also should not be discounted when working on a project vehicle. Storage space is necessary to keep the workspace clear, as well as keeping parts from becoming damaged or lost.
Tools
Like the workspace, much progress can be made even with limited resources, however, the greater variety of tools at your disposal makes the work much easier, faster, and safer.
Many of the tools you’ll need you already have on hand. There will certainly be some that you don’t have, and ones that really can make a job doable are often specialized and expensive. Thankfully, most of these tools dont need to be purchased, as most specialized tools (spring compressors, engine hoist, power tools, etc.) can be borrowed or rented as needed.
The Right Tools for the Job May Be Loaner Tools from your local Auto Parts Store We get it. Tools can be pricey, and sometimes you only need to use them once. If you’re short on tools, borrow them from your local auto parts store. We’ve done the leg-work for you and put together a summary of the tools and services available from your local auto parts store.
Always practice safe working habits. Always use the correct tools for the job and know how to use them safely. Do not cut corners (cost) when it comes to your safety and the safety of those around you.
Camera / Computer / Laptop / Smart Phone
For a restoration or rod project, a camera should be considered a necessity. It need not be an expensive unit, and a Smart Phone will do just fine. Use of a camera in the restoration or build process is explained below in the Take Reference Photos section.
While a computer is not absolutely necessary to during a restoration or hot rod project, it can be very useful to do your research, record research information, progress logs, part numbers, etc. For young whipper-snappers, the Smart Phone may serve the purpose here too.
This equipment can also be used for scanning photos and product labels (explained in Keep a Project Log below), as well as other uses that you may discover yourself as you go.
Take Reference Photos
Before disassembly or any work begins, it is prudent to take minimally several “Before” photos of your project. This should be done even (maybe especially) if the work is to be done by a professional shop.
Photos should include general overview photos taken at all angles of the vehicle, decal/identification plates, as well as photos of important details and/or unique features that could aid during reassembly.
During disassembly and throughout the project, photos can be very useful to ensure correct assembly or placement. Photos of wiring behind switches and gauges can also be indispensable when your trying to get everything back together.
Additionally, you may find it helpful to take photos of other vehicles similar to yours at car shows or museums to be used as a reference or inspiration.
Research
If you are reading this, you are already doing research. Good job.
You’ll find that research will be necessary throughout your project. Here are some resources to help with ongoing research.
Use the Internet
The Internet is your number one research tool, as well as a conduit for meeting and sharing ideas with other automotive enthusiasts. There are scores of websites devoted to automotive interests and almost any type of vehicle.
The ones worth spending time on have interactive features allowing enthusiasts and hobbyists to ask and answer questions, buy and sell parts and vehicles, and share their projects with people who share their interests.
Visit Car Shows and Museums
Car shows (and the people met at car shows) and auto museums can be a great source of information and contacts.
Some museums have research libraries that can also be a great source of information.
Books and Publications
There are many publications available that cover almost every type of classic or collectible vehicle. They contain useful information, as well as ads for commercial parts vendors — often an idea gold mine when building a vehicle. Many of the rags have transitioned to the Internet, others are no more, but back issues can be found on sites such as Amazon, eBay, and Facebook Marketplace.
Join a Club
Clubs can be a great way not only to enjoy the hobby, but also a great way to share information and “network”.
There are many national and international clubs that focus on specific makes and models, or types of vehicles. Clubs are an indispensable source of information, parts, and in some cases, assistance! A local club can also be a great source of information about local services that may be needed such as welding, machining, and paint, not to mention like-minded comradery and general advice from others that have built and restored automobiles.
Many clubs have regional or local chapters and regional and/or national meets that can be a honey-hole for the swap meets parts, and an avenue for showing off your pride and joy when it’s finished. Local clubs can also be a great way to maximize the enjoyment of the classic and collector vehicle hobby year-round.
Find Sales Literature, Service and Parts Manuals
These publications can provide a wealth of detailed information:
- Sales literature can provide information on original colors and interiors, optional equipment that was available, etc.
- Service manuals can provide disassembly/assembly, repair and maintenance information.
- Parts manuals often provide exploded views and can assist greatly during disassembly and help to ensure proper parts and fitment during assembly.
Keep a Project Log
A project log or journal is useful for several reasons:
Record Progress
Not only can this build morale, but will help to plan future needs and goals.
Record Part Numbers and Information
When purchasing parts, whether from a commercial source, swap meet, local merchant, wherever, it can quite be useful to keep a record of the following things for future use, e.g. replacement, etc:
- Part Number
- Vendor Name
- Vendor Address/Phone/eMail
- Date Purchased
- Any other part information (photograph, record or keep information label or panel from the packaging)
Record Costs
Record the cost of parts and services. It can also be helpful also to record the funds raised from the sale of spare/unused parts to offset the cost of parts/services purchased.
Record Ideas, Comments, Research
Often during research, or disassembly, information will be obtained that will be useful at a later date. Make a note of it.
Record Contacts
Many times useful contacts can be made by talking to other hobbyists. Whenever possible, exchange contact information.
Maintain a Shopping List
Some items are not available through aftermarket or reproduction vendors, and may only be available at swap meets. Maintain a list of parts and tools needed to complete your project.
Finding Parts
Swap Meets and Car Shows
As mentioned in Research, swap meets and car shows can be an excellent source of parts. Larger swap meets will be attended by commercial vendors, many which also do mail order business. Gather catalogs and business cards for future reference.
Internet
Many hobby-related web sites offer a parts/ vehicles for sale/wanted bulletin board, also many commercial vendors have web sites.
https://www.facebook.com/marketplace/category/autoparts/
Salvage Yards
Once very common, salvage yards and junkyards containing collectible/vintage vehicles are fewer and further between.
There are still a few around the country that specialize in collectible and vintage vehicles, some we’ve featured on this site.
Parts Donor Vehicles
For some builds, the parts list gets to the point where it is more cost-effective to buy an entire parts vehicle. This is especially true if a lot of miscellaneous parts (brackets, trim, handles, glass, and other small items) are needed to complete a project — these smalls can nickel and dime a project to out of control.
Excess parts that go unused can be sold or traded to recover the cost of parts and/or services purchased.
Before you jump into a towing a parts car home, consider:
- A parts vehicle will need to be stored. This could require extra cost if stored in a commercial storage facility, or use valuable space in your workspace.
- Buying an entire parts vehicle can tie-up needed funds. Does this make sense for your build?
The value (or need) of a parts vehicle must be considered before purchasing. As a suggested rule of thumb, at least 50-60% of the purchase price of a parts vehicle should be parts that can definitely be used on your project, with the remaining parts having some value for resale.
Vintage Car & Truck Parts For sale by Category
What’s the best way to set things up for a successful build?
In the loosest of terms, we break it down to:
- Disassembly
- Chassis/Suspension
- Wheels/Tires
- Engine/Transmission
- Exhaust
- Bodywork
- Mock-Up
- Wiring
- Paint
- Interior
- Final Assembly
- Make It Legal
Disassembly
Now that initial planning and preparation are out of the way, it’s time to fire up the cutting torch and start tearing things apart, right? Here’s a couple points to ponder:
- Disassembly should always be done in a thoughtful, organized manner.
- Don’t disassemble/remove any more parts than your ready to work on.
The importance of marking, bagging and tagging parts
During disassembly, take photos, make sketches, and record fasteners (bolts, nuts, screw) location, size, the number used, and any other pertinent information as things come apart.
Label everything — especially brackets, mounting hardware, and other small parts. Be prepared with plenty of zip-lock freezer bags (freezer bags are stronger and have a label section for marking clearly), masking tape, and sharpies on hand. If you’re pulling the harness, zip-ties and electrical tape can also be handy to keep the harness managed in sections as it comes out of the vehicle.
Save samples and info for replacements
If the old hardware, panel clips, weather-stripping, or other items or materials require replacement, save selected samples with as much information as possible (number/length/amount needed, etc.). This information will be very useful when purchasing replacement parts.
Take note of original colors
Any given vehicle may have been repainted many times, or the original paint may have faded. During disassembly, check-in enclosed/protected areas (inside fender wells, under mounting brackets, etc.) for the original color.
These areas are less likely to have been repainted and/or exposed to the elements.
Chassis/Suspension [Rolling Chassis]
It’s often best to start on the chassis, as wheel and tire choices will determine whether or not wheel tubs need to be widened or flared.
As with any other aspect of the build, choices here have cascading effects, as wheel choices determine what brakes will fit or vice versa. Engine and transmission choices might necessitate firewall or floorpan modification as well.
While on chassis, if you’re thinking about a Chassis Swap, we’ve put together an overview of swapping a classic vehicle to a modern drivetrain.
Finding a chassis
(or looking up specs for your project vehicle)
Building a chassis
- How To Build a Budget Hot Rod Chassis
- How To Build a Model A Hot Rod Chassis
- Old School Model T Chassis Build
- Early Ford Beam Axle Identification and Dimensions
Getting your chassis dialed-in
- How To Narrow a Chassis
- How To Graft a Sub-Frame or Front Clip
- How To Install Universal Rear Step Notch Kit
- How to Firm the Flex ~ Chassis Stiffening
- How To Install Rear 4-Link Suspension for Air Ride and Coil-overs
Wheels/Tires
- Wheel Bolt Pattern Cross Reference ~ What Wheels Fit?
- How To Determine Suspension, Brake, and Wheel Clearance
Related resources to help get you to rolling chassis
- Axle Flange Housing Identification
- Differential Identification Chart
- Differential Gear Ratio Calculator
- Early Ford Beam Axle Identification and Dimensions
- How To Determine Ride Height and Shock Absorber Length
- How To Select Proper Rear-End / Differential Gear Ratio
- Rear-End Widths of Classic American Cars
- Speed Potential Calculator for Ring Gear and Pinion Changes
- Tire Change / Speedometer Change Calculator
Engine/Transmission [Drivetrain]
Your engine block/transmission can be used for mock-up purposes before the vehicle is fully assembled and painted, which is why it makes sense to sort out the chassis first.
With the chassis planned, your vehicle needs a heart. We’ll assume that you won’t be machining your block yourself. If your block needs boring, honing, and decking, send the engine out to be machined.
If your transmission is in need of a rebuild, or your choices make a custom bellhousing or adapter a requirement, now is a good time to get crackin’ on those things.
Finding and engine/transmission
Going junkyard or salvage engine/transmission?
- How To Test and Assess the Health of an Older Engine
- How and Where To Score a Cheap Junkyard Engine
- How To Scavenge a Junkyard
- Cheap Junkyard V8 Engine Potential ~ Ford vs Chevy vs Dodge
Getting your engine/transmission dialed-in
- Custom Motor Mount Considerations
- How To Adapt ANY Engine to ANY Transmission
- How to Measure for a Driveshaft
- How To Determine Engine/Pinion Angle
- How To Select a Torque Converter
Additional engine resources
- Chevrolet Engine Block Numbers
- Ford Engine Block Numbers
- Mopar Engine Block Numbers
- Connecting Rod Ratios
- Engine Displacement Calculator
- Engine Firing Orders
- How To Calculate Compression Ratio
- How To Build Hot Rod Motor Mounts
- Horsepower Gain from Additional Blower Pressure Calculator
- Popular V8 Engine Swap Dimension Chart ~ Will your engine choice fit?
Additional transmission resources
- Popular Automatic Transmission Dimensions
- Popular Automatic Transmission Identification Chart
- Popular Manual Transmission Dimensions
- Transmission Gear Ratio Chart
Exhaust
- How To Design An Exhaust System
- How To Determine Proper Exhaust Tubing Size
- How to Make X Pipes, Y Pipes, H Pipes and Exhaust Transitions
- Exhaust System Kits and Parts
Like many other parts of the build, this overlaps to point with mock-up. You’ll need to ensure exhaust clears inner fenders, for example, and may need to fit timgs to fashin body mounts or perches on the chassis.
Bodywork
If you’re planning anything close to a full restoration, you’ll need access to at least the door jambs and sill plates, and likely the entire floorpan and dash as well.
Strip the car down as far as possible, especially because everything will get covered in sanding dust. Once the panels are nice and straight and rust is repaired, the bare metal and filler can be sealed.
Get your sheetmetal and body dialed in
- How To Remove Dents from a Panel Using a Slapper File
- How To Fix Car Dents with Fire
- How To Use Automotive Body Filler
- How To Cut Your Long Bed to a Short Bed in a Weekend
- How To Shrink Stretched Sheet Metal with a Propane Torch
Looking to go old school? Here’s how to use lead instead of plastic filler.
Bodywork will largely, and to a point, coincide with mock-up and making sure everything is going to work and fit.
Mock-Up
High-end shops will assemble and disassemble any given build dozens of times. A mock-up, or dry fit, allows panels to be fitted and gaps double checked ensuring any fitment issues are cured, or anything else that could cause a the paint to rub.
Seats and any other bolt-on parts and accessories should be fitted and checked to ensure repaired or new components match the factory mount and attachment locations
This is the time to get your engine back in between the frame rails to plan out where to run wiring and plumbing to confirm that your headers fit with the inner fenders in place. Aftermarket radiators should be fitted, and any addition firewall penetrations should be made, and those unused patched.
- How To Get Perfect Panel Gaps in Doors, Fenders, Hood
- How To Align Body Panels
- 1955-59 GM Truck Body Panel Alignment: Cab to Door to Fender to Hood (While this article is done with a ’55 Chevy truck, the info in this applies to many vehicles with similar construction. Very good explanation)
This step is your last to chance to get things dialed in and solved before final assembly, and you biggest opportunity make sure things go smoothly when you’re putting things together.
Wiring
Running the original OEM harness? Here’s tips for cleaning and freshening up a wiring harness.
Going bare bones? Here’s a basic hot rod wiring diagram and links to diagrams for lighting and turn signals.
More wiring, lighting and electrical How-To and DIY Guides
Paint
With the panel gaps and mounting and fitment issues sorted, it’s time to do the final priming and block sanding before the basecoat and clearcoat are sprayed on.
- How To Block Sand Body Panels + Tips & Tricks
- Setup a DIY Paint Booth in your Home Garage
- How To Paint A Car At Home In 4 Easy Steps
- How To Color Sand and Buff a Car After a Fresh Paint Job
Don’t have paint in you? Consider vinyl wrap to give your old ride a new look.
Sticking with the original patina? right on. Here’s how to protect and preserve patina.
Interior
- Install heat insulation and sound deadening material
- Mount gauges and dash accessories, audio. Final wiring.
- Install door panels, foot well panels, etc. Final wiring.
Additional resources:
- Interior and Upholstery Preparation for Hot Rods and Customs
- Interior Parts and Accessories on listed on eBay Motors
Final Assembly
At this point you should be very familiar with your car’s every nut, bolt, and wire. Most importantly, there shouldn’t be any surprises when everything goes in its proper place and your project car is once again a driver.
It’s especially important during these final steps to stick to the same methodical process you’ve been doing all along, lest you undo months of careful planning.
- Install Windshield and Glass
- Weather-stripping
Restoration projects can be a straight-forward process. If your research and notes are correct, once the parts are painted and/or repaired, the vehicle can be reassembled, using caution as not to scratch or damage parts.
Hot rods pose a special problem since many systems such as the drive train and suspension have been modified. The vehicle should be pre-assembled (in primered state) to test the operation before committing to final paint, upholstery, and the addition of expensive add-ons or customizations. This will prevent damage (and expense) to painted surfaces if modifications are required.
It might not be a bad idea to run one car shown season in this condition as a “shake-down”.
In either case (restoration or street rod) the vehicle will require some finishing touches (door alignment, paint touch-up, etc.) to complete the project.
Make It Legal
- Insurance, Appraisal, Title and Registration
- Insuring Your Hot Rod or Vintage Car
- State-by-State Hot Rod Information
(State DMV, Insurance, Appraisal, Title, Registration, and more…)