This article and video will guide you through wiring up a Kubota light switch to control various components in your vehicle. We’ll cover left and right turn signals, parking lights, headlights, high beams, hazards, brake lights, and even make the horn work.
The Advantages of Using Relays
Before diving into the circuits, let’s understand why we use relays. In a typical circuit without relays, there’s a risk of exceeding the amp limit of switches and fuses, leading to damage or fire hazards. Relays act as electronic switches, allowing us to use smaller switches while controlling larger circuits safely.
Wiring the Horn Circuit
We start with the basics by explaining a horn circuit. Understanding the limitations of switches and fuses, we introduce the concept of relays. With a relay in place, we can use a 5 amp switch to control a 6 amp circuit, ensuring safety and efficiency.
Wiring Headlights with a Relay
Moving on, we explore how to wire headlights using a relay. The relay lets us control the headlights with a smaller switch while ensuring that the wiring and components can handle the load. We cover the pin configurations and how each wire connects to create a functional headlight circuit.
Adding a Power Distribution Block
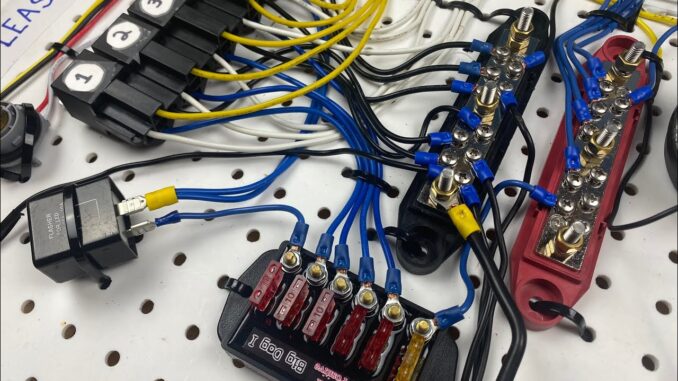
To enhance the organization of our wiring, we introduce a power distribution block. This block simplifies the connection of wires, ensuring a clean and efficient setup. We discuss how it streamlines the power distribution process, making it easier to manage multiple circuits.
Adding a Ground Distribution Block
Similar to the power distribution block, we introduce a ground distribution block. This block centralizes the grounding points, providing a cleaner and more organized wiring setup. All ground wires from various components connect to this block, streamlining the circuit’s ground connections.
Wiring Brake Lights with a Relay
Next, we tackle the brake light circuit, demonstrating how to wire it with a relay. This setup ensures that the brake lights receive power only when needed, enhancing safety and efficiency. We discuss the pin connections and how the relay interacts with the brake light switch.
Wiring Parking Lights with a Relay
Expanding our setup, we add parking lights to the mix. Similar to previous circuits, we utilize a relay to control the power flow to the parking lights. We detail the wiring connections, explaining how the relay and switch work together to activate the parking lights.
Wiring Turn Signals with Relays
Finally, we add left and right turn signals to complete our comprehensive setup. We create a functional turn signal system using two additional relays and a turn signal flasher. We explain the wiring connections for both left and right turn signals, ensuring a synchronized and efficient operation.
With all circuits successfully wired, you now have a complete setup for controlling headlights, turn signals, brake lights, parking lights, hazards, and a horn in your vehicle. This modular and organized approach allows for easy customization and troubleshooting. Get ready to hit the road with confidence, knowing your vehicle’s lighting and signaling systems are well-designed and safely configured.


