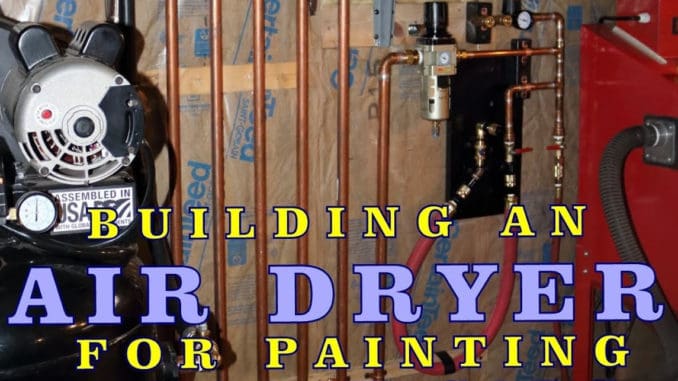
Busted Classic Garage takes you through the process of building an air dryer. This system requires about $130 in copper and brass (parts list below)…
DIY Air Dryer Parts List
The tubing in this demonstration was cut to 72″ to best utilize the most space in that area. You’ll want to have at least 40-50′ of copper for this system to be effective.
Air Dryer parts, starting at the compressor:
- 1x – 2 1/2″ 3/4″ brass nipple (Sioux Chief 17700324)
- 1x – 3/4″ brass street elbow (female and male end)
- 1x – 3/4″ brass ball valve threaded (both female ends)
- 1x – 3/4″ Rapid Air Compressed Air Jumper Hose (Part # F0215)
- 1x – 3/4″ Male Adapter (Nibco 604 3/4″ to 3/4″ threaded)
- 10x – 3/4″ 90° Copper Elbow (Nibco 607)
- 3x – 3/4″ Copper Tee (Nibco 611)
- 3x – 3/4″ to 1/2″ Male adapter (Nibco 604 3/4″ to 1/2″ threaded)
- 3x – 1/2″ Ball Valves threaded (both female ends)
- 4x – 3/4″ Copper pipe Type L ( I cut these to 72″ for the main height)
- 9x – 3/4″ Copper pipe in 2″ pieces
- 1x – 3/4″ Brass Compression fitting (to the regulator)
- 1x – 3/4″ Rapid Air NPT Filter Regulator (K93217)
The piping after the regulator was set up with 3 endpoints, one for my blasting cabinet (125 psi at all times), one for my tools, and one for the paint gun. The paint side has a DeVilbiss 130502 Desiccant snake, a regulator, high flow fittings, and a Devilbiss Rhi-01 Relative Humidity Indicator.


