We stumbled upon an interesting thread on Pirate4x4.com and figured it was worth a refresh…
Sep 14, 2011 ~ Forum member B.A.R.K from Lafayette, Louisianna sets himself and his small garage workshop up with a space-saving attic mounted air compressor and remote switch, air pressure gauge and hose connection.
Editor’s Note: This is from a forum that’s nearly ten years old, but presents a good idea. There are several opportunities for improvement, but the concept is solid.
From the thread:
My “shop” is a small two-car garage, and I can’t really afford to have much on the floor — anything on the garage floor eats up parking space, mobility, and makes clean-up difficult. I’ve been wanting to move my horizontal Craftsman compressor up into the attic for quite some time but have procrastinated because of how I wanted to run the electrical and plumbing.
The recent cool weather motivated me to climb up in the attic and wrap up this project.
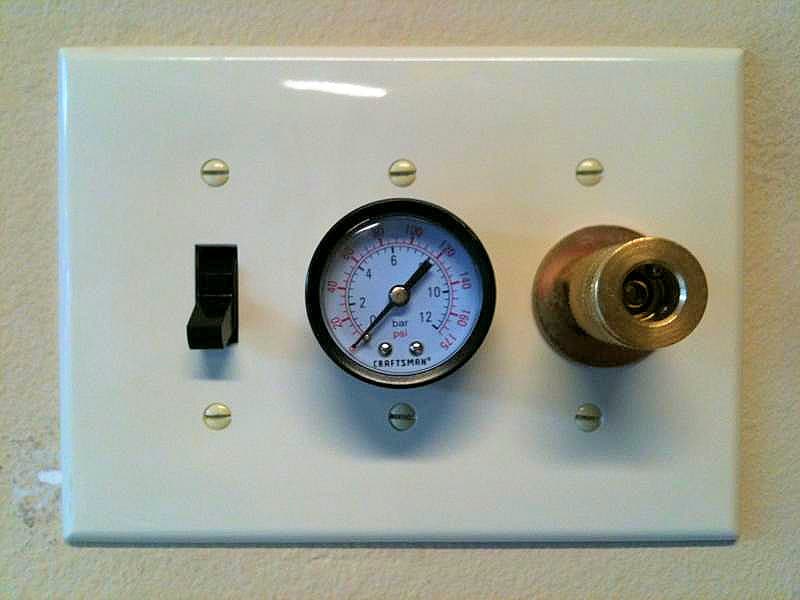
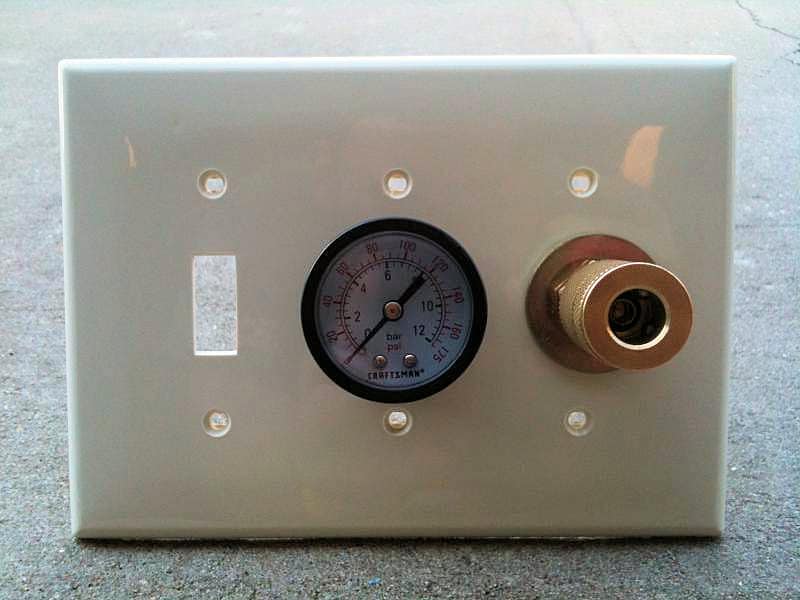
The electrical and plumbing is nothing special. One thing I had fun with was the switch panel. I wanted to know what kind of pressure I had in the tank. If I was going to run a remote pressure gauge, might as well add a remote air connection too.
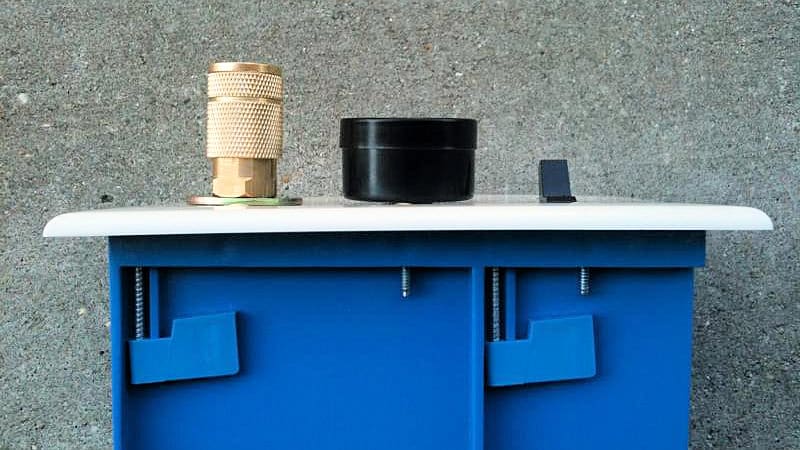
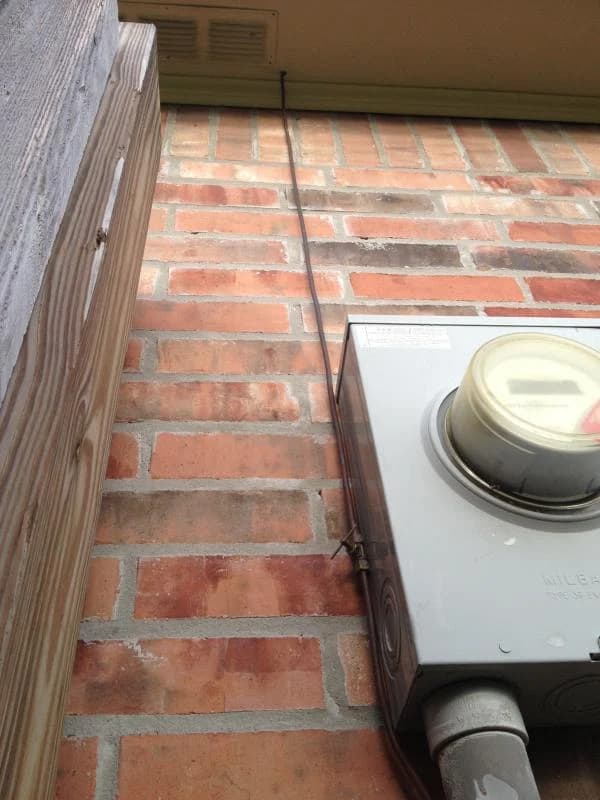
I have a hose reel on the ceiling so this isn’t my only air supply. I salvaged an old switch to make a second “support” for the switch plate cover. I hacked off one half of the “box” so that the pressure gauge could slip into that spot. I routed copper tubing through the soffit and down the exterior brick wall to have a moisture drain at ground level.

Draining the Remote Air Tank
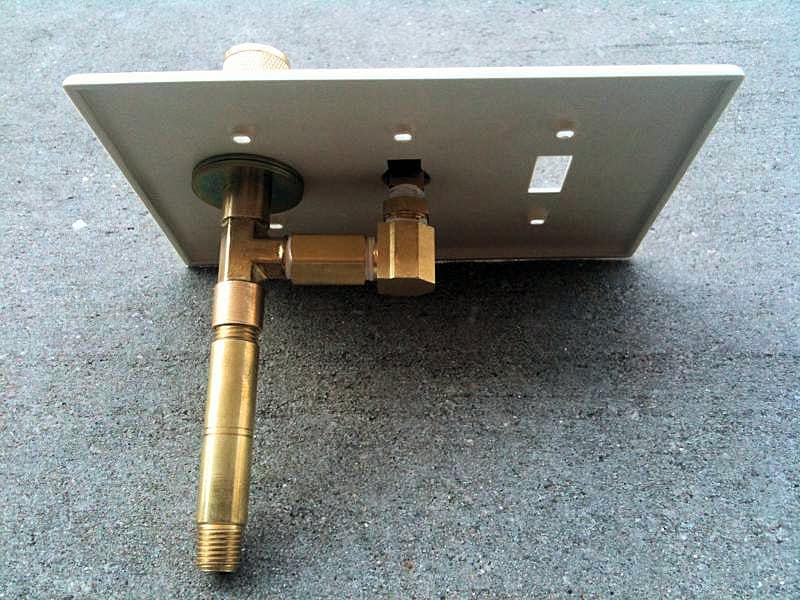
I screwed a 1/4″ tee into the drain port. One side of the tee has the normal bleeder for local draining, and the other side has a 1/4″ ball valve as an isolation valve before going to the drain line. The 90 converts the 1/4″ NPT to 1/4″ tubing, and from there, the 1/4″ needle valve is now the drain valve at ground level just on the outside of the garage.
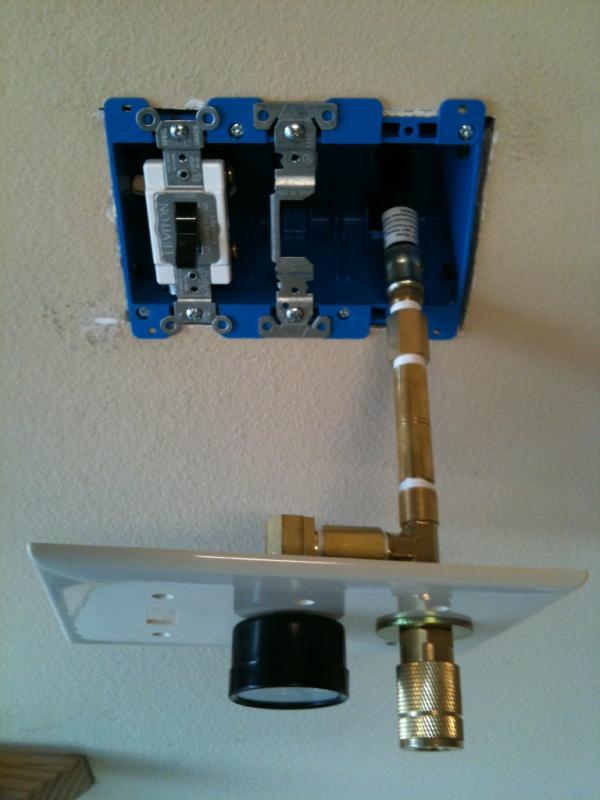
Below is a picture from when I was conducting a leak test. The section of copper tubing between the 90 and needle valve is now about 30 feet long. I just have to walk around the corner outside and crack the valve to drain the tank.
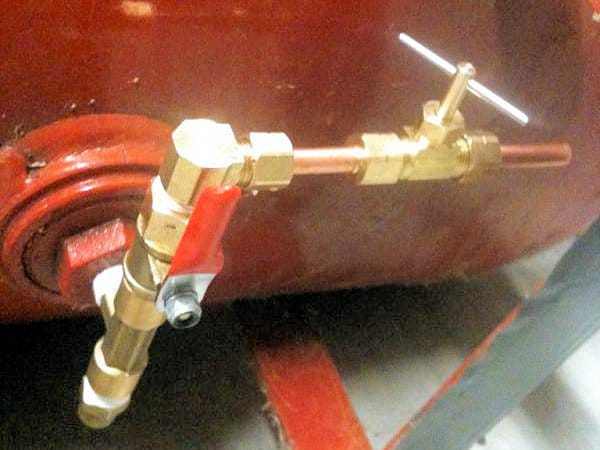
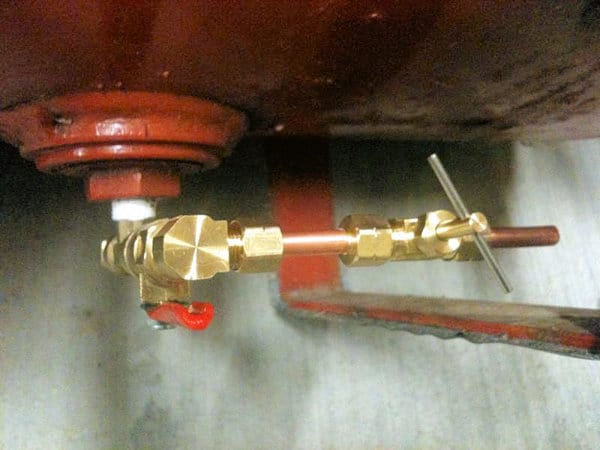
This is how I drain the tank remotely. 1/4″ copper tubing runs from the bottom of the tank, through the soffit, and down to the ground with an inline needle valve outside. Much easier than climbing up into the attic to drain the tank and easy to operate.
Question from the forum:
How secure is the air fitting fixed to the box? It seems like it would break the plastic switch plate easily if you are rough with connecting to it or tugging on hoses.
BARKS’s Response:
I feel pretty good about it left/right & up/down because the 3″ nipple coming off of the back passes through the back of the plastic triple gang box. Its essentially supported in two places, but the downside is that one of those places is the plastic wall plate.
Right now there is a little bit of movement in and out, which is actually the wall plate flexing in and out. I am planning to control this movement by putting a hose clamp around the supply hose in the front and backside of the box where the hose penetrates it.
I don’t plan on hooking up a long hose to this port and whipping it around the garage. At most this would be used with one of the lightweight coiled hoses for quick work.
I have a hose reel hanging from the ceiling that will see 99% of the duty. The only reason I put a supply port in this box was that I didn’t want to go through all of the trouble of running this airline just for a pressure gauge.
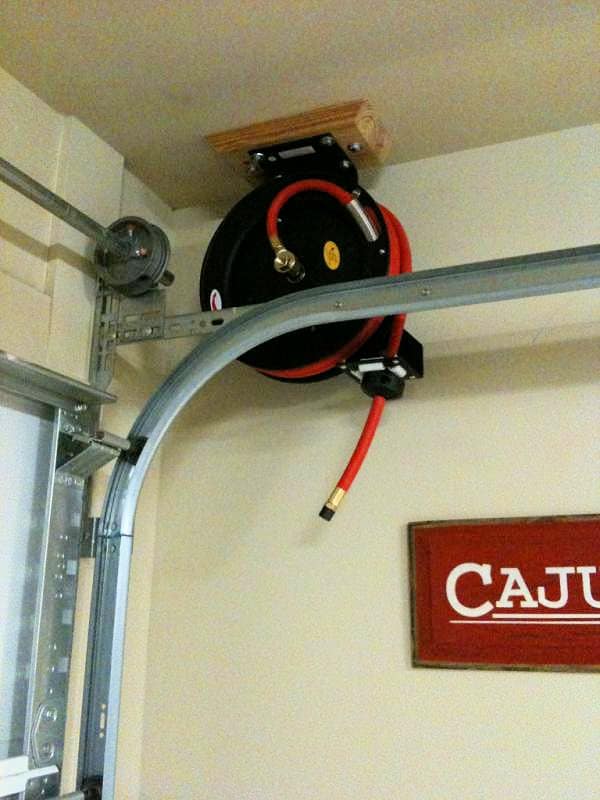
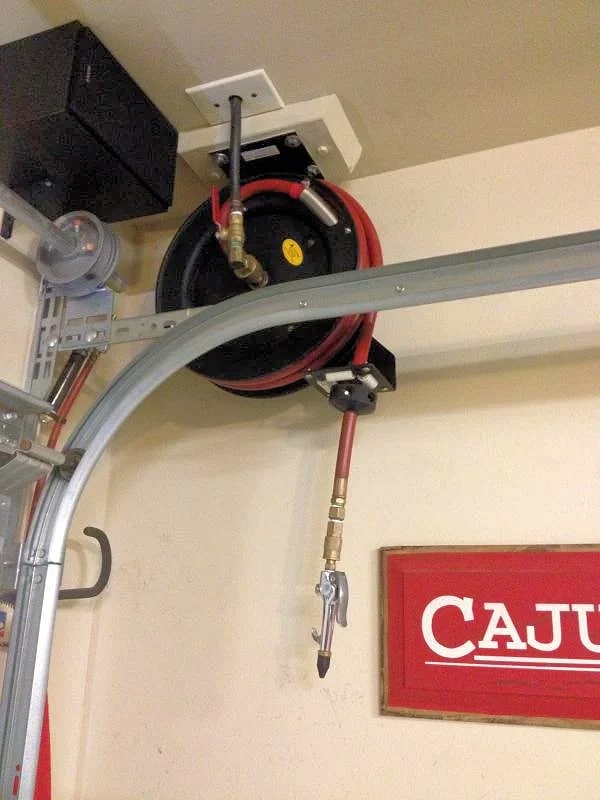
25′ hose reel from Harbor Freight works well and fits nicely in this little useless nook created by the overhead garage door tracks.
Question from the forum:
I like this a lot. Maybe a steel swaitch plate would work better for durability?
BARKS’s Response:
They do have stainless steel switch plates and some horrible looking Aluminum diamond plate switch plates. The plate attaches to the actual switch (or the cut-up switch/support that I made).
The switch could be through-bolted to the plastic box or they do sell metal galvanized boxes. You can make this system as robust as you want, I just know my intended purpose. It is mainly to have a remote power switch and pressure gauge that matched the rest of the house. I just added the pressure tap for possible future use.
Two-Year Update
Aug 1, 2013 ~ Nearly two years later this setup is still in place and working well. Putting the Craftsman oil-less compressor in the attic drastically cut down on the noise. There was nothing wrong with the way it was running, but he ran across a Kobalt 30 gallon oiled compressor for $160 and couldn’t pass it up.
The Kobalt unit has a max pressure of 155 psi instead of the Craftsman at 125 psi, so my impact has more oomph behind it, and the tank can hold more supply air. Additionally, the oiled compressor is so much quieter than the oil-less unit that you don’t even hear it running in the garage unless you have the attic door open.
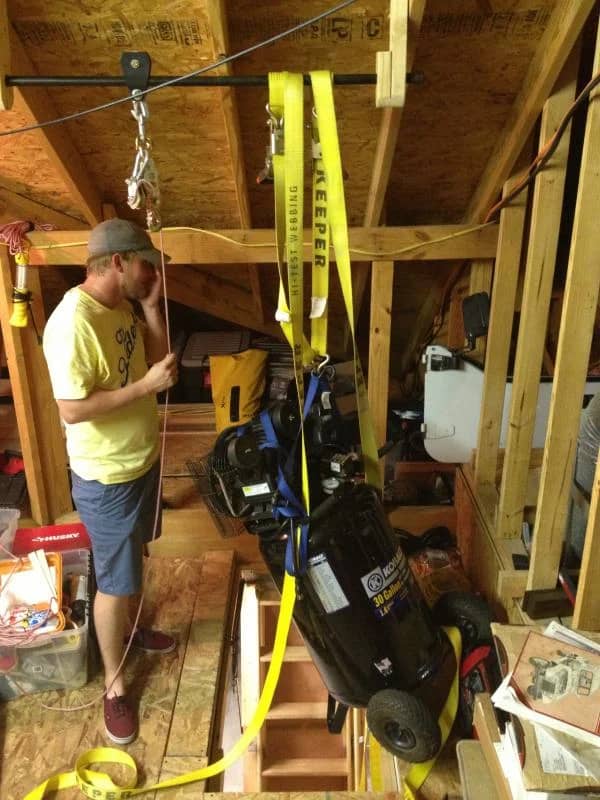
Kobalt 1.6-HP 30-Gallon 155 PSI, 5.5 SCFM @ 90 PSI works great in his home garage…
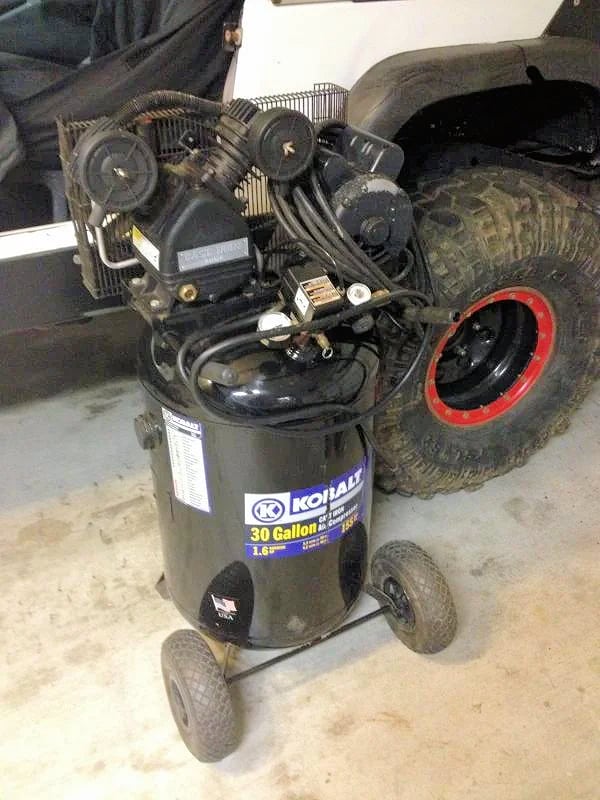
System now pressures up to ~150 and will hold it for a couple days before it slowly starts to drop due to system leaks.
The compressor was a little heavy to haul up the attic steps by hand, so I used a couple of 4″ ratchet straps to make the lift. Surprisingly easy to crank that much weight off the ground. Used one at a time, took the slack out of the second one, cranked it until the strap filled up the spool, then released the other, removed the slack, repeat.