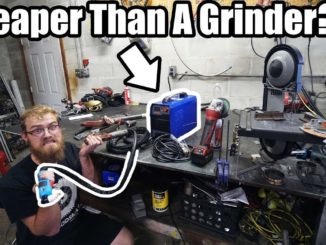
Plasma Arc Cutting (PAC) is a thermal cutting process that is commonly found in many welding and fabrication shops. These machines are so affordable now that even a lot of home hobbyists have started using them in their home garages.
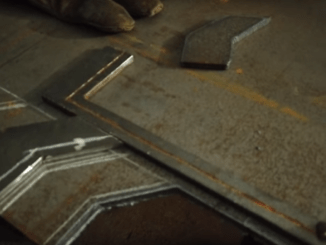
Plasma arc cutting has many advantages over Oxy-fuel cutting and is usually our first choice in the shop when we need to do any metal cutting. For one, it cuts any metal that is electrically conductive; unlike Oxy-Fuel which is limited to ferrous materials only. It also cuts much faster than Oxy-Fuel on all materials, this, in turn, causes a much smaller heat effective zone (HAZ).
Now as with anything in life, we have to take some of the bad with the good. Plasma Cutters are not as portable as Oxy-Fuel systems. In order to run a Plasma cutter, one must have electricity, whether it is a wall outlet or run off an appropriately sized generator.
The next item we will need is an air supply. We can get this in one of two ways, either a high-pressure cylinder or an air compressor. Either way, it limits portability. There are units out there that generate their own air but they are rather expensive. Depending on the type of cutting you plan to do, you will have to make the decision which system is best for you and your budget.
Consumables are another downside to this system. On average, consumables will last 1-2 hours for handheld operations and 3-4 for mechanized operations.
Plasma Cutting Setup
The setup for Plasma cutting is pretty simple, you have to connect an air hose to it and then hook up the workpiece clamp and the torch. You will want to refer to your user’s manual to ensure you have the correct air inlet pressure.
You will also want to reference your manual to ensure your consumables are installed correctly in the torch. The consumables from one type of torch to the next will differ depending on the manufacturer but should have the same basic components:
- A swirl ring will direct the flow of air/gas down the torch,
- an electrode will provide the flow of current,
- the nozzle will direct the flow of air and current to the material,
- a retaining cup will hold all of the pieces in place, and
- a shield will screw on the end to protect the parts from the molten metal.
Once everything is in place you should ensure the area is free from hazards prior to cutting.
You will want to remove any flammable objects or hazards from the area as the sparks generated from the plasma cutting process can travel up to 40 feet from the cutting area.
You will also want to ensure you have a way to capture or remove the fumes generated from the cutting process. The fumes generated from this process are potentially hazardous and should not be inhaled.
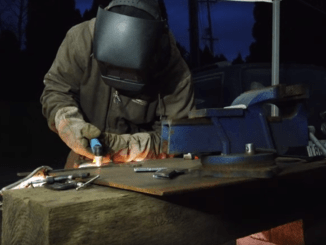
As always safety is our first priority and you should wear the appropriate PPE for the task at hand. This includes covering up all exposed skin and wearing appropriate clothing for dealing with heat and sparks.
In addition, due to the high UV rays, we recommend using a welding hood with an adjustable lens. For our demonstration, we are cutting with 105 amps so we’ll will be using a shade 9 lens. A good pair of leather gloves should also be worn.
Because the material we’ll be cutting has to be part of an electrical circuit to be cut, we have to hook up the workpiece clamp to the material.
We highly recommend you hook the clamp up the material being cut and not the piece being cut off. If you hook the clamp to the part being cut off, you will break the electrical circuit once it falls and the electricity will look for the path of least resistance, and with the clamp no longer attached, YOU could be that path and experience an electrical shock…