The digital multimeter is the go to tool for dealing with electrical problems in a car, and is the proper tool to measure voltage, current, and resistance.
In fact, a multimeter is three tools in one:
- A voltmeter that measures voltage.
- An ohmmeter that measures resistance and continuity.
- An ammeter that measures current.

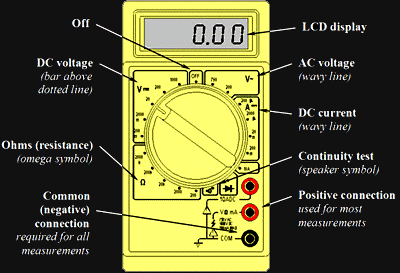
Digital multimeters each have several main areas:
- A display at the top of the meter showing the measured value.
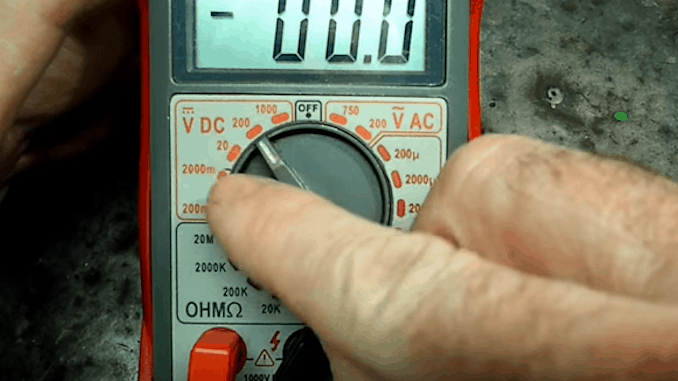
- A rotary dial in the middle used to select the basic measurement.
- Several sockets at the bottom to plug black and red test probes into.
Some will also have option buttons just below the display.
Video Tutorial: How To Use A Manual Range Select Multimeter
Beginners Guide To Using Electrical Multimeters On Automobiles
Will an Inexpensive Multimeter Do The Job?
Most automotive electrical troubleshooting is simply verifying the presence or absence of voltage or continuity. Any multimeter will help in these areas.
Harbor Freight offers a functional multimeter for $5.99 (or free with coupon) – We have several of these around the shop, and we’ll take them on road rescues where it’s likely to get damaged, lost, left behind or stolen. For your primary electrical troubleshooting tool, you should spend a bit more (like $20/30 +/-) for an autoranging multimeter. This is why:
The $5.99 multimeter does not have an autoranging feature — you’ll have to manually set its range of values. If you are using a non-autoranging meter to measure voltage, you choose the range closest to the 12 volts in the car’s electrical system, generally the 0 to 20 volt range. Simplify this and assure against setting errors with an autoranging one: You select voltage or resistance or current and let the meter determine the proper range.


