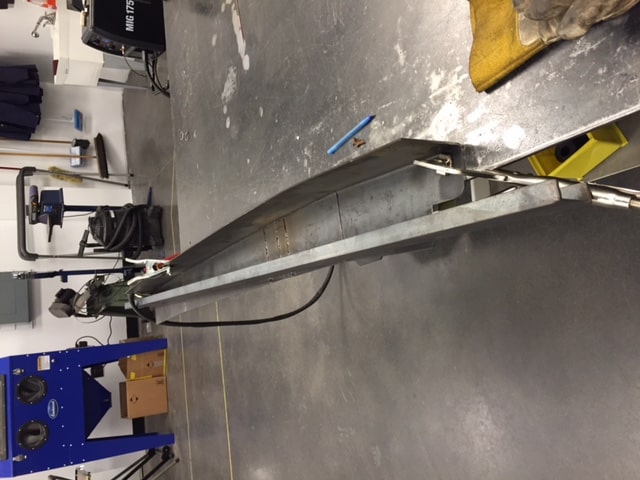
In a previous post, a simple hot rod chassis from scratch for a 1930 Ford Model A Coupe was demonstrated…

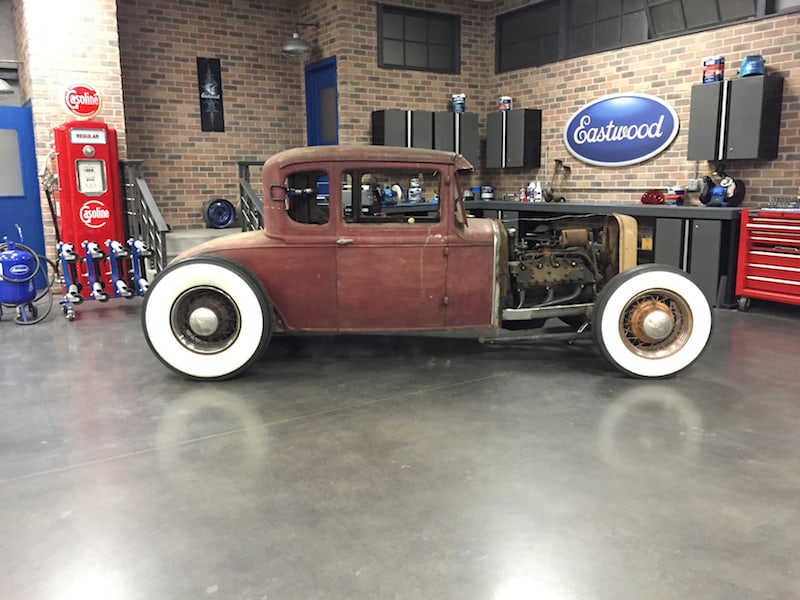
The chassis and project is now ready to start channeling the body down over the frame to give the car a lower overall profile.
I’m building this car as a traditional Hot Rod in an “East Coast” style. Back in the late 1940s-1960s, it was pretty easy to distinguish if a hot rod in a magazine was built on the east coast or on the west. One of the big differences is how the profile and stance of the car differed.
An “east coast hot rod” was easily identifiable by its low ride height and body channeled pretty hard over the chassis without chopping or lowering the roof. It seems as the years went on guys were channeling and lowering their cars more and more until there was almost no ground clearance and no headroom from the raised floor.
This car I am building more true to the late 1940s-early 1950s so I decided to do a mild channel job and document the process along the way.
I started by bracing the body widthwise between the B-pillars and mark out our cut lines on the floor. Since my original floor and door sill areas were very solid I decided to leave the inner door sills and the outermost side sub rails and build off of them.
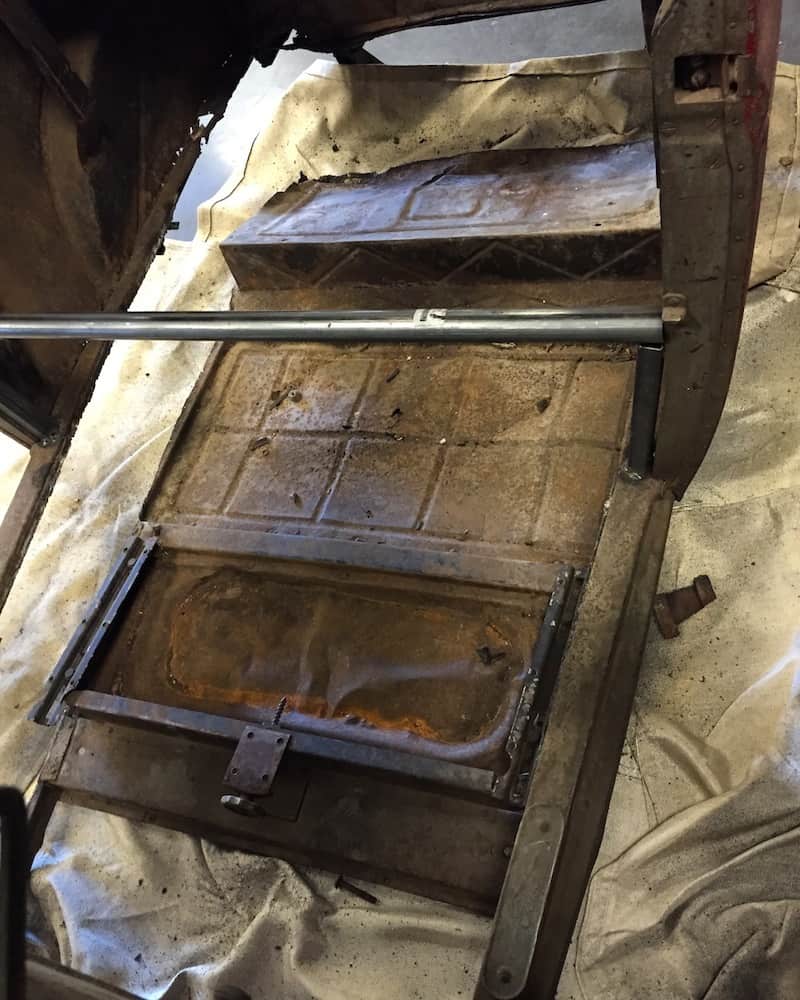
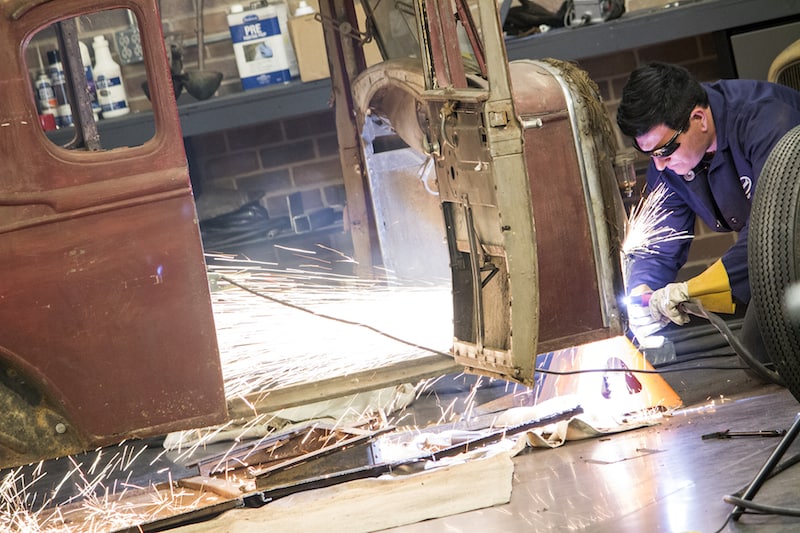
For a quick, clean cut I used the Versa-Cut 60 to cut the inner floor and associated braces out of the bottom of the car. I also used the plasma to blast out the original rivets holding in the firewall braces. This allowed us to have a clean slate to build a new floor, subrails and braces from.
I then measured out the estimated distance I wanted to lower the body over the frame and cut notches out of the firewall to match.
With the body notched in the front we mounted the body back down on the frame allowing the front to sink down over the chassis.

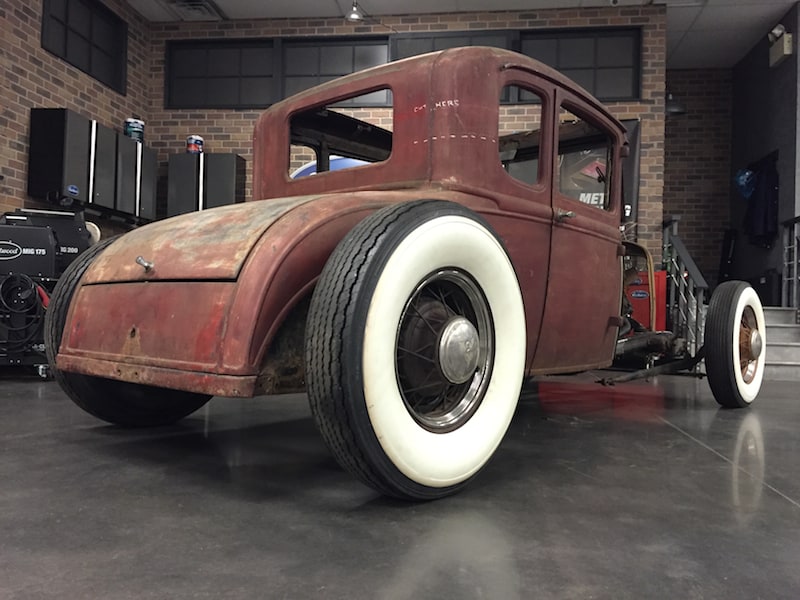
We then rolled the rear axle with the wheels and tires next to the car to give us measurements for how high the rear axle notch needed to go. We used some scrap metal as guides for our plasma torch so we could make nice even cuts in the wheel wells.
Make sure that you’re doing this step with the same size wheels and tires as what you’ll be running in the end as it can drastically change the way the car sits. In my case I plan to switch to blackwall tires but these whitewalls I found at a swap meet last summer are the same size and work just fine for mockup.
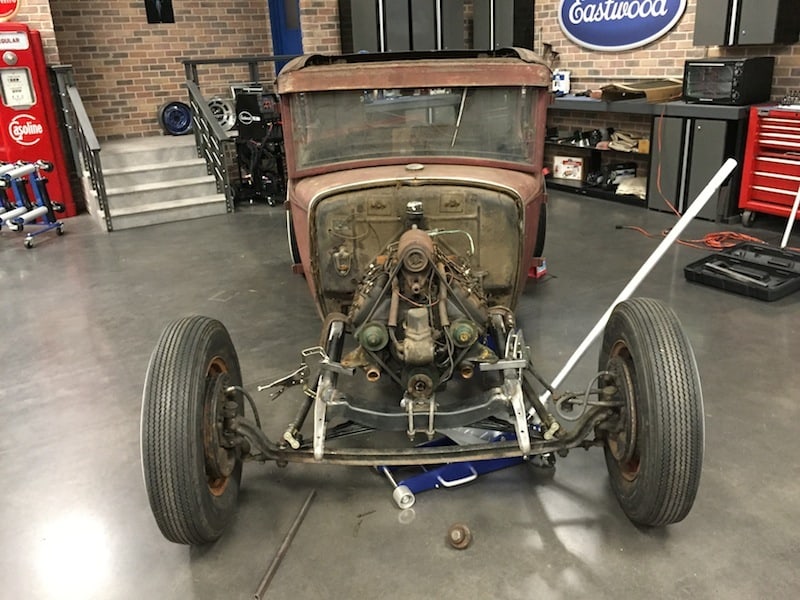
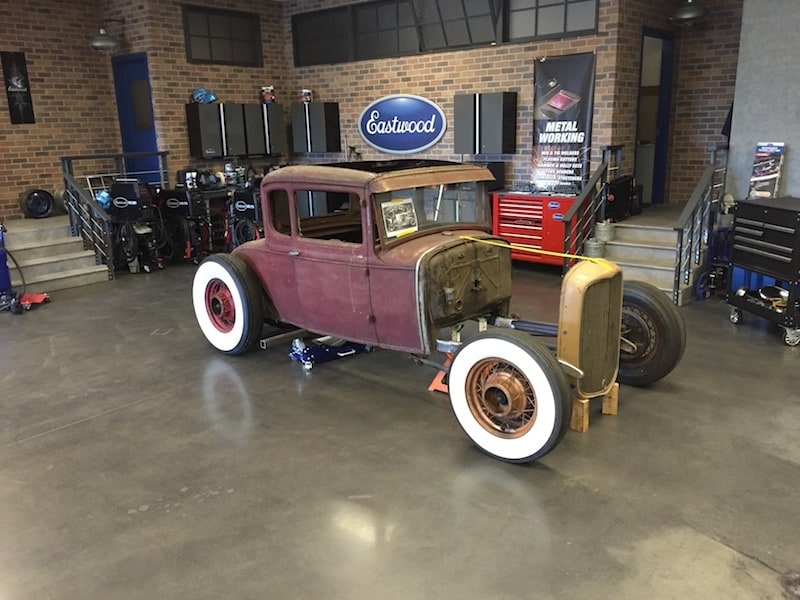
We then slid the rear axle under the car and bolted it in place. With the body sitting over the chassis I added the drivetrain to the chassis to load the front suspension, giving us an idea how the car will sit when done. This allowed us to stand back and look at the side profile of the car to decide if the body needed to be channeled more.
I ended up dropping the body another 2 inches to get the “look” I was going for.
Once we were happy with the height of the body I had to figure out how to connect the body to the chassis. I studied a lot of pictures and found that most people just make a sub-structure out of 1X1 box tubing and call it good.
I wanted something that was a little more “OEM” so I decided to build up an inner rocker that would connect to the original side subrails and the door sill in the door openings.

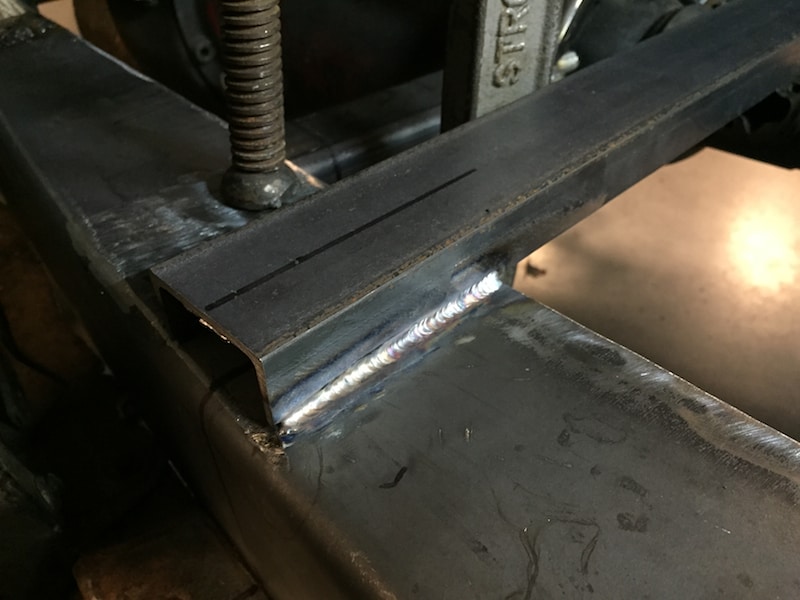
I started by having some pieces of 1/8″ pieces of steel bent into a 90. for each side. I had these made a few inches wider than needed on the top. Height wise I had them made so that they were tall enough to go down to match up with the bottom of the original side sub-rails.
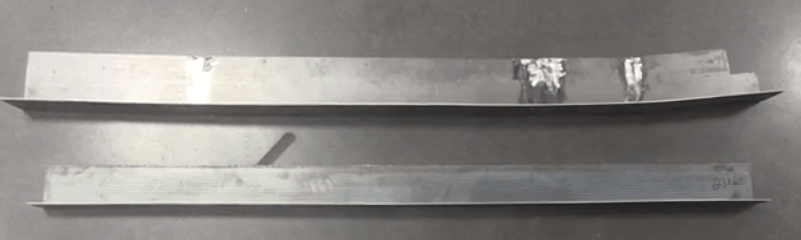
Since the body of a Model A pinches in at the front and rear so our straight pieces of 1/8″ weren’t going to fit. I decided to modify these new side rails so they matched the profile of the inside of the body where we cut out the original floor.
I started by taking small pie cuts out of the side rails around the A and B pillars where the body pinches in. I then clamped the ends of the new side rails to the chassis and pulled outward on them so that they flexed and curved to match the profile of the inside of the car.
If you calculated your pie cuts correctly they should have closed up on themselves as you pushed to curve the rail. I didn’t try to make all of the bends move at one time, instead I got the front bent as needed and tack welded the pie cut closed. I could then move the B-pillar cut and do the same.
Depending on your car you may need to make numerous cuts to get the part bent to shape. The welded up result is a curved inner rocker type panel that will straddle over the frame and butt up tight against the inner rocker and side sub-rails.
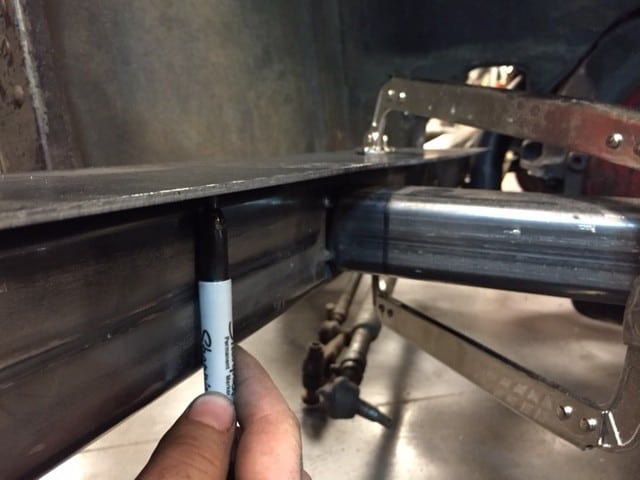
I then left the curved side rails clamped to the chassis and marked off the excess overhang on top of the frame. Because the frame pinches in towards the front and the body pinches in the front and back the amount of overhang of our new side rail varied from being flush in some spots to a few inches of overhang in others. I ran a marker against the inside face of the frame rails tracing where the overhang was and cut it off with the plasma cutter.
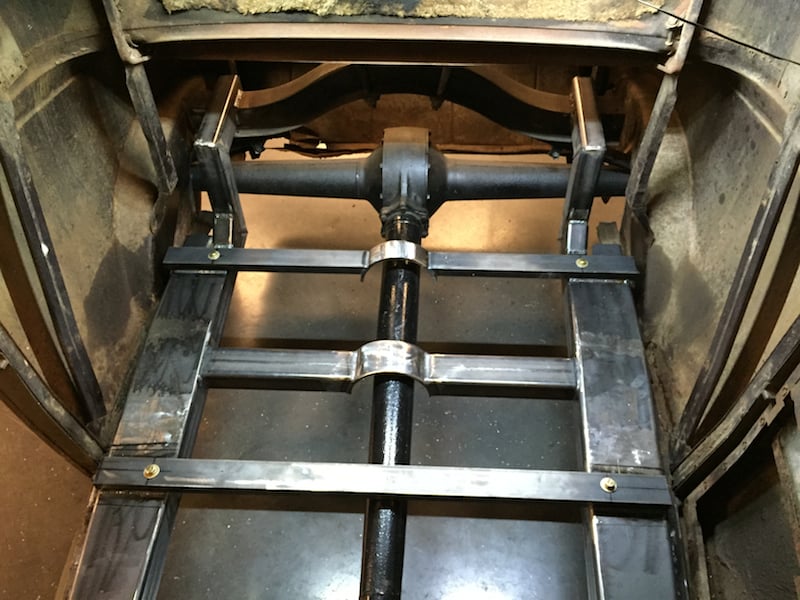
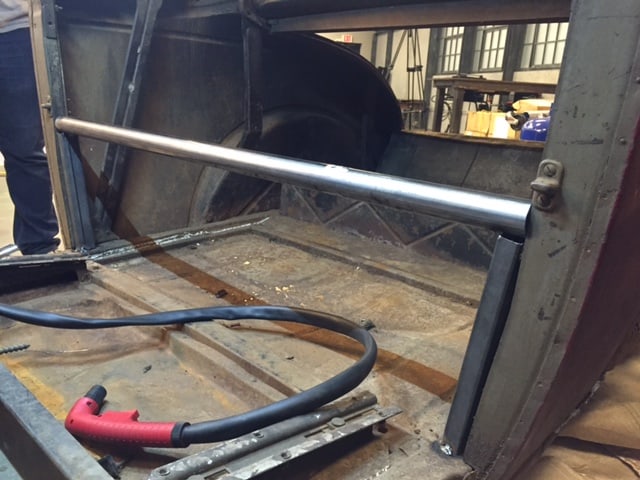
With the new side rails built we needed to connect the two sides together again. I chose to use simple 1/8″ wall channel, but if you have the time or access to a large press brake you could make hat channels to use for cross braces that would look even more like factory. I evenly spaced out the channel and welded them each in place using the TIG 200.
With our floor bracing all built I add stitch welds along the perimeter of the new sub-floor with the MIG 250 connecting it to the door sills and original sub rails. This permanently fixed the bracing to the body.
Now we were on the home stretch I marked out the center of each cross brace and drilled holes down through the channel, side rails, and into the top of the frame. With the holes transferred to the frame on the end of each cross brace we pulled the body off of the chassis.
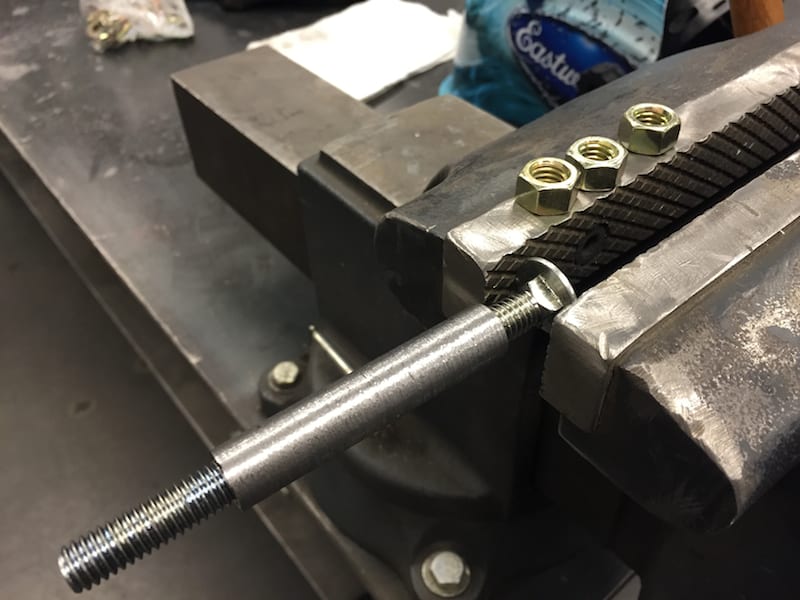
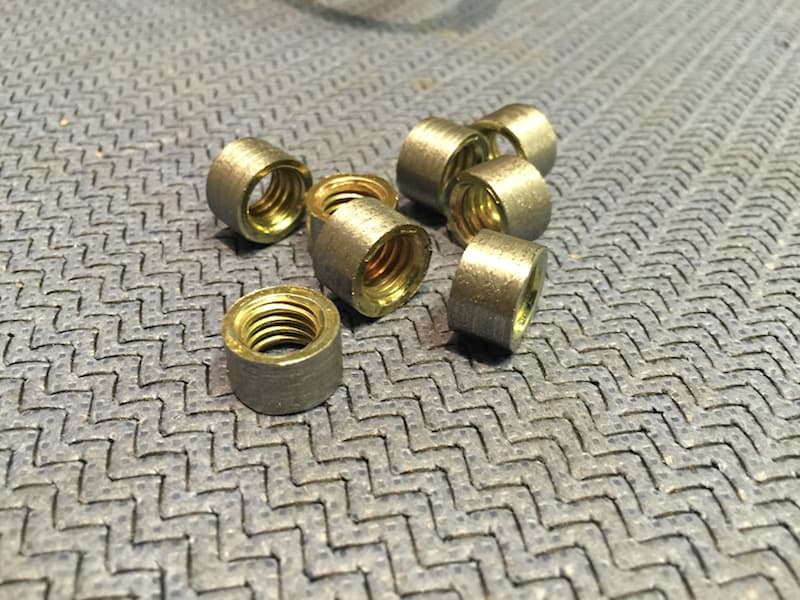
I wanted to use Grade 8 fasteners for all of the body mounts instead of just tapping threads in the frame or inserting rivnuts that would fail over time. We came up with a slick solution. We threaded a batch of Grade 8 nuts onto a carriage bolt and locked them all together.
I then mounted the bolt into the lathe and cut off the hex portion of each nut leaving us with perfectly round grade 8 threaded inserts.
The nuts were cut down just a hair bigger than 1/2″ so they would be a press fit into a 1/2″ drilled hole.
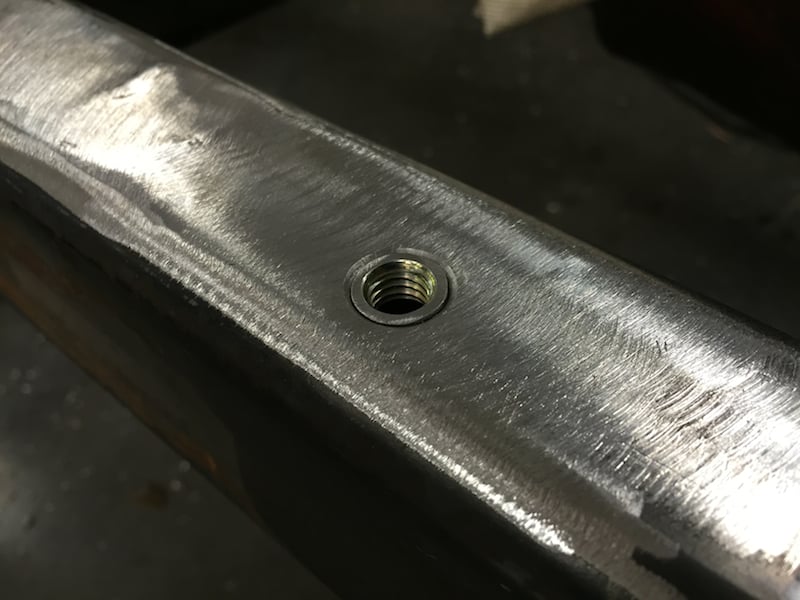
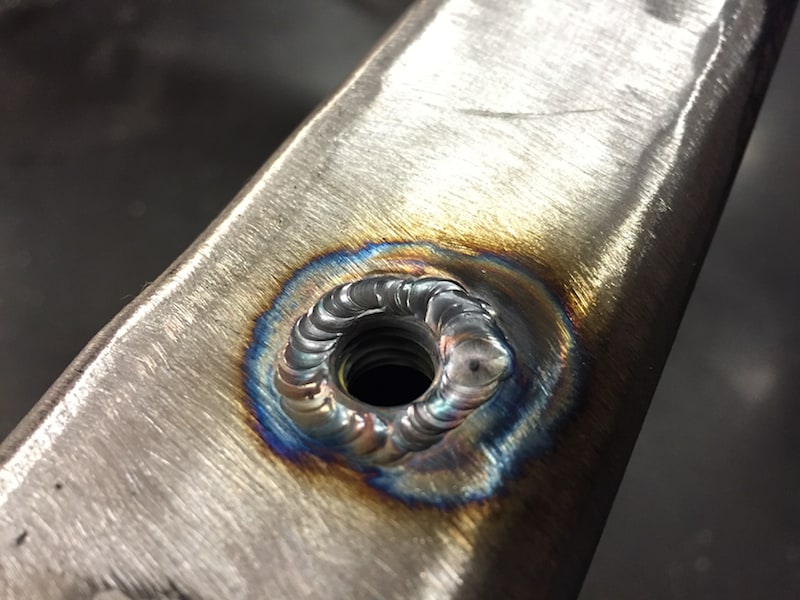
I then counter sunk each hole and threaded a bolt into each insert so I could adjust them so they were straight in the holes. I used the TIG 200 to carefully lay a weld puddle on the edge of the threaded insert melting it to the frame.
You must take your time here and be very precise because a rogue dab of filler rod could go over the edge of the threaded insert and make your life hell when it comes time to thread a bolt back into the insert!
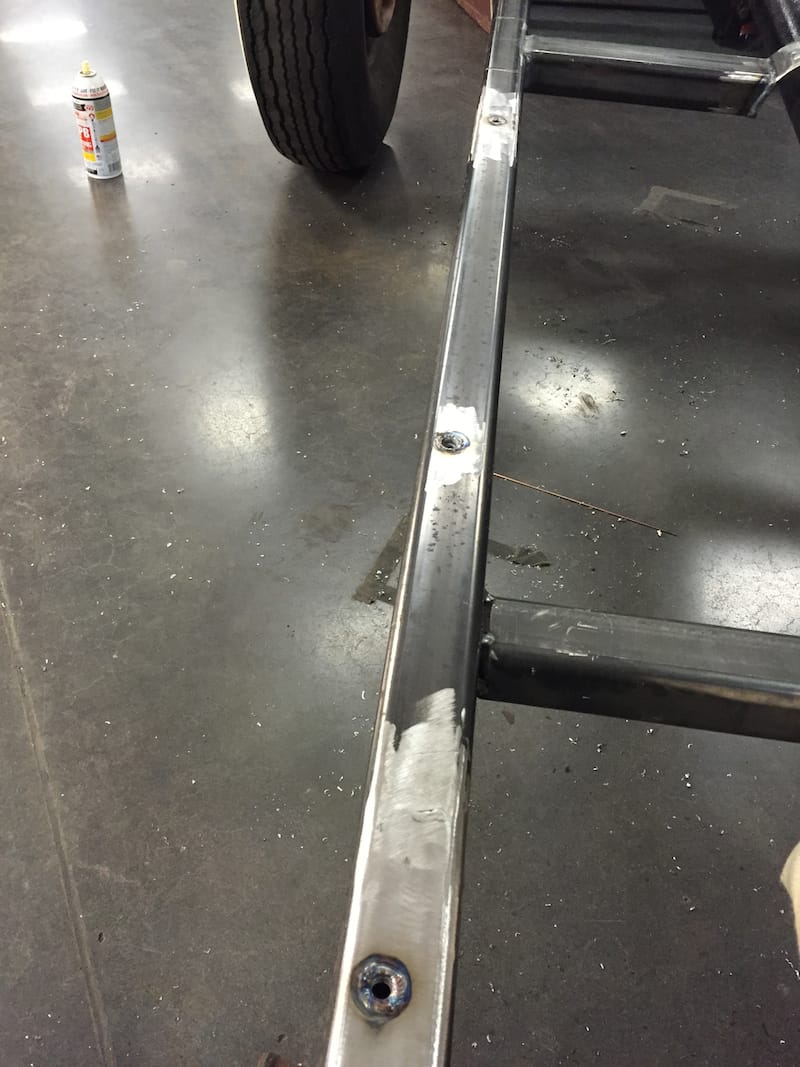
Finally we threw the body back on and ran some grade 8 3/8″ bolts through the sub-rails and into the frame. By cutting the original floor where we did and making the side rails the way we did I’ve been left with a “pinch weld” area underneath the car that I can spot weld together when the body is off for final welding.
I’m just happy we aren’t precariously holding the body in place over the chassis using jacks, jack stands, and blocks of wood!
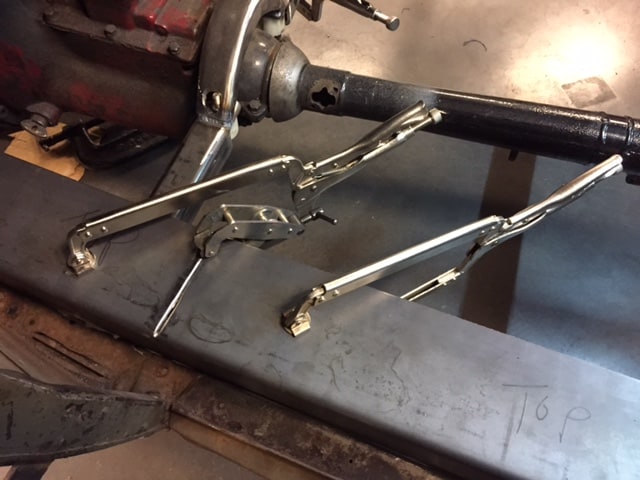
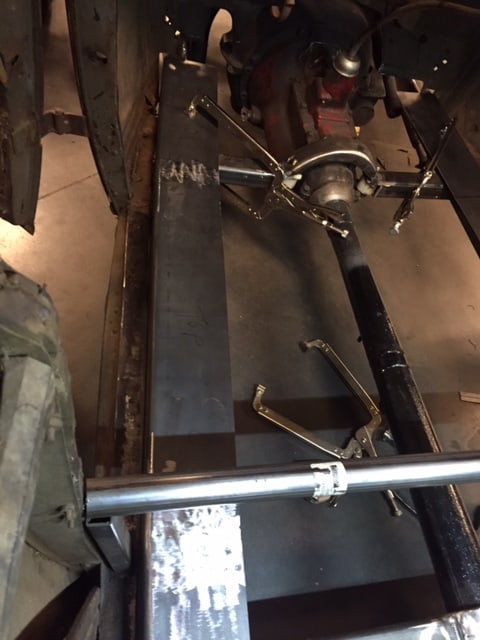
Before I can build the floor in the car I need to set up the pedals and steering column location…
via Eastwood Garage