John Fabris shared a few photos that demonstrate adapting a marine style file filler and making a custom fuel filler for the stake pocket hole in a Fleetside bed.
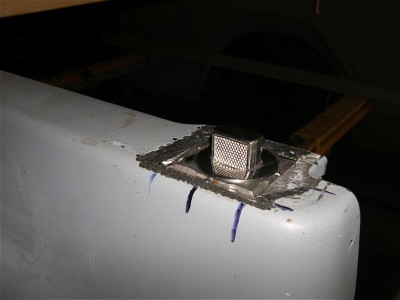
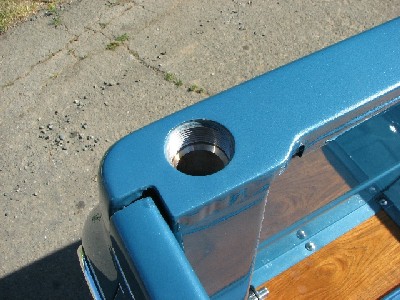
John acquired the gas filler assembly from a marine supply store for about $50 (there are several kinds available, this one has a center section that pops up when pressed, allowing you to unscrew it).
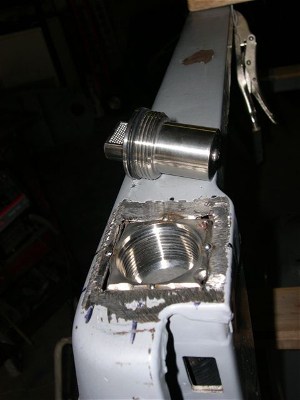
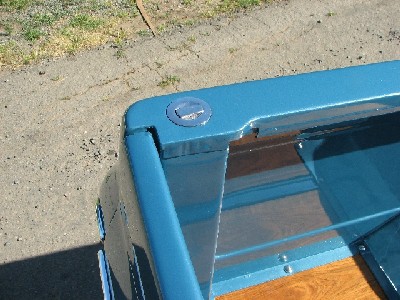
The filler housing is round, so John cut it down to fit within the opening of the enlarged stake pocket hole.

What is not pictured is a small hose nipple that was welded onto the filler housing that is about 2 inches below the top of the bedside. This is for the displacement of air when you are filling the tank.
Also, depending on how you place this within the pocket, you need to consider the placement of the hose clamp so you can access it from the hole that the tailgate tang goes into. Consider how much room to clear the tailgate tang or cut the tang down a little bit.
There is the piece of metal that is the stop or the bottom for the stake pocket. When I opened up the hole at the top of the pocket, then I used a chisel and hammer to knock out this stop. It is held on by spot welds, and you make get lucky and have it pop right off if the spot welds are not that deep (as in the case with mine).
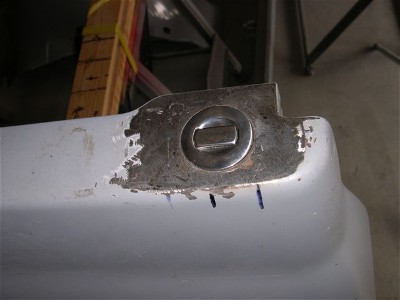
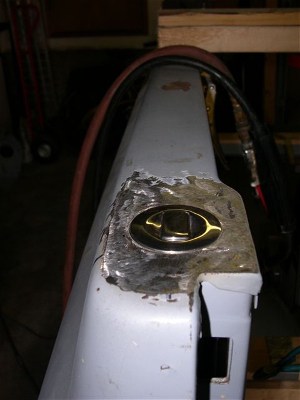
I also made sure that when the cap is tight, it lines up with the bedside…
The lower bedside with the 1-1/2″ filler hose and air hose hanging out is shown below. John used a 90-degree exhaust pipe bend from a local shop to make the turn at the bottom of the hose…
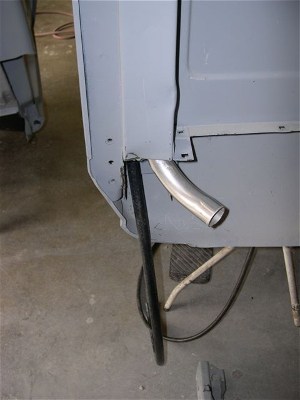
The rear bed crossmember was cut to provide clearance for the gas hose…
The Finished Stake Pocket Fuel Filler
John also changed the way that the gas tank filler hose and air vent hose come out from the tank. If you look at a factory 67-72 suburban tank (or 69-72 blazer tank), the filler tube exits the tank at a 90 degree, or straight out towards the driver side. John changed his to angle back towards the rear driver side stake pocket.
This was done by cutting and rewelding the tube and allowed him to have no bends in the gas filler hose. He then moved the air vent tube, which is located in front of the gas filler tube on the tank, to the rear of the tank, or behind the filler tube, just to make it easier to access and install the hose onto this vent.
Marine Fuel Filler Vacuum Consideration
Since these types of filler caps are not vented, you may run into a vacuum lock of your fuel system where no air can get into the tank, and as you are driving, the fuel pump is pulling fuel out of the tank and creates a vacuum in the tank, and soon your pump cannot pull anymore fuel out. Hence the use of vented caps.
What John did to resolve this was to add a $7.00 vacuum ball vent from a local motocross shop. These go onto the hose of a gas cap for dirtbikes to allow the intake of air, but because they have a spring and ball bearing inside, nothing can come out, kinda like a one-way ball valve.
John simply drilled a hole in the top of the tank and epoxied the vent into place. Now air can be sucked in when needed, but it is still a closed system. Originally shared on 67-72chevytrucks.com