We’ve all given that small, non-load-bearing bolt just “one last turn,” which results in hours of regret and a mess of stripped-out threads. Well, fear not. We have just the video for you. If you want a quick three-step video on drilling and tapping holes, this ain’t it. In this video, Davin covers everything you need to know when drilling and tapping holes: essential tools, thread types, thread design, thread tolerances, and, yes, the step-by-step process of drilling and tapping.
Mastering the Art of Drilling and Tapping: A Comprehensive Guide
In DIY projects and metalworking, having the ability to drill and tap your holes is a valuable skill. Whether working on car repairs, home improvement, or crafting, understanding the tools and techniques can save you time and money. Davin will walk you through the essentials of drilling and tapping in this comprehensive guide, from the necessary tools to the step-by-step process.
Tools of the Trade: Setting the Foundation
Before diving into the intricacies of drilling and tapping, let’s first familiarize ourselves with the tools required for the job:
- Tap and Die Set: An essential toolkit containing taps and dies for various thread sizes.
- Drill Bits: Matched to the tap size for creating precise holes.
- Drill: Whether a hand drill or a drill press, the right tool depends on the complexity of your project.
- Rotation Tools: T-style handle, specific holders, or a ratchet to rotate the tap.
- Lubrication: Cutting fluid, rapid tap, or even motor oil for smooth operation.
- Center Punch and Hammer: For prepping the workpiece and preventing the drill from wandering.
Understanding the Anatomy of a Bolt
Before delving into the drilling and tapping process, it’s crucial to grasp the basics of a bolt’s design. The major and minor diameters, thread diameter, crest, thread angle, and pitch are key components. Knowing these elements aids in selecting the right tap and drill bit for the job.
How to Use the Tools: Step-by-Step Guide
Now, let’s break down the drilling and tapping process:
- Prepping the Workpiece:
- Use a center punch and hammer to mark the spot for drilling.
- Consider deburring the hole for a smoother start.
- Choosing the Right Drill Bit:
- Refer to a tap-and-die chart to find the appropriate drill bit size.
- Ensure the drill bit matches the tap size for optimal engagement.
- Drilling the Hole:
- Apply lubrication to the drill bit before starting.
- To prevent overheating, maintain a low speed, especially with larger drill bits.
- Drill the hole, keeping the drill perpendicular to the surface.
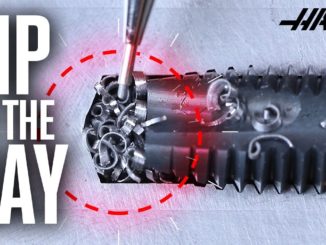
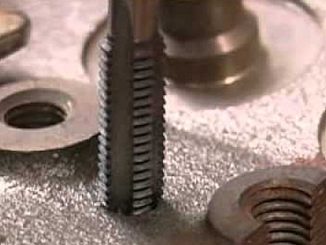
- Tapping the Hole:
- Apply tapping fluid to the tap.
- Use a T-handle or other tools to rotate the tap into the hole.
- Take it slow, ensuring the tap doesn’t bind or break.
- Back off periodically to clear chips and lubricate.
- Cleaning the Threads:
- Use brake clean or a similar solution to remove oil and metal chips from the threads.
Tapping on a Drill Press: Leveraging Precision
A drill press can be a game-changer for larger projects or increased precision. The process involves clamping the workpiece securely, drilling the hole, and then using the drill press to tap with controlled speed and torque.
Bare Minimum Tools for Beginners
For those just starting, the bare minimum tools include a center punch, tap, drill, a means to rotate the drill bit, and a T-handle or alternative tap-driving tool. Lubrication, such as cutting fluid, is essential for smoother operations.
Investing in a complete tap-and-die kit offers versatility for various projects. A comprehensive kit, like the one mentioned in the guide, ensures you have the right tools for the job, even in unexpected situations.
Contents:
0:00 Intro
0:12 Recommended tools
1:33 Design of a bolt
4:29 How to use the tools
6:40 Determining thread size
7:55 Reading a tap-and-die chart
9:22 What drill bit you need
10:33 Drilling the hole (hand tools)
12:18 Prepping the hole
12:40 How a tap works
13:07 Tapping the hole
15:50 Finished product
16:04 Tapping on a drill press
20:15 Minimal tools needed
Mastering the art of drilling and tapping opens up a world of possibilities for DIY enthusiasts. With the right tools, knowledge of thread design, and a step-by-step approach, you can confidently tackle projects that require precision and reliability. Whether you’re repairing threads on a vehicle or creating custom metalwork, the skills acquired from this guide will undoubtedly prove invaluable in your journey as a DIY enthusiast.