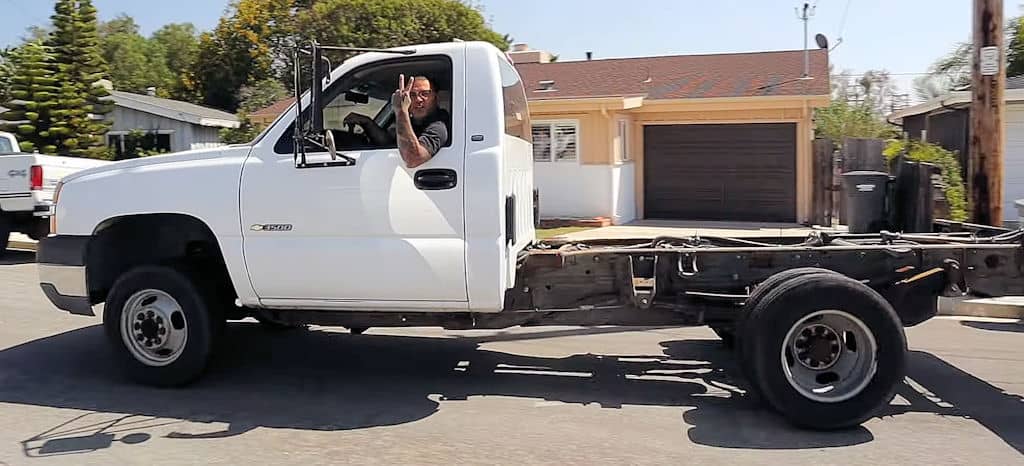
Mike Bello and the crew at Bello’s Kustoms tear down an early 2000’s Chevrolet Silverado 3500 dually to be modified and used as the chassis for an air bagged 1950 GMC COE or Cab Over Engine build.
Part 1 ~ Front Suspension
Removing the stock A-arms and front suspension before cleaning up the existing brackets on the frame. Welding in and installing the upper and lower a-arm kit from Michigan Metal Works for air ride suspension…
Part 2 ~ C-Notches
Cutting off the factory leaf springs, cleaning up the frame and differential to get measurements for the C-notches. Drawing and cutting the notches out of 1/4″ plate on the Plasma-Cam. Welding in the C-notches and cutting out the frame for the notch. Drawing and cutting out the top and bottom plates before welding them in to complete the frame rails…
Part 3: 4 Link
Centering the axle before taking measurements to create the custom brackets for the 4 Link and shocks. Cutting out the brackets on the Plasma-Cam and assembling them. Installing the brackets on the frame and axle. Cutting 1/4″ ID tubing for the links and installing them to be tacked together and welded later. Welding in the brackets for the shock mounts…
Part 4: Rear Airbag Mount
Designing and cutting out brackets to build an airbag mount off the rear axle. Mounting the airbags and building cross member to attach to. Cycling the bags and fixing clearance issues with the gas tanks. Building and installing the Panhard bar. Taking it all back apart and welding it all up…
Part 5: Fitting the Bed
Reinstalling the 4 links, moving the gas tank, and plumbing the fuel and brake lines. Dropping the service bed on the back of the truck. Fixing wheel fitment issues by creating a step out of sheet metal on the area around the wheels.
Part 6 ~ Shortening the Frame
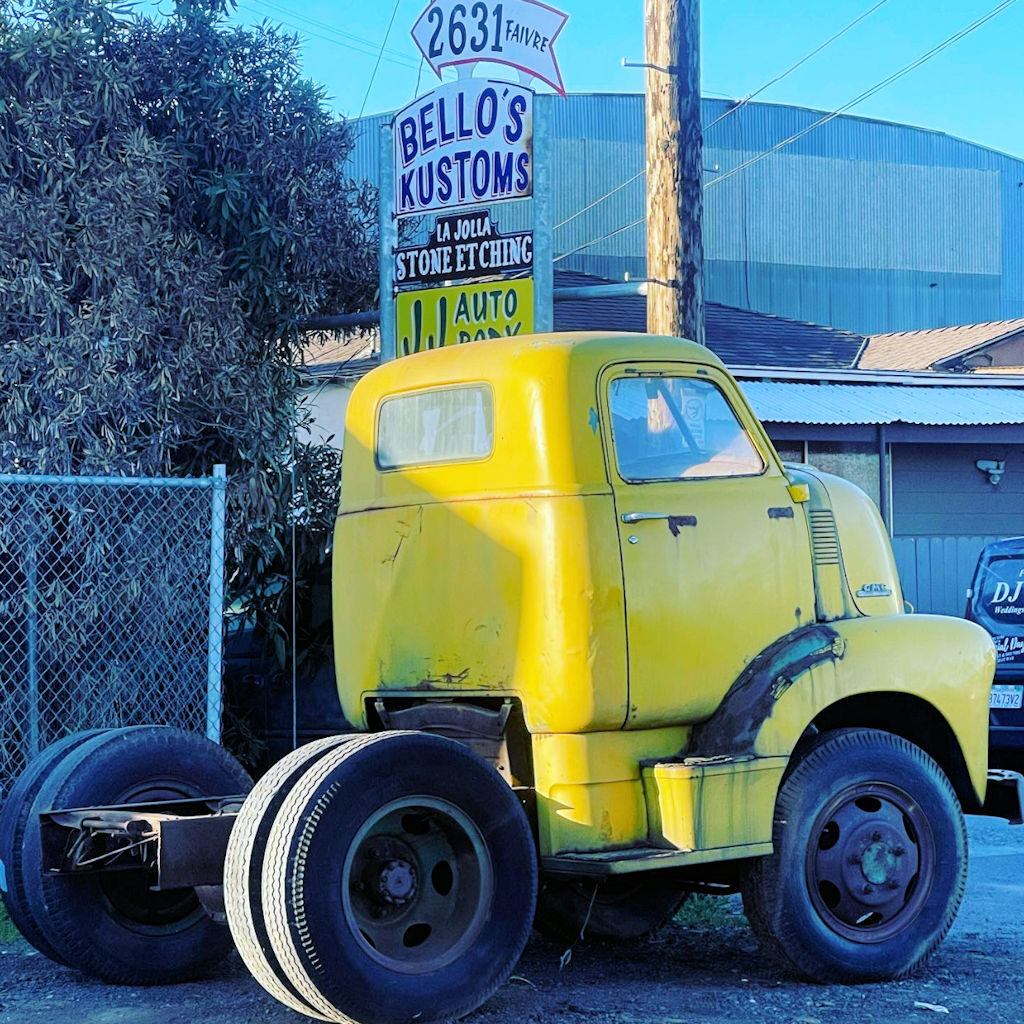
Tearing apart the rest of the 2002 Chevy cab to prepare to cut the frame. Getting the 1950 GMC dropped off at the shop and measuring the dimensions of the cab. Cleaning up the factory frame brackets and removing the transmission cross member. Cutting 27″ out of the factory frame before welding it back together and making plates for reinforcement to be welded in. Creating and welding in a new transmission cross member to take place of the old one.
Part 7 ~ Fitting the Cab
Tearing down the GMC cab and the rest of the engine bay of the Silverado. Installing the new wiring harness. Dropping the GMC cab onto the Silverado chassis. Fitting the cab so that it lays rocker and creating body mounts.
Part 8 ~ Body Mount, Exhaust, Air Tanks, and Compressors
Shortening and fitting the old steering column to work with the Silverado steering box and creating mounts for the radiator before taking back off the cab to reinforce and weld up the body mount. Installing an air tank, sensors and compressors for the air ride. Fabricating an exhaust system with glass packs.
Part 9 ~ Steering, Brakes, Air Lines, and Pedals
Fabricating a brace for the Gennie Shifter to fit on the 4L80. Installing the Wildwood remote mount Hydroboost brake kit on the body mount. Creating and running custom-made brake and power steering lines. Creating a bracket for the air ride solenoids before installing them and running airlines. Cycling the 3 rear airbags. Dropping the cab back on the frame and installing the brake pedal. Modifying the original gas pedal from the 2004 Silverado to fit and work under the GMC dash.
Part 10 ~ Sheet Metal Flooring
Strapping up the wire harness. Making paper templates and cutting out sections of sheet metal to create the tunnel over the LS motor. Test fitting, bead rolling, and braking panels into form. Slip rolling the top part of the tunnel. Planishing a special piece of the tunnel to fit the alternator. Pulling it all off the weld it together before reinstalling it. Creating “mini tubs” to cover the part of the flooring cut out to fit the tires after the laying body.
Part 11 ~ Front End
Creating a battery tray to be suspended from the floor of the cab. Hooking up the ECU, sensors and radiator overflow to the firewall. Reinstalling the radiator and power steering cooler. Fabricating bumper brackets so the bumper lays on the ground. Reattaching the splash pan and air deflector. Building brackets for the grill to be secured to the frame to finish putting the body together for the front end.
Part 12 ~ Test Drive!
Creating and installing a K&N cold air intake, cutting out a bracket to hold it in place. Wiring up the battery, power cut-off switch, and alternator. Sending power to the rear of the car for the air ride set up. Wiring up the solenoids, switches, ignition, and headlights. Firing up the motor. Putting heat to the Gennie Shifter and rebending in the right way for the cab before installing it. Dropping back in the seats and pulling the truck out for a test drive.
Part 13 ~ Channeling the Bed
Cutting the floor from the utility bed to raise it 8″. Setting the bed back onto the frame to get the floor level, measured, and welded. Pulling the bed off to fix gaps left by the channeling and welding it up one last time. Setting the bed back onto the truck to build the tunnel over the rear end. Installing a gauge to read air pressure in the bags. Cutting, braking, and bead rolling sheet metal for the tunnel. Installing rivet nuts to fasten down the sheet metal before color matching the bed back to yellow.
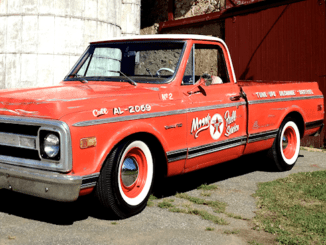
Cruising the Cabover
Cruising the 1950 GMC Cabover through San Diego, CA after finishing the build. This GMC Cabover is sitting on a 1st generation Chevy Silverado 3500 chassis and drivetrain with the Vortec 6000 6.0L V8 and 4L80 transmission. The suspension has been modified for air ride with a 4-link and C-notch in the rear to lay body. A Harbor service bed follows behind the cab and was channeled 8″ to lay on the ground.
About Bello’s Kustoms
Bello’s Kustoms is a traditional kustoms shop located in San Diego, CA, with a focus on 1954 and earlier American automobiles.