In this DIY project, you’ll make the easiest Spray Paint Can Shaker imaginable — a short stretch of 3-inch plastic pipe and an end cap that installs with a simple wrench. Done. This DIY Project is really that easy — No welding, no special tools, just simplicity!
Supplies Needed:
- (1) 10 – 11″ length of 3″ ABS Pipe (Could be PVC).
- (1) Oatey 3″ Mechanical Test Plug (amzn.to/2X7xAIx).
- (1) 3/8-16 nut.
- (1) 3/8″ fender washer.
Tools Needed:
- A Saw.
Basically any saw (hand or electric) that will cut wood, which will also cut ABS pipe. - A wrench.
- Spray paint that needs shaking.
Making the Spray Paint Can Shaker
Time needed: 10 minutes
This DIY Spray Paint Can Shaker Project will take just minutes to make and could not be any easier. There is no welding, no special tools, just simplicity!
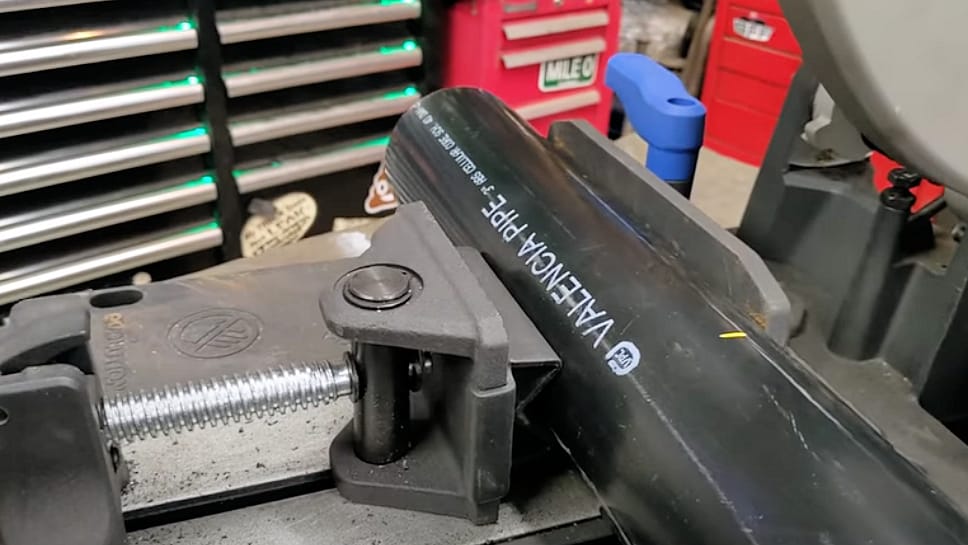
- Cut a 10″ long piece of 3″ ABS plastic pipe
Cut a piece of 3″ ABS plastic pipe to a length between 10 and 11 inches. This can be done with a hand or power saw. Clean-up and deburr the cut pipe end with sandpaper.
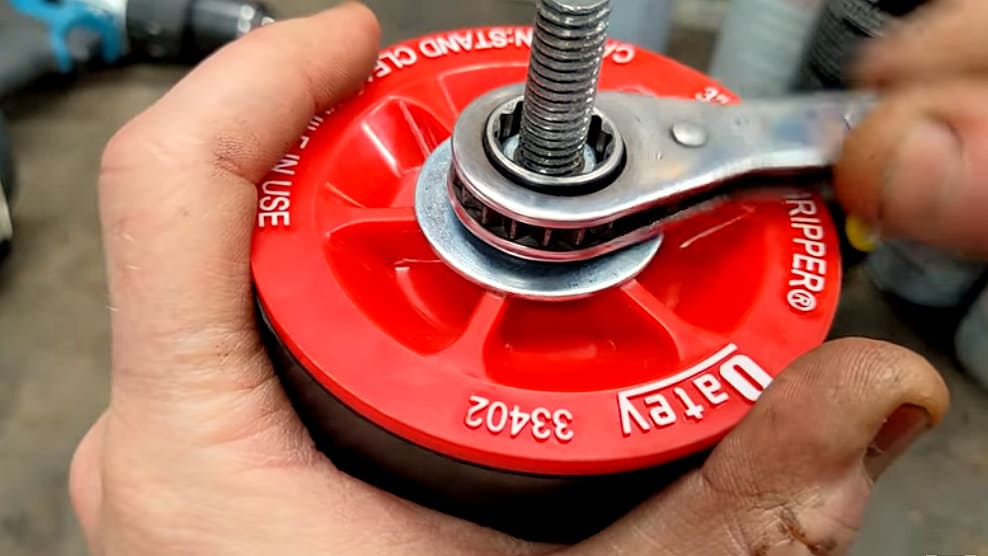
- Insert and secure end cap
Insert an Oatey 3″ Mechanical Test Plug into the end of the pipe and secure with a wrench.
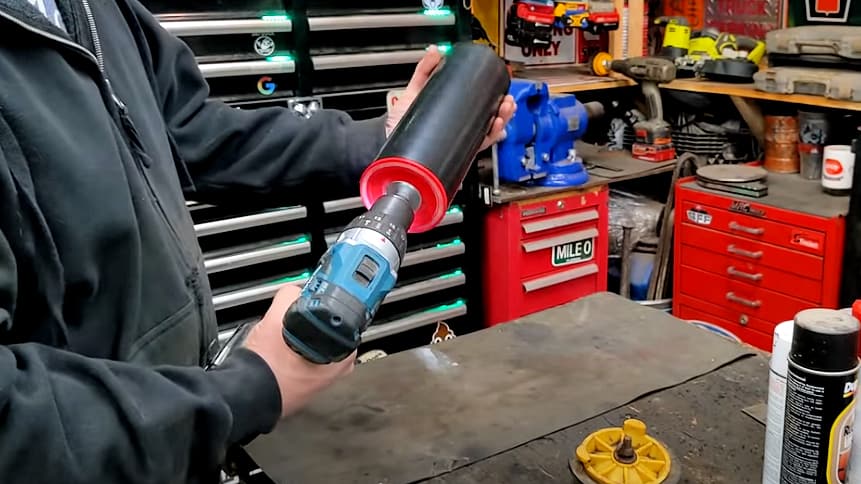
- Attach to drill
Chuck up the shaker in either a corded or cordless drill.
Using the Spray Paint Can Shaker
After quite a few tests, 1,500rpm seems to be about what you should start out with. The rag, as demonstrated in the video below, makes it much smoother at higher RPMs.
Running 60 seconds for full cans seems to be more than enough. Less than full cans have more room inside for the paint to move around so they mix faster at 30-45 seconds.
Pulse it on and off a few times and the can will be ready to spray. The 3″ tube is sized to fit all sizes of cans from Rustoleum, Valspar, Krylon, and everything in-between…