Evan at Classic Nation takes a close look at the acid dip process for classic cars, showing his 1967 Mustang Fastback project getting acid dipped from start to finish.
Acid dipping is a less common alternative to media blasting or sandblasting, but yields much more thorough results because it not only strips the paint and body filler, the acid permeates all of the open frame rail cavities and removes rust that media blasting/soda blasting can’t reach.
For anyone wanting to perform a full “frame-off” restoration on their classic car or muscle car, this is the way to go!
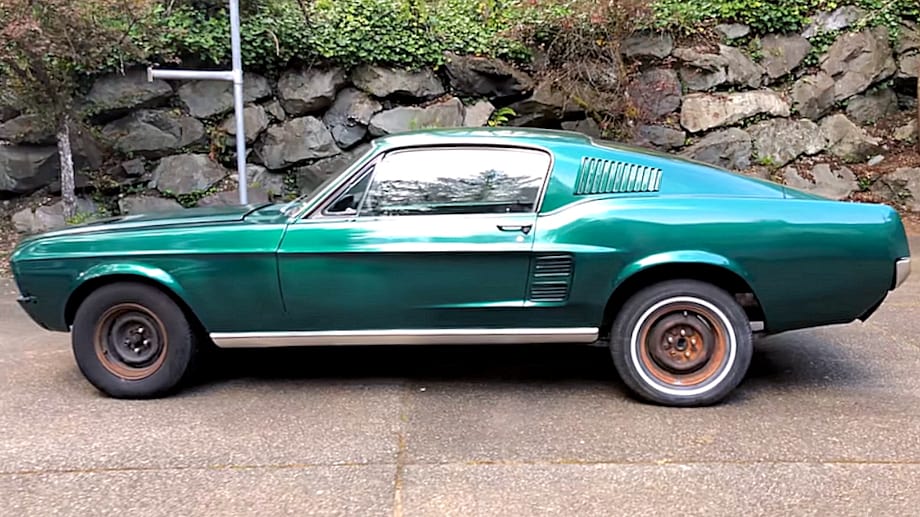
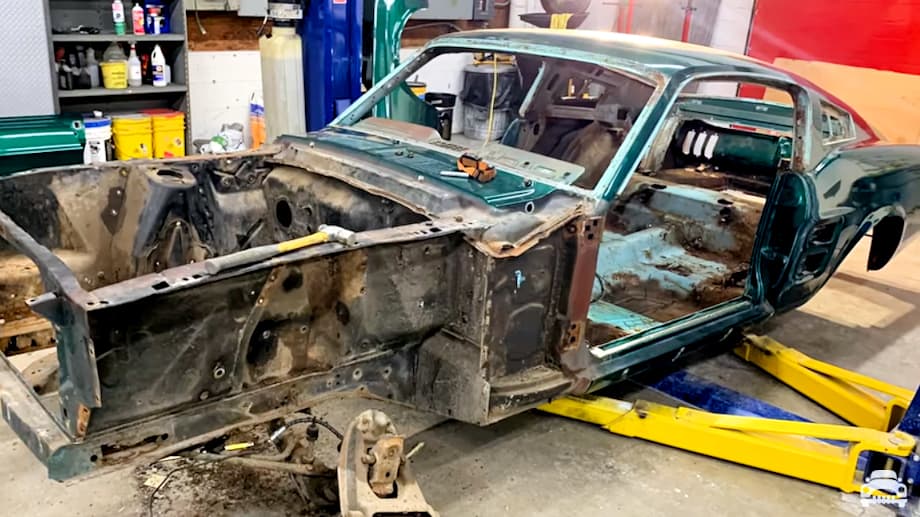
This photo shows what the car looked like before tearing it down.
All of the parts were stripped off of the car down to the smallest fasteners — everything had to come off leaving just the shell. This is how the car looked before Evan delivered it to the acid dip vendor in Eugene Oregon.
Acid Dipping ~ An Alternative to Media Blasting
Step One is the hot tank in which the car is put into a 200-degree tank of cleaning solution where it stays submerged for two days. This is where the main cleaning is done.

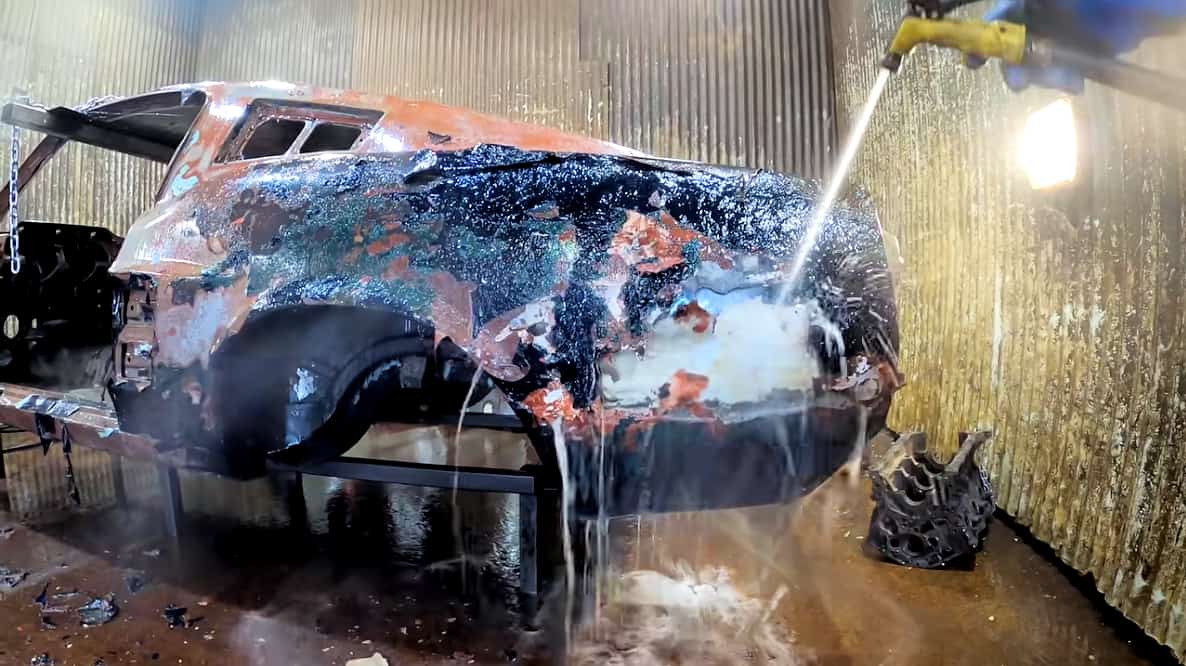
Step two is high-pressure cleaning once the car has marinated in the cleaning solution tank for a couple of days. The entire body is meticulously sprayed to remove all the loose material. This step is where you really get to see the body filler and paint almost melt off the car.

Editor’s note: In step 2, the car was cleaned with a pressure washer, which wasn’t shown in the video.
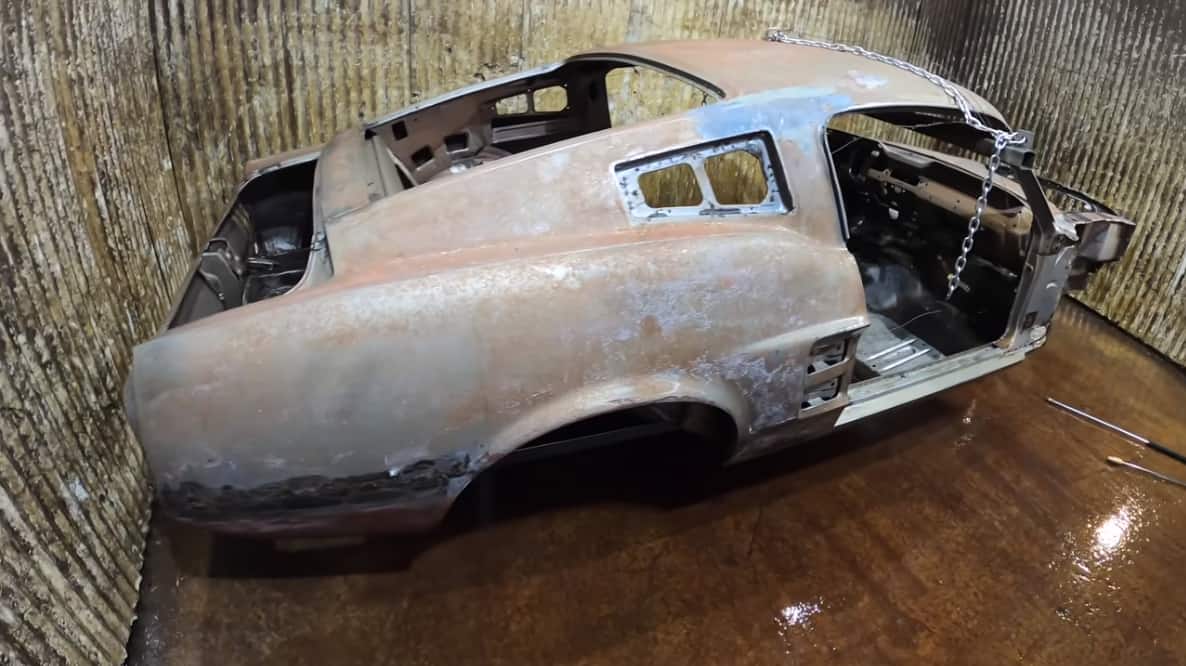
At this point, the process is halfway done. The car has been cooked; it’s been hit with a high-pressure freshwater wash that removed as much of the debris as possible. The next step is going into the acid bath which will neutralize any of the residual cleaning agents. It’ll also do some additional cleaning — all the remaining primer will be removed during this third step in the acid bath.
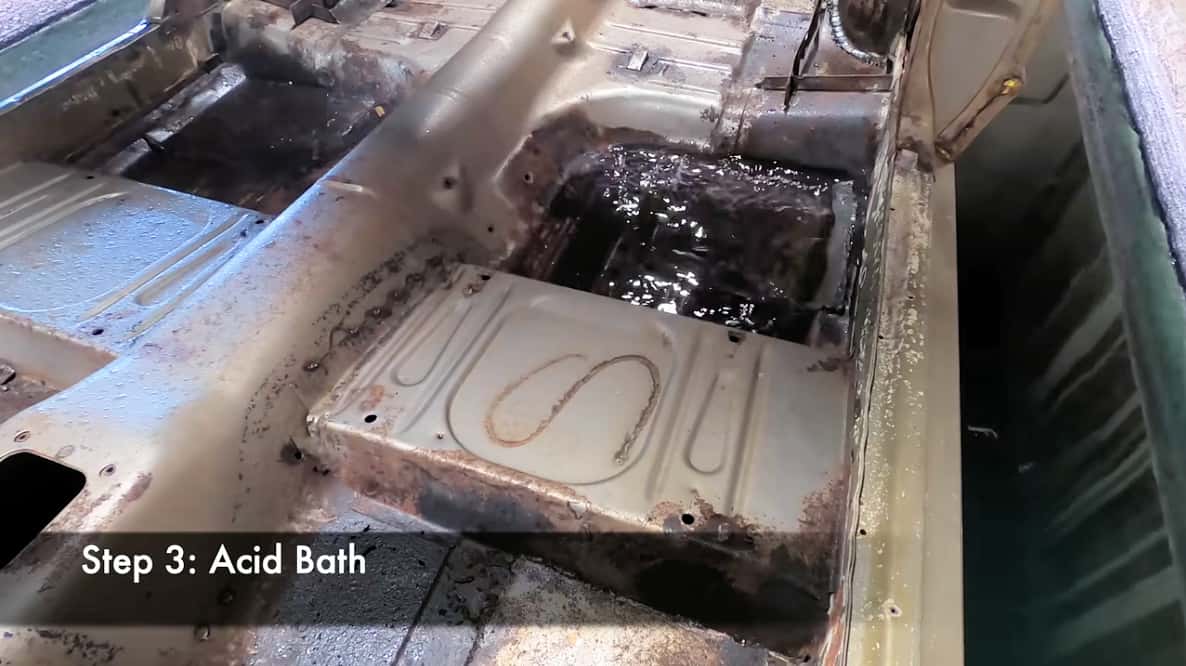
Step three is the acid bath. The car is lowered into the acid solution tank for two days where the acid treats the rust and also neutralizes the paint removal chemical that was used in the previous step.
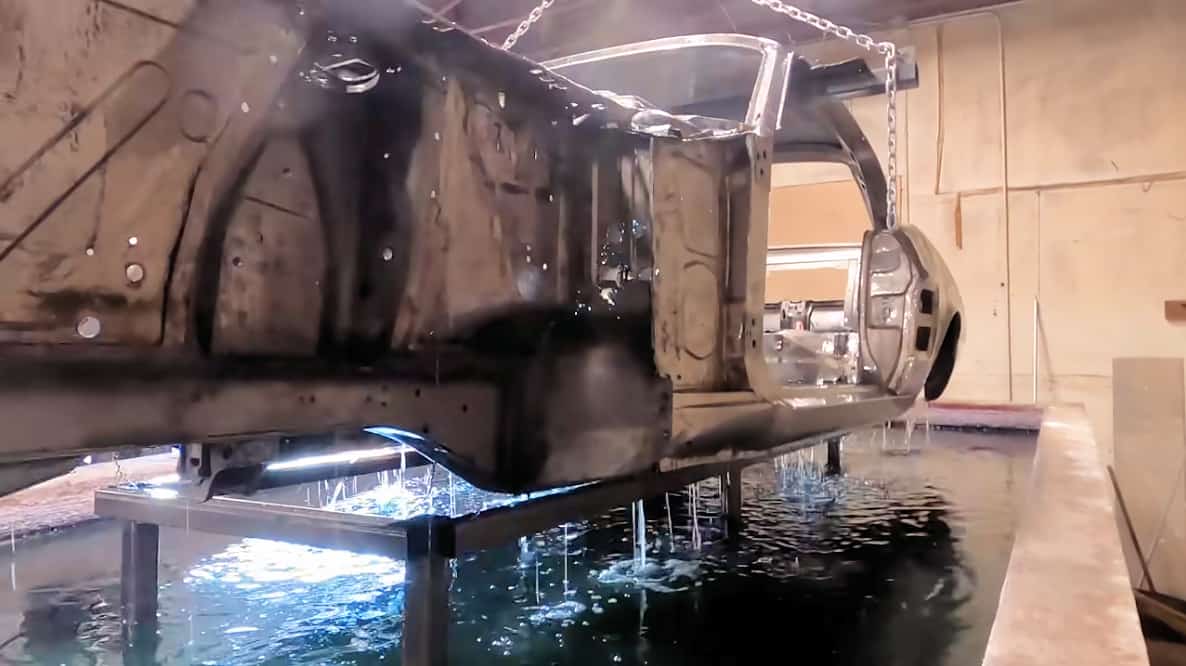
Step four is high-pressure cleaning, For a second time, the car body is hit with a high-pressure freshwater cleaning solution focused on all the gaps and the seams to thoroughly rinse away all the rust that was dissolved by the acid.


Step five is rust inhibitor. This key step prevents rust from forming prior to any metalwork, primer, and paint. The smaller body panels are submerged in a rust inhibitor, while the body is sprayed.

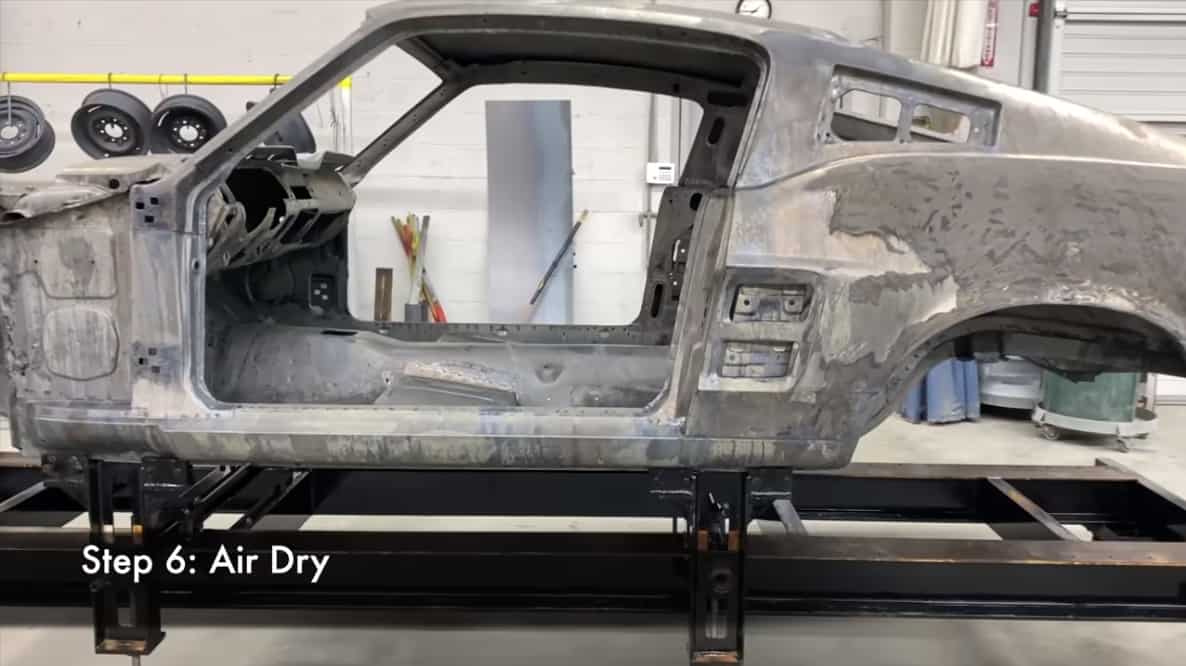
Step six is air-drying the car and parts with warm air which ensures that there are no pools of rust inhibitor remaining and helps ensure that the rust inhibitor will prevent any flash rusting.
Watch the acid dipping process from start to finish
Acid Dip Results
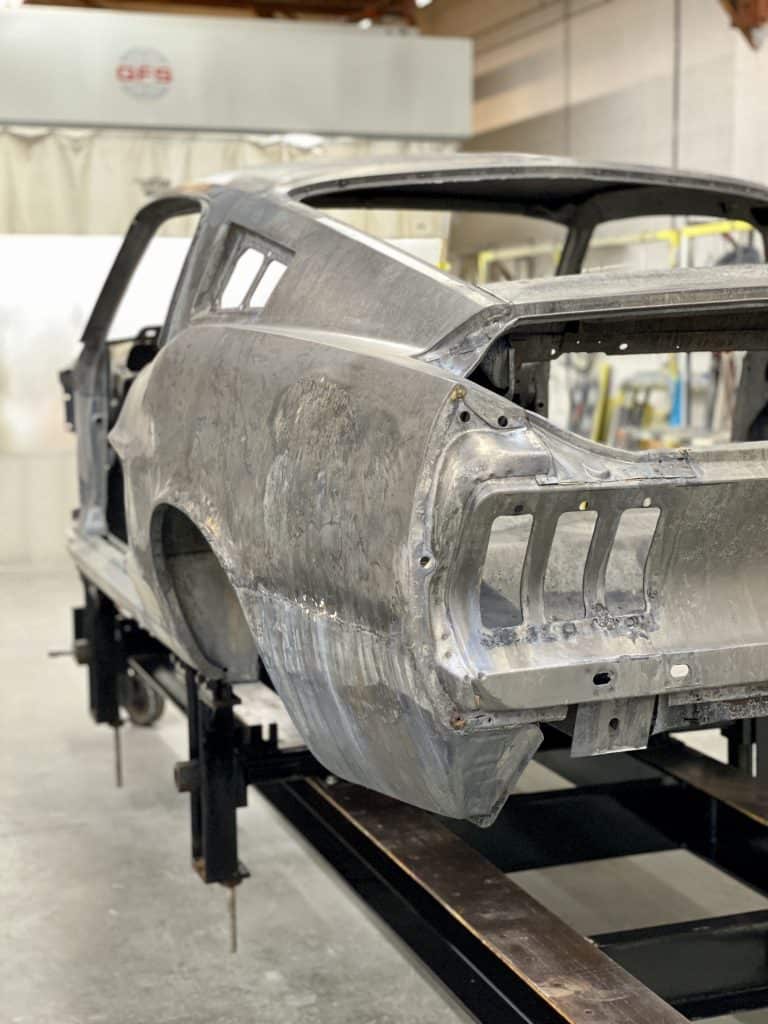
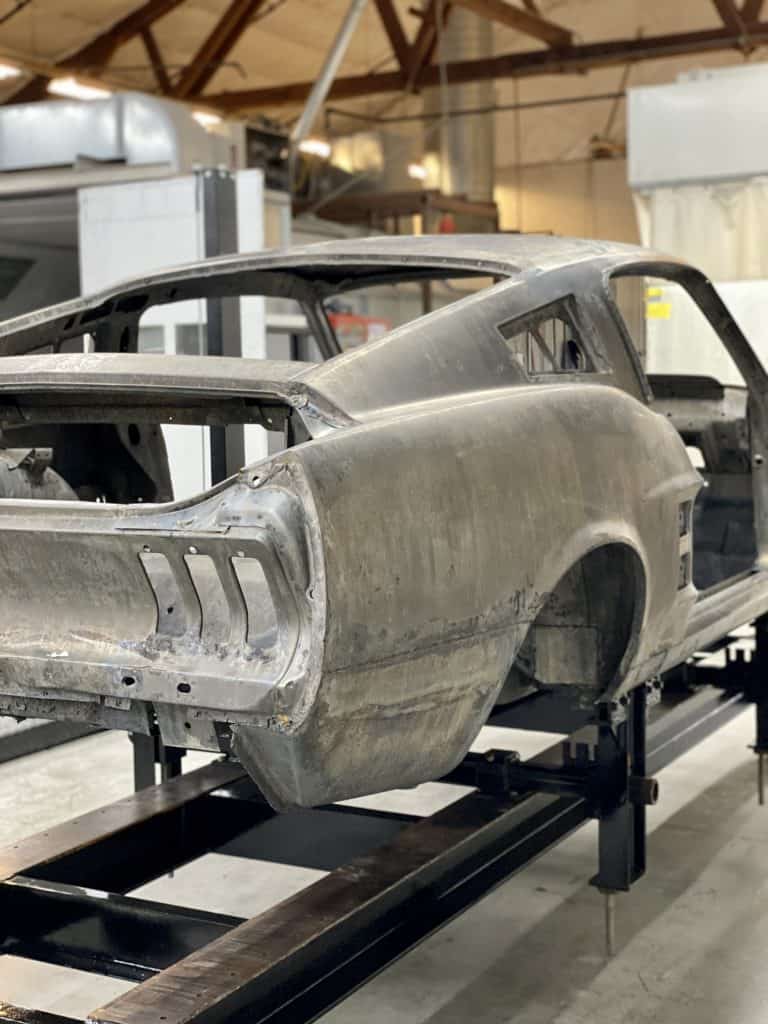
As you can see, the car is clean and bare metal now. There is a clear coat rust inhibitor that is preventing the car from flash rusting.


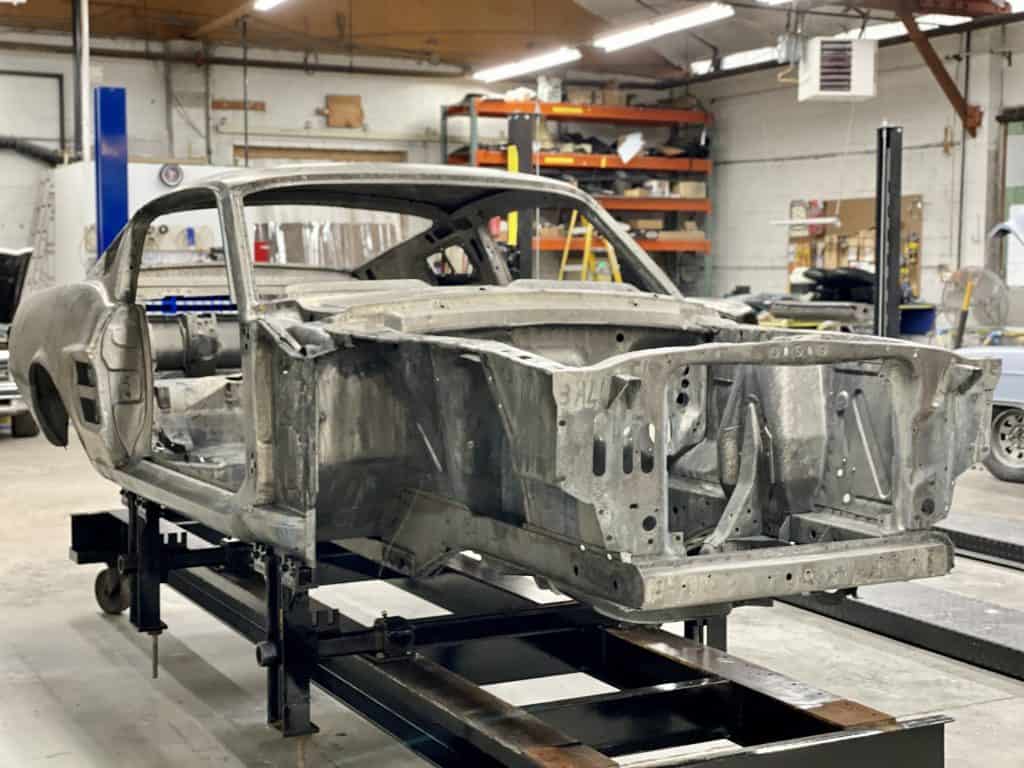
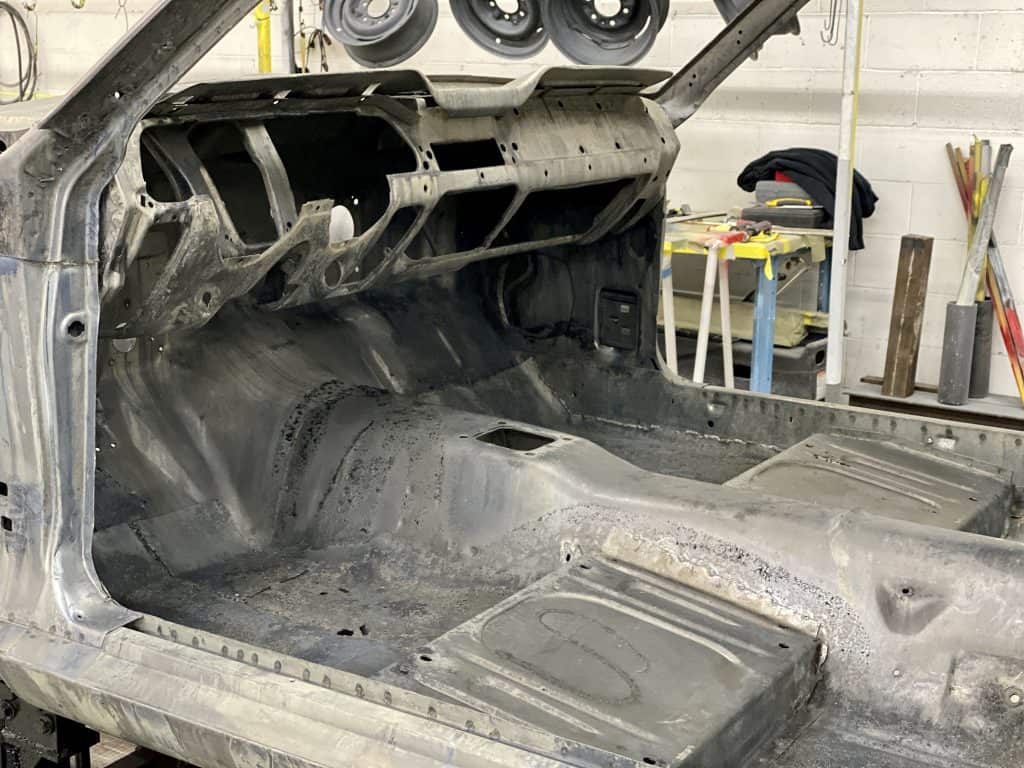

Evan takes a closer look at how the car turned out and lays out the game plan for the next steps…
As you can see from the photos and video, there are quite a few rust holes that will need to be repaired. Evan has already ordered a new full-floor from Dynacorn, which will rectify the issues in the floor and trunk pans.
About this Project
Follow Evan’s journey as he takes on the restoration of his ’67 Mustang covering every detail and talking you through all of the build plans, considerations, and parts. Ultimately, this classic Mustang Fastback will be turned into the restomod that he’s always wanted. But first – he’ll need to repair the car. Here’s the video build thread on this ’67 Mustang Fastback project: youtube.com/playlist?list=PLmeQh…