A paint job can be no better than the prep underneath it. Any flaw in the bodywork will only be magnified by the topcoat, so great pains should be taken to ensure the surface is as straight as possible.
Perfect paint can’t hide ill-fitting panels and trim any more than it will sloppy bodywork. Given that most projects involve replacing some sheet metal, the time to find out your doors won’t properly line up is not after you’ve painted everything. Ideally, you’d like to know that before rolling the car in the paint booth.
So how do you know your panel gaps and body lines are even? According to John Balow, owner of Muscle Car Restorations (MCR) in Chippewa Falls, Wisconsin, the answer is to preassemble or mock-up the entire exterior before the final bodywork phase.
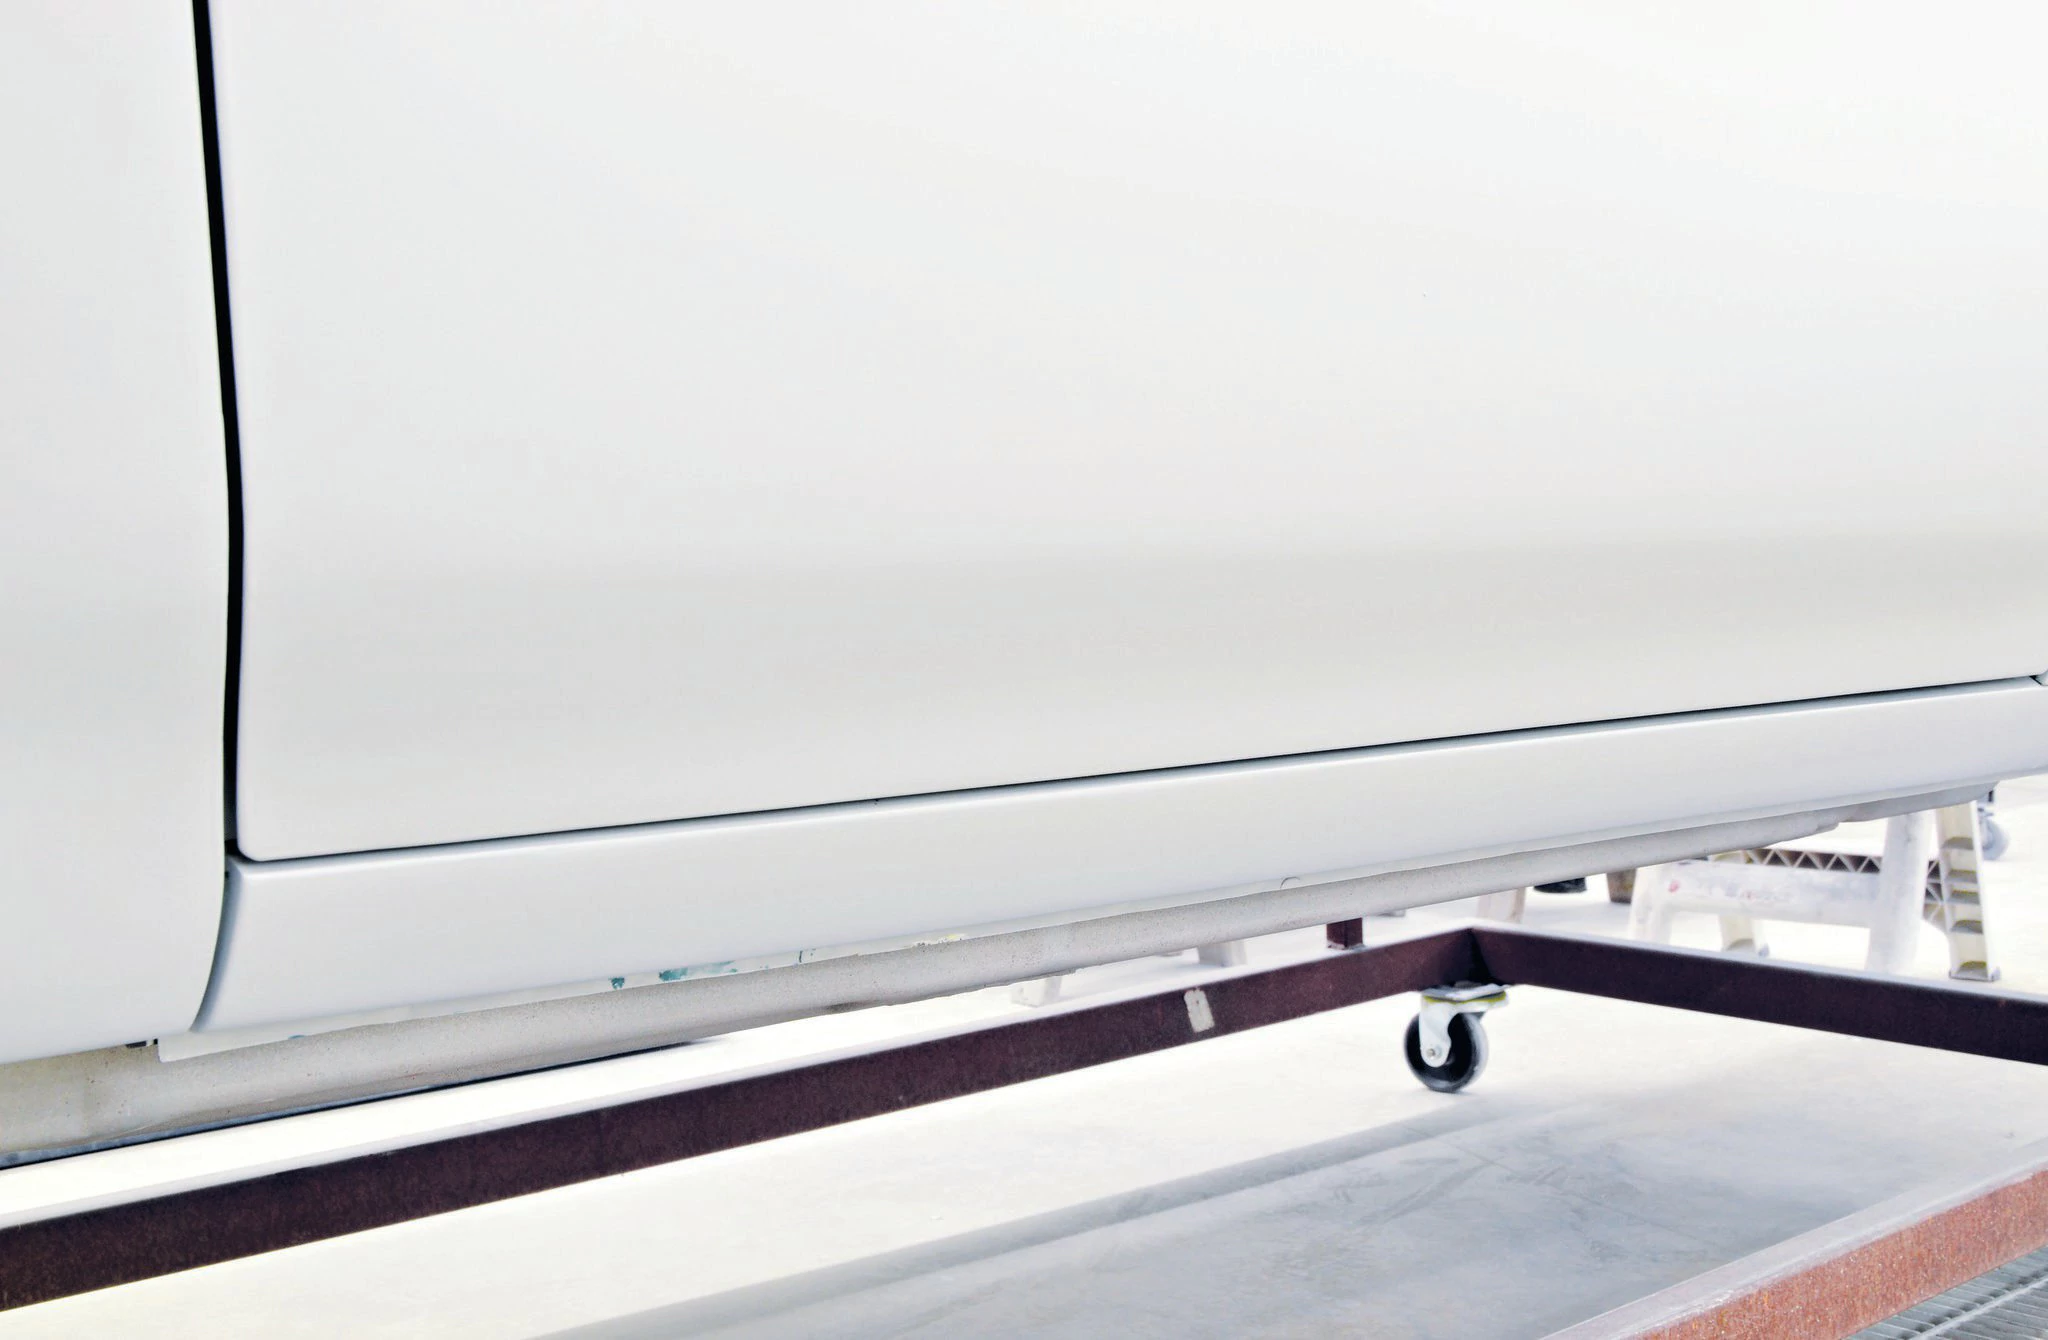
This is where the process starts with every car. Line up the bottom edge of the door with the top of the rocker panel. The leading edge of the door then needs to be even with the leading edge of the rocker.
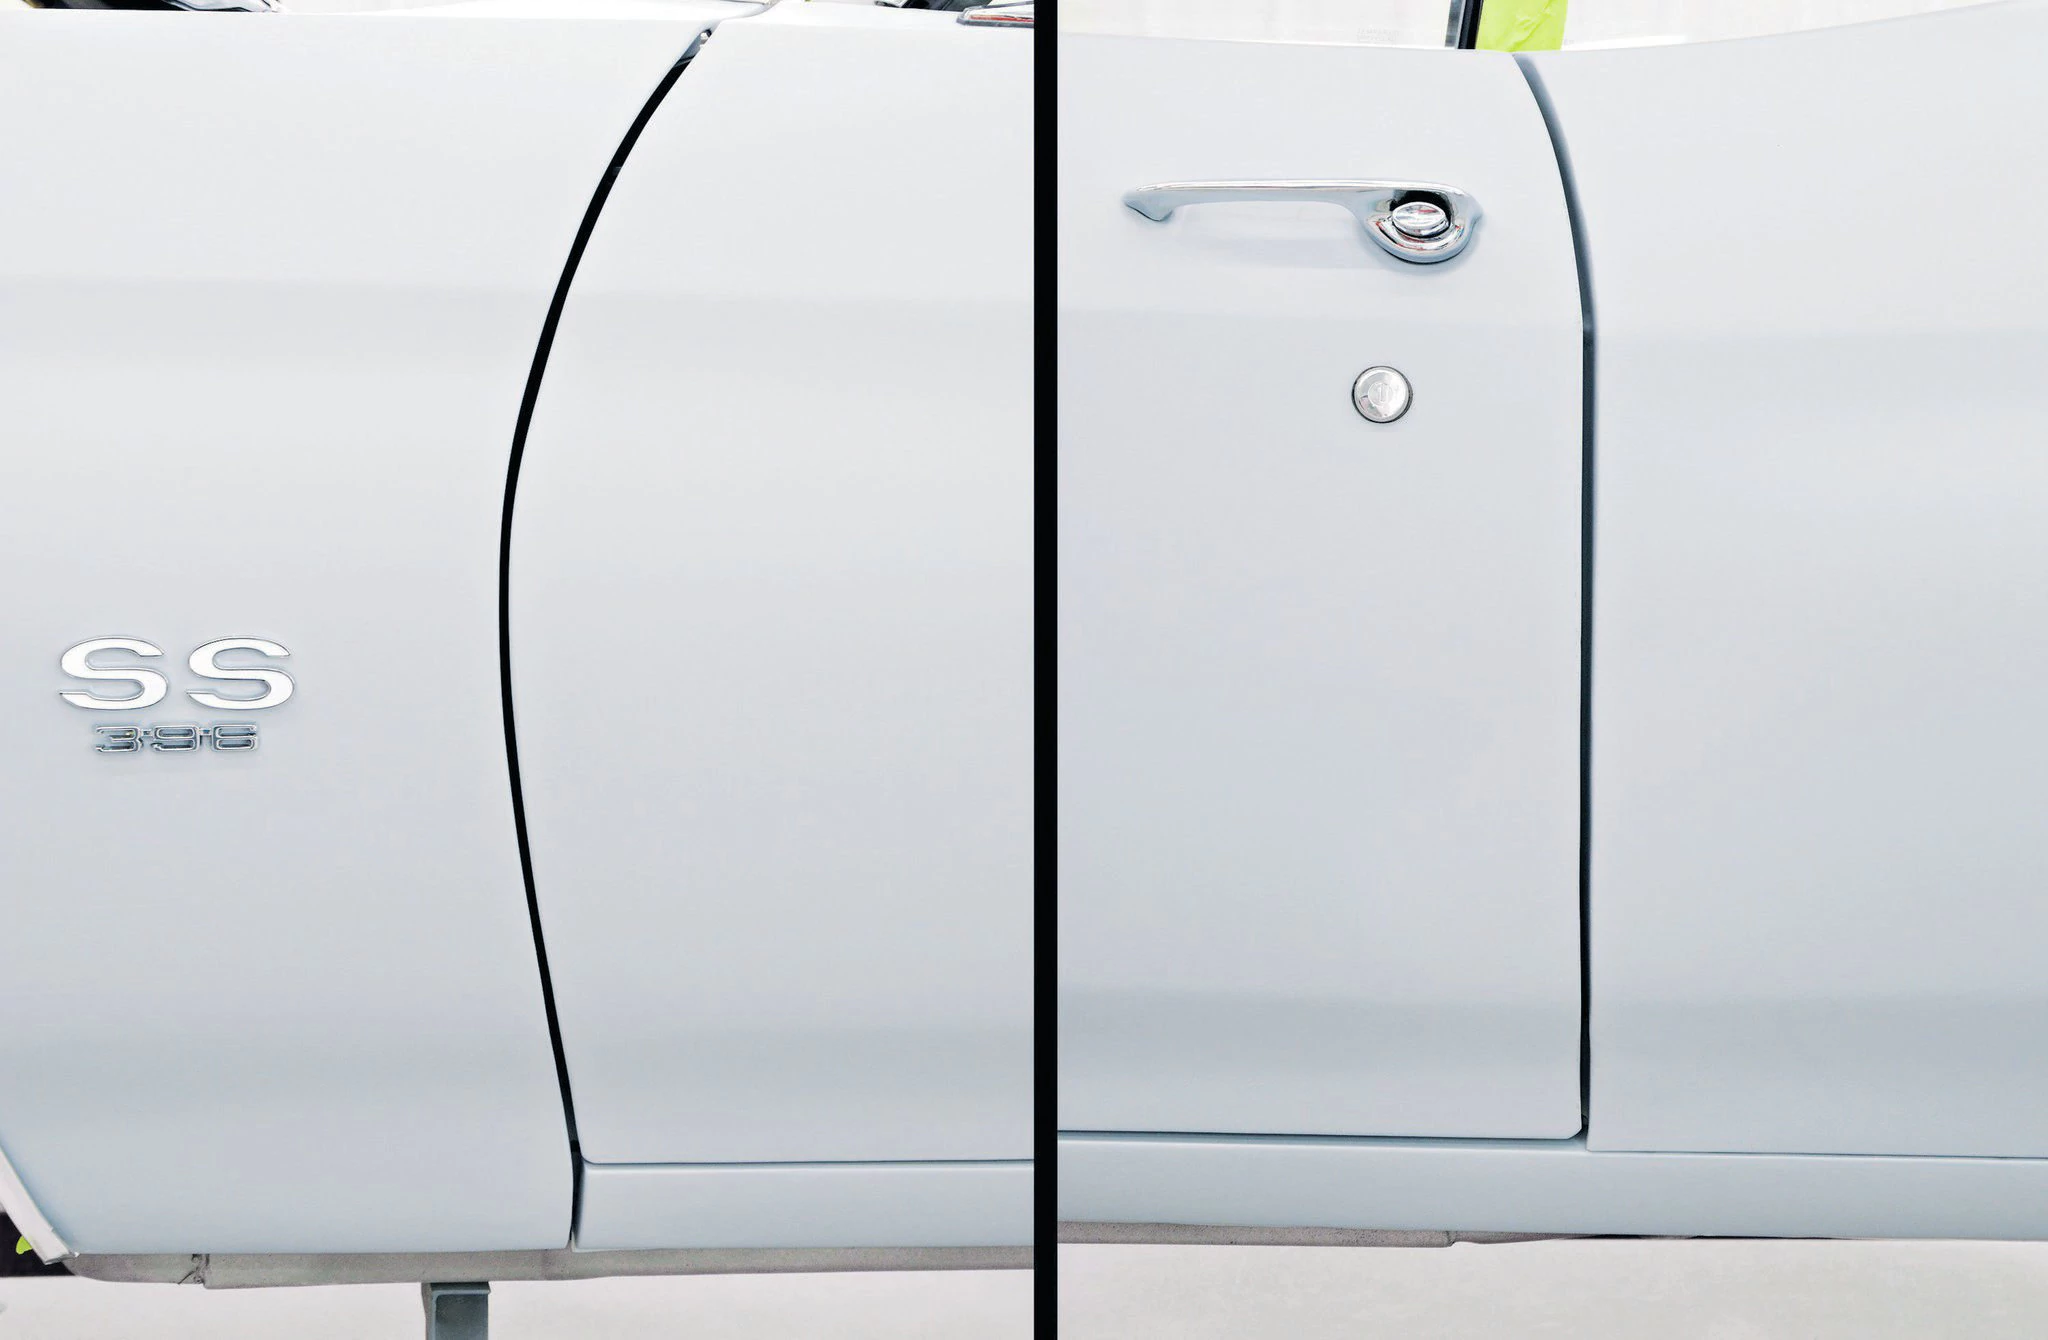
With the door aligned with the rocker panel, the gap between the door and the quarter-panel has now been established. If the door to quarter gap isn’t to your liking, then some metalwork will be required to tweak that gap.
The height of the door, in this case, is determined by lining up the top-rear corner of the door with the top-leading corner of the quarter. With the door and quarter-panels in alignment, adjust the fender to match the leading edge of the door.
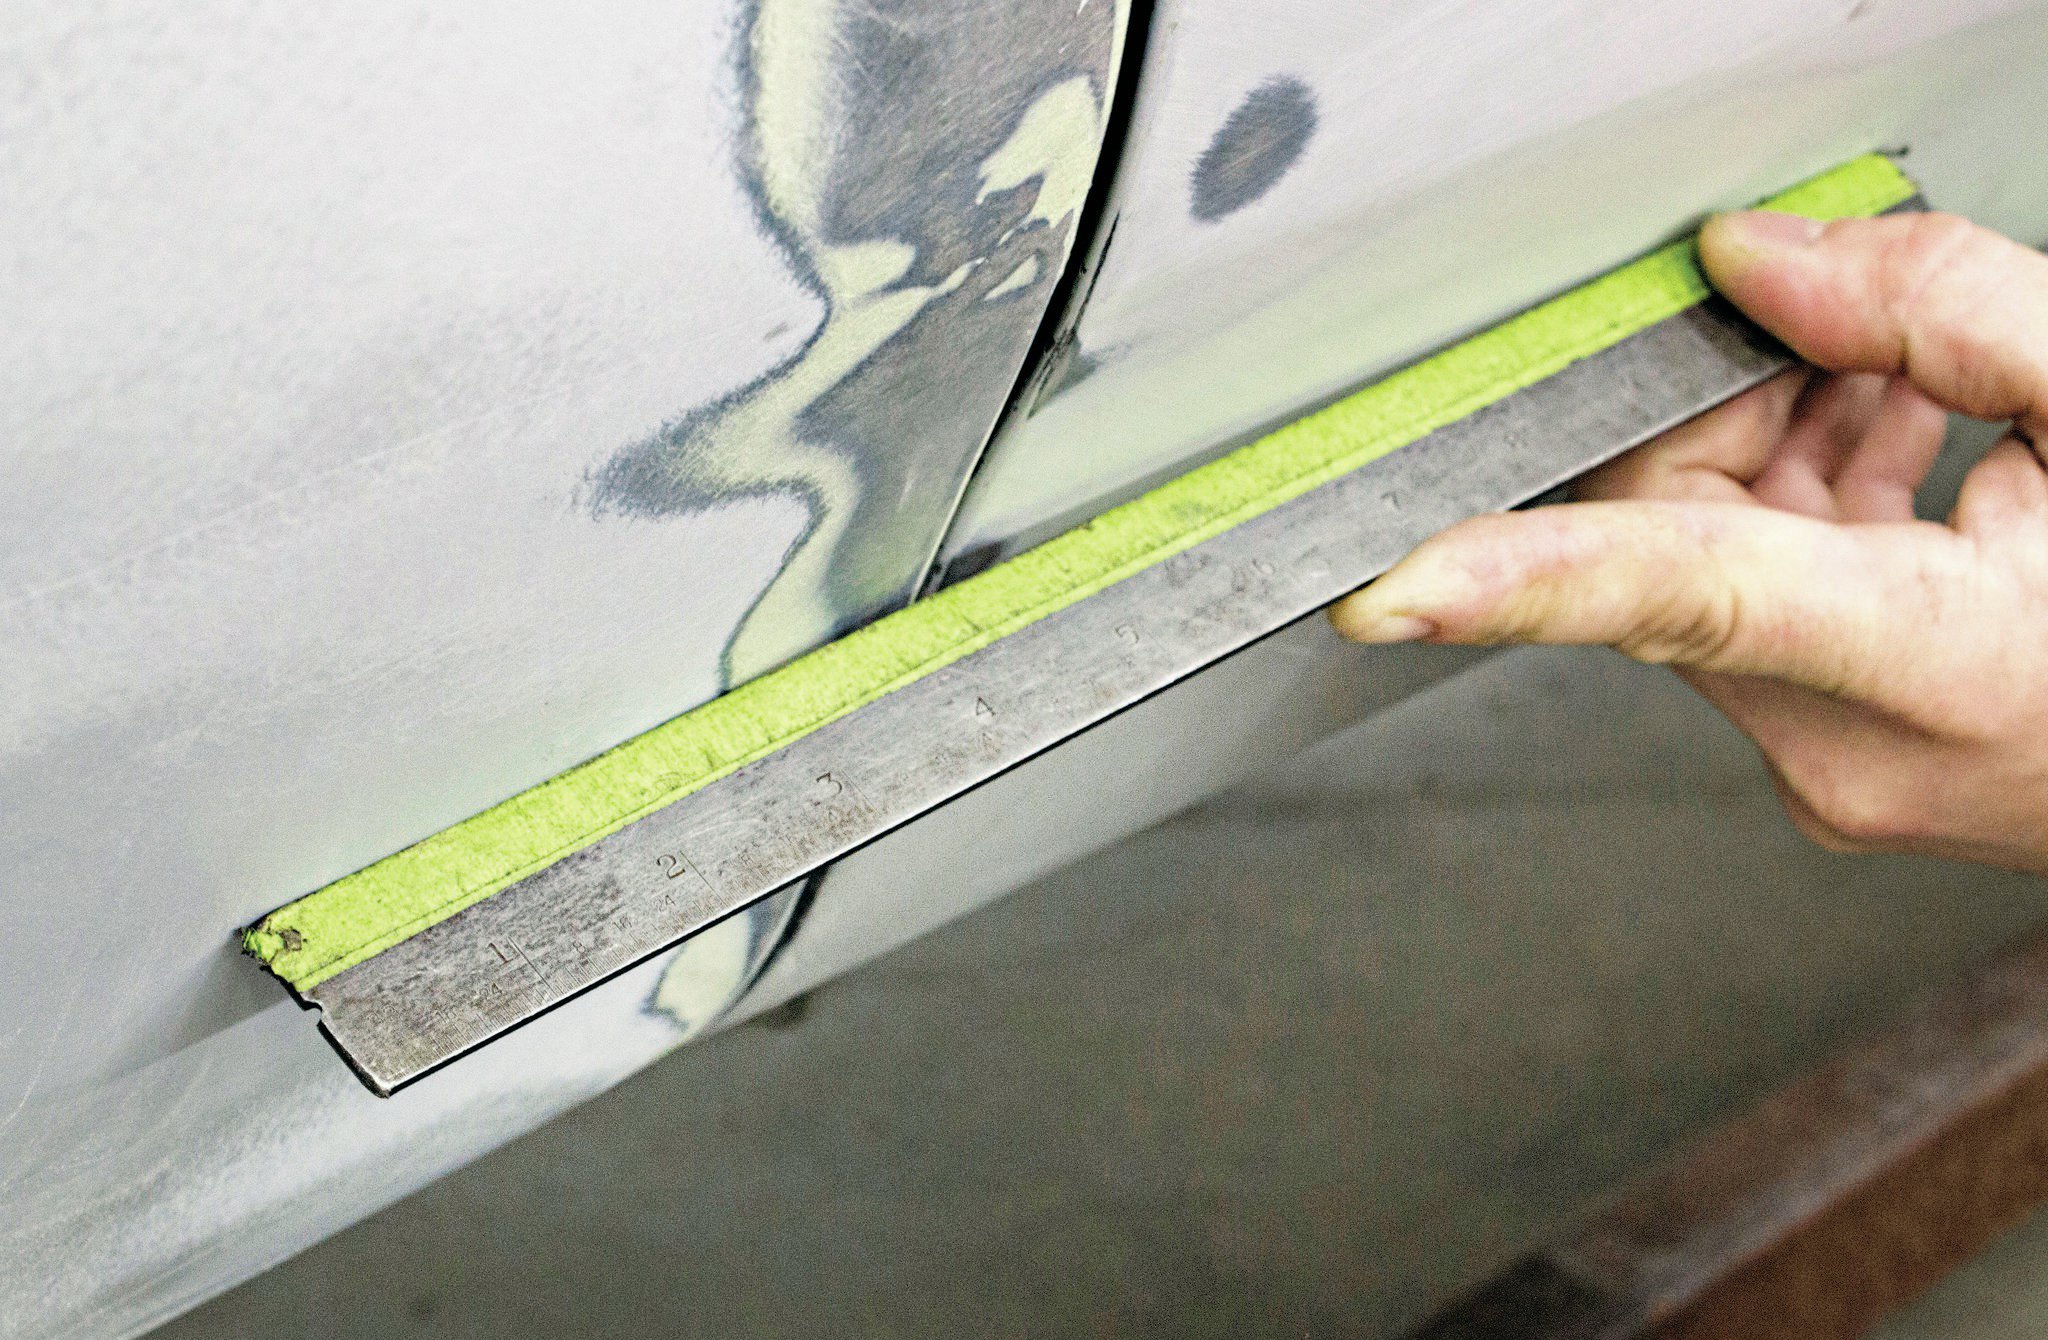
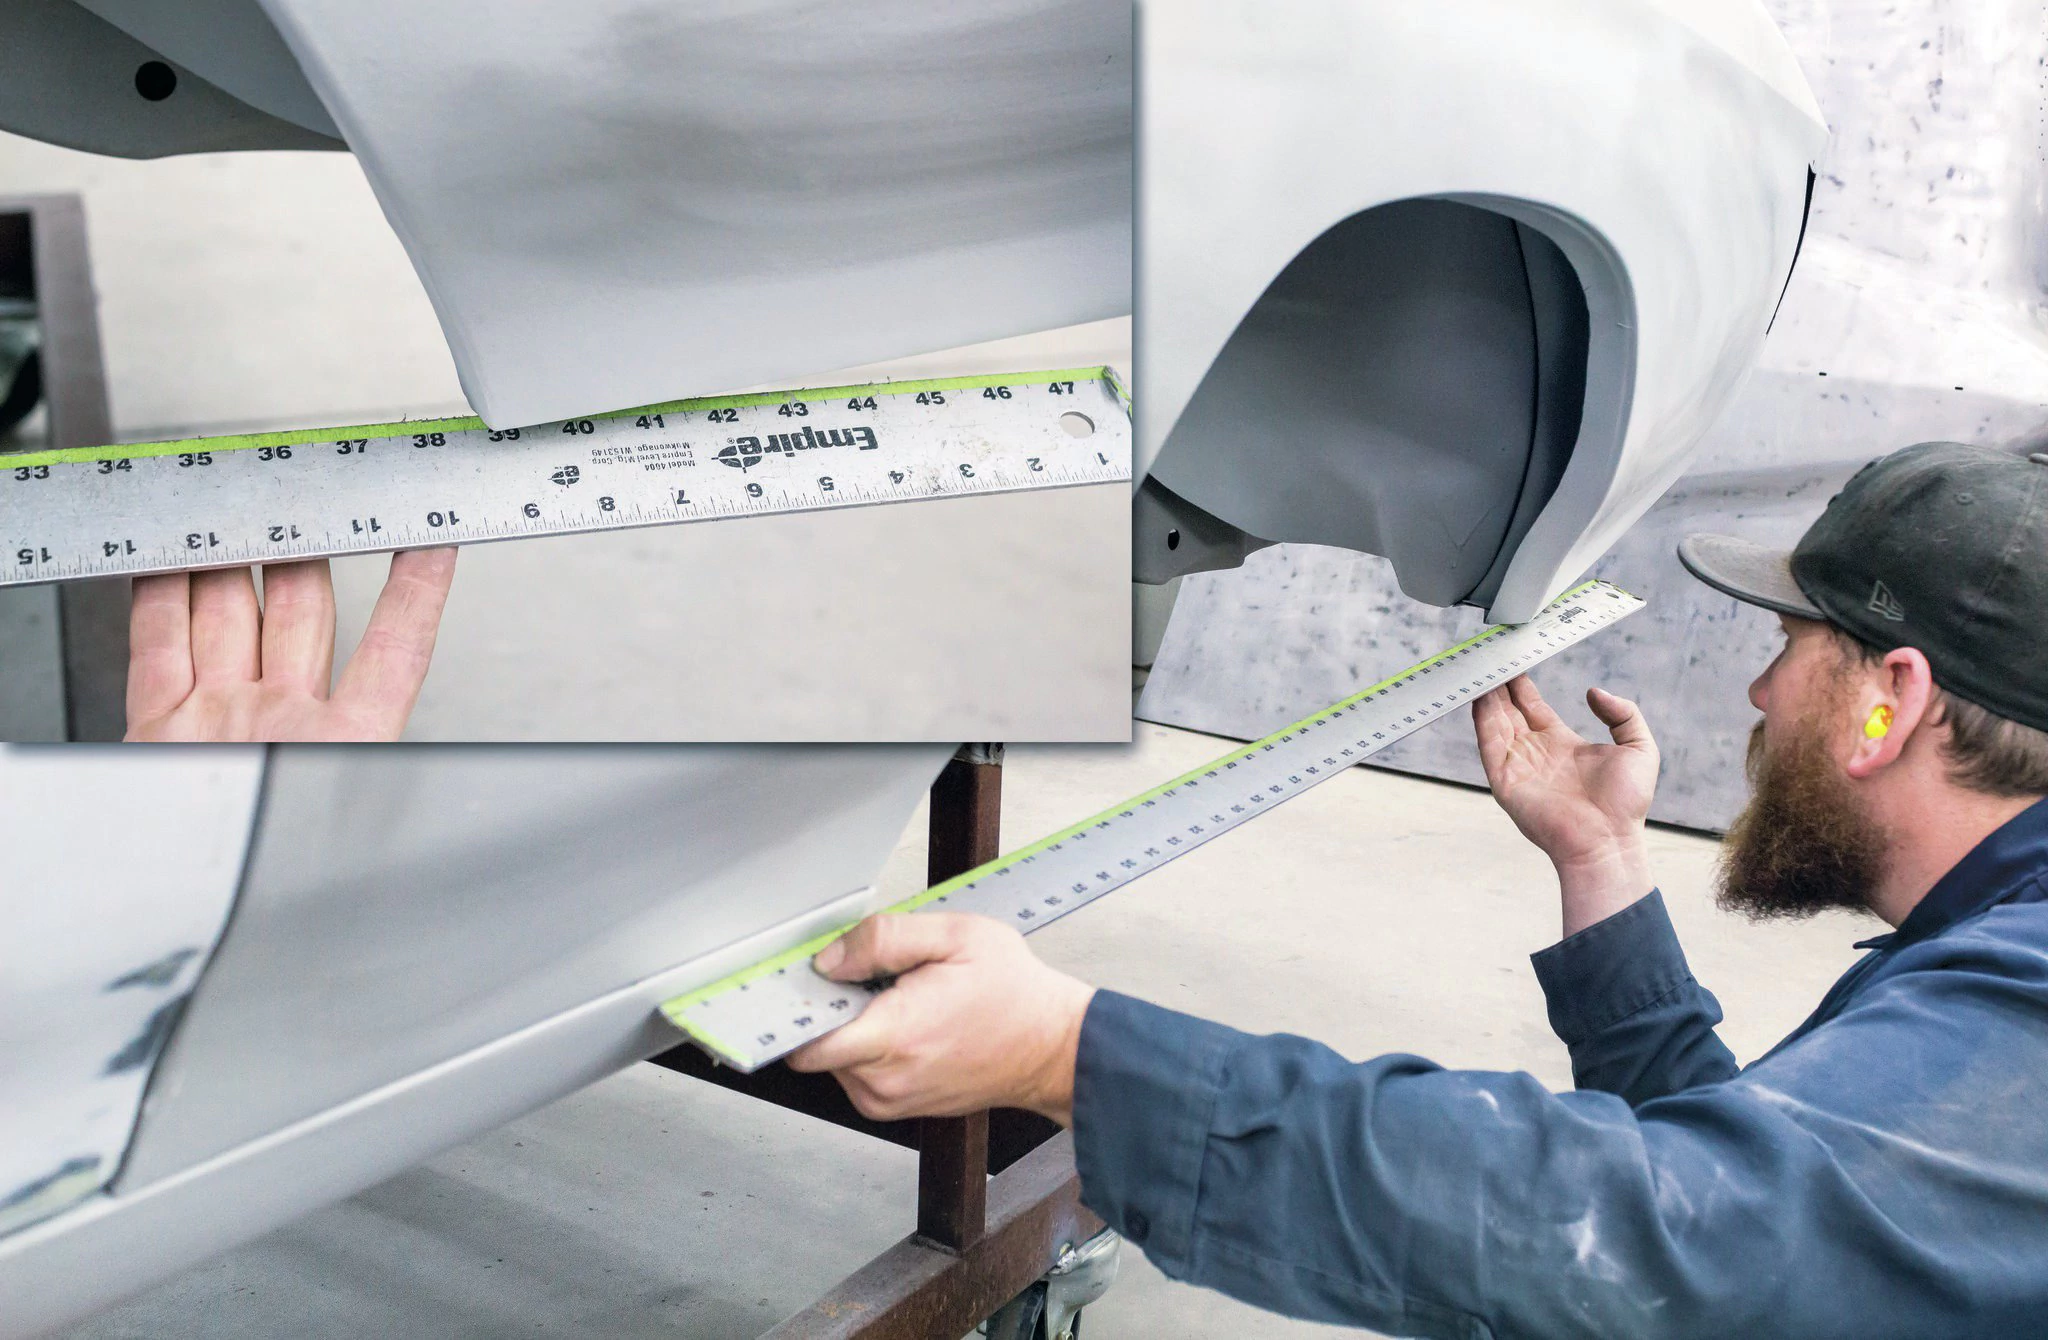
Of course, it’s not just the gaps we’re concerned about but also whether the panel surfaces themselves are in alignment. Putting a ruler across the gap will quickly reveal whether a panel needs to be pushed in or pulled out.
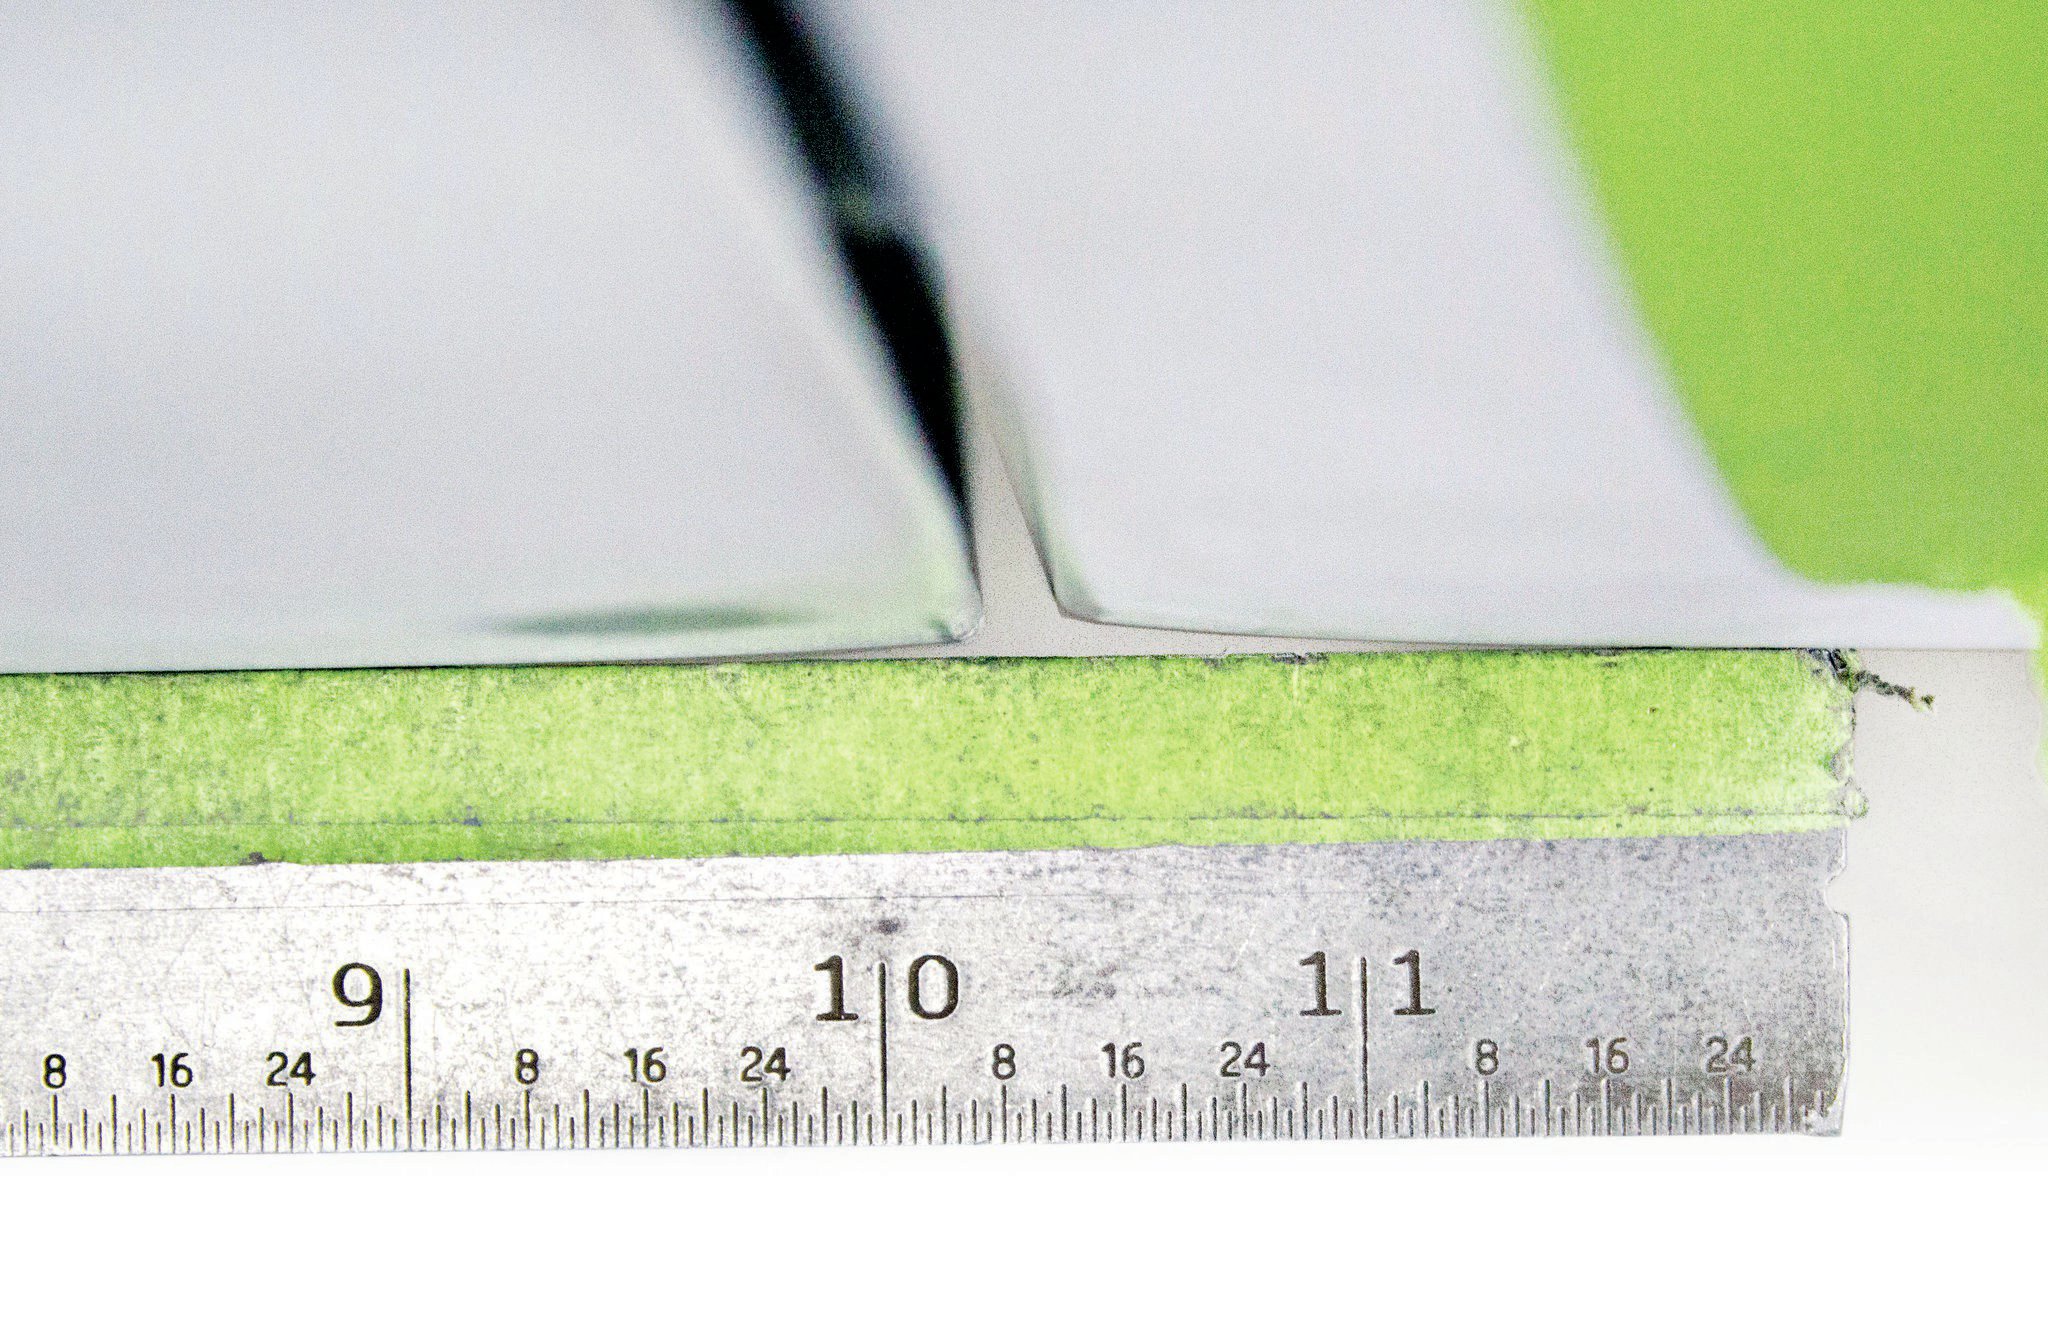
Pay particular attention to the edges of each panel. Both of these panels curl in some. This is a relatively easy fix now. After paint, forget about it.
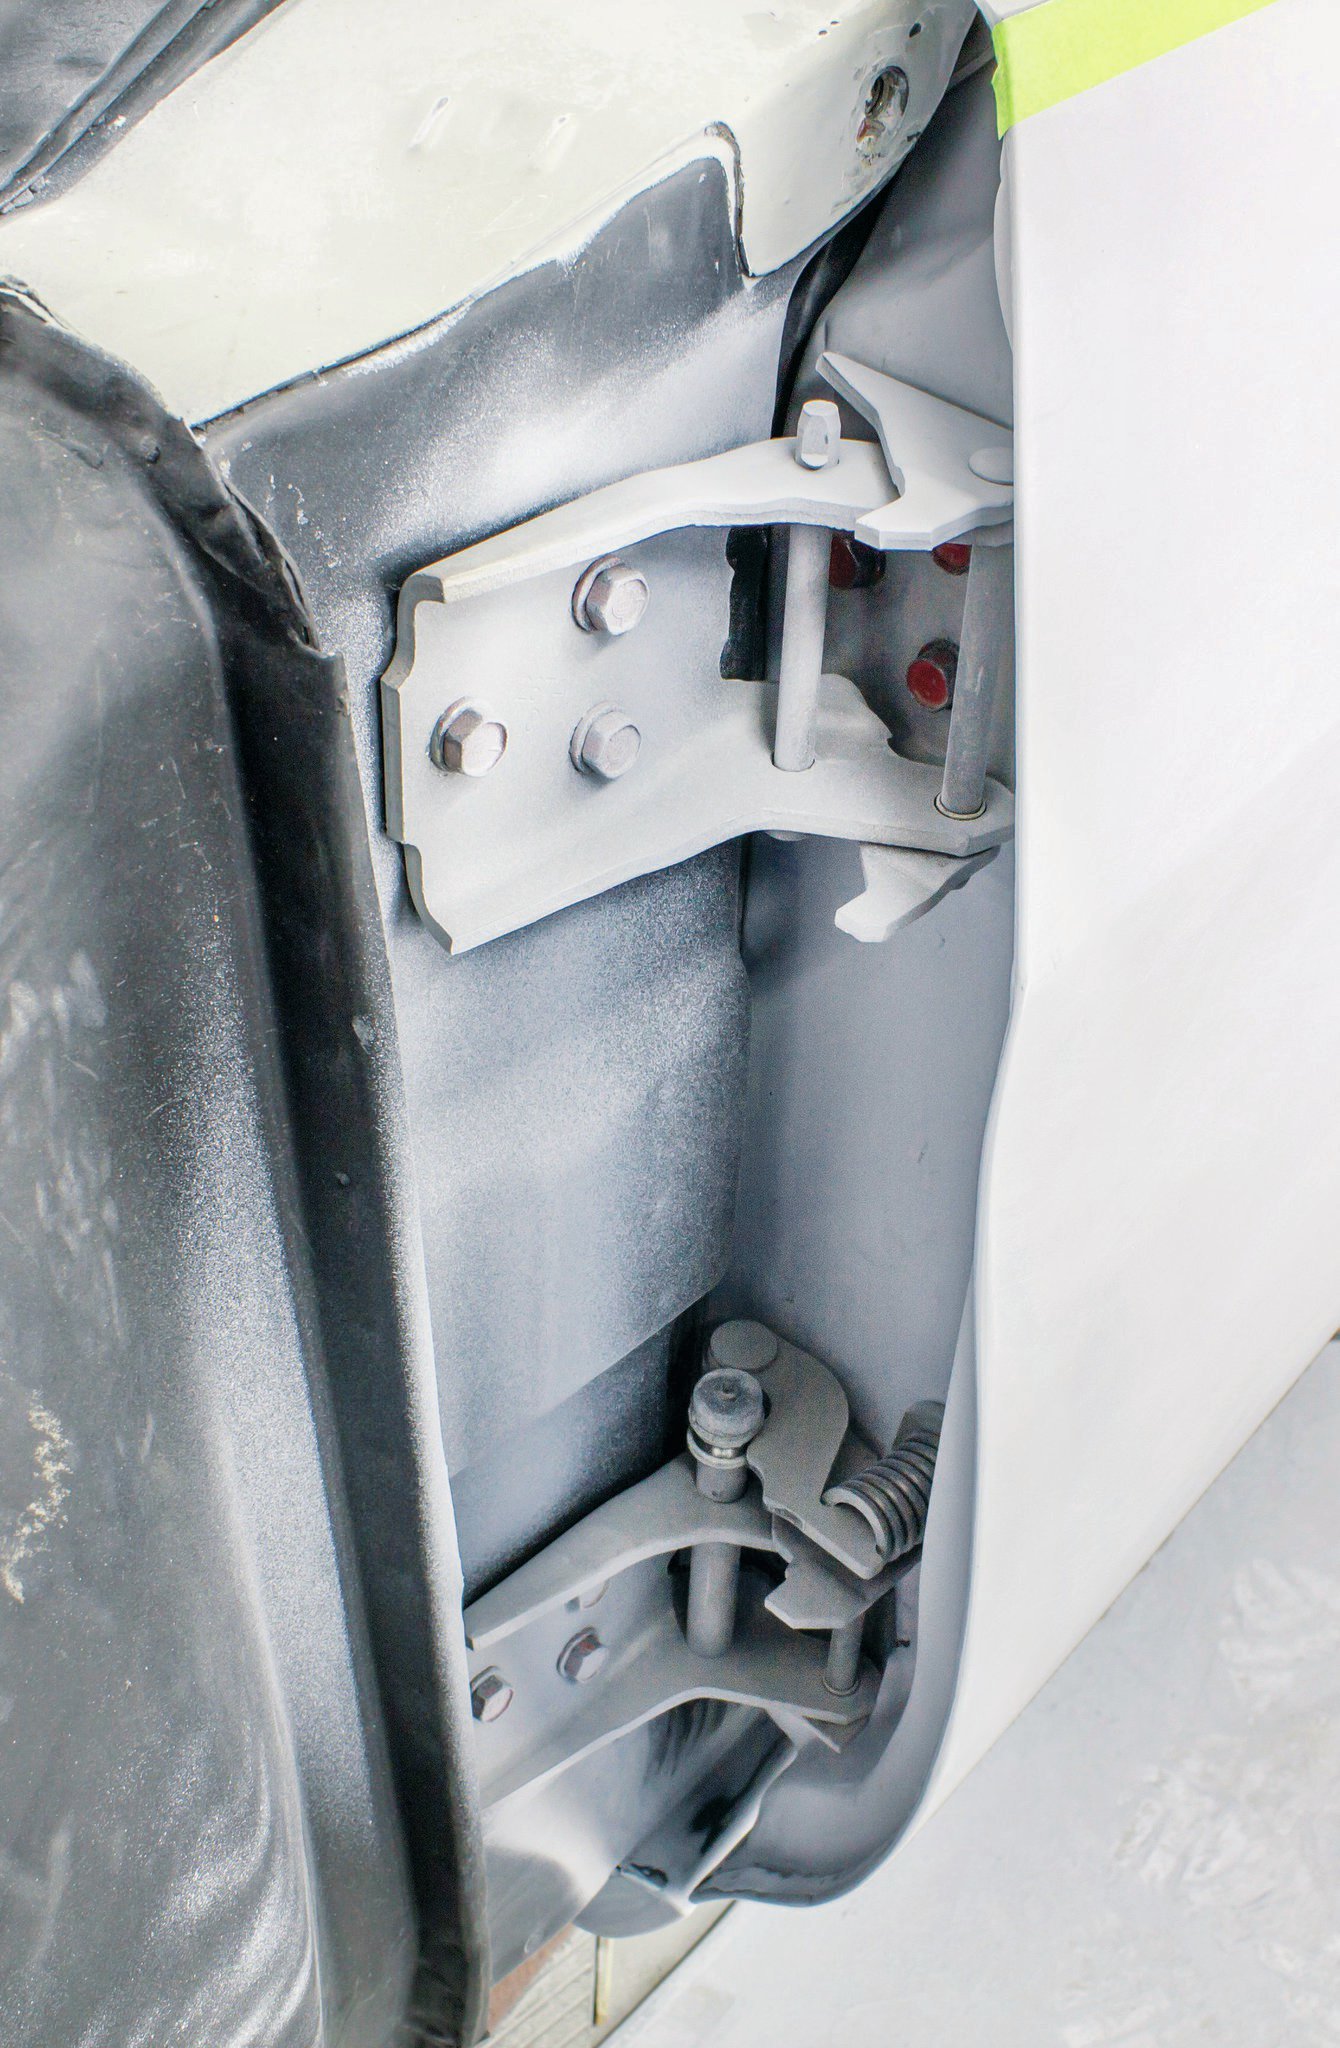
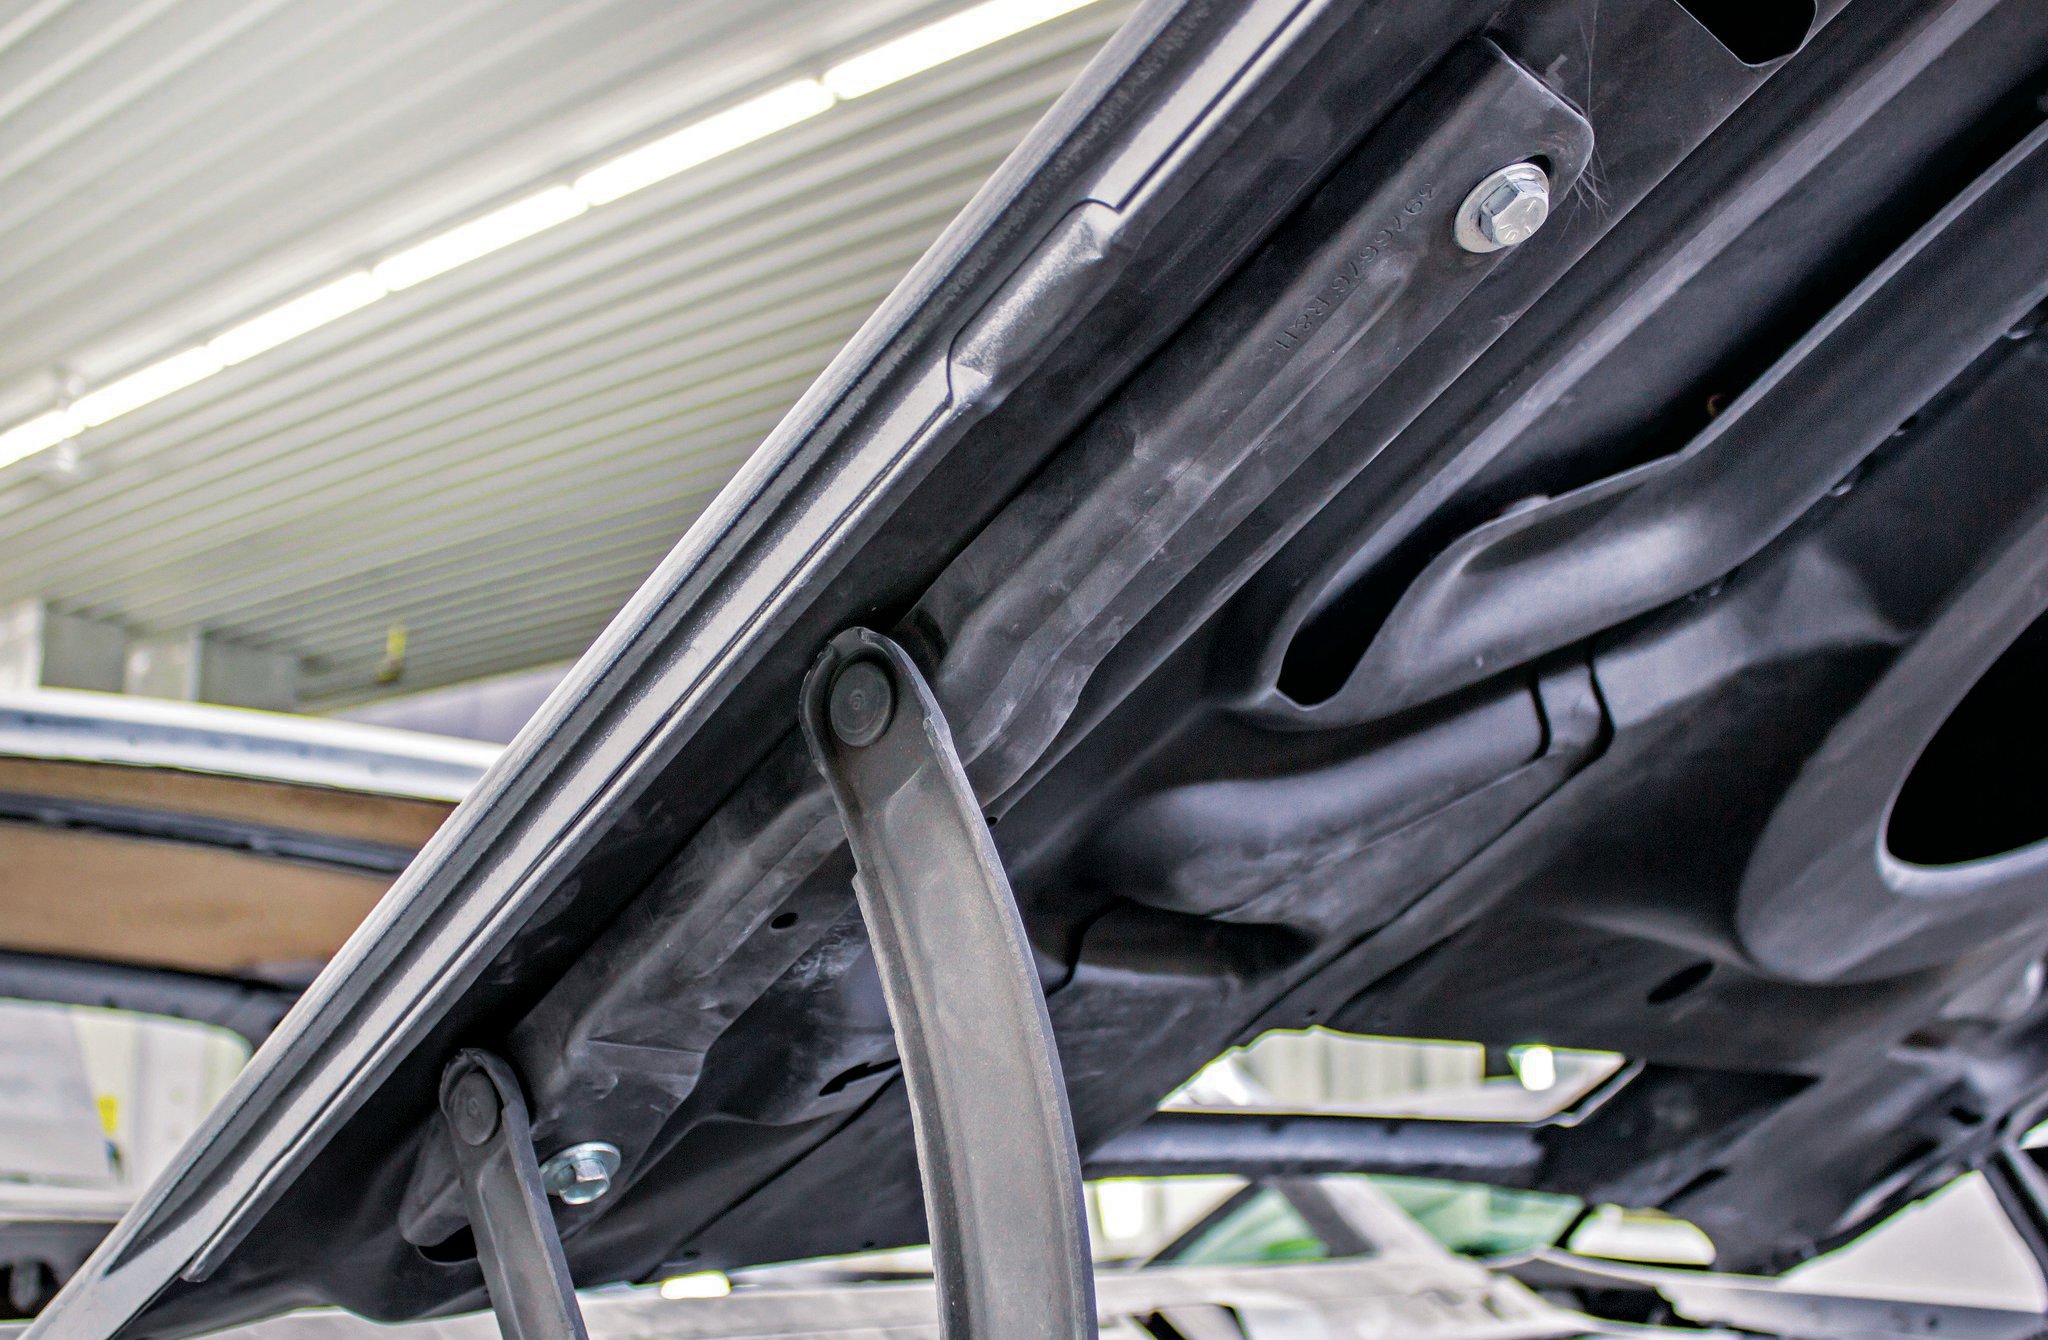
Door hinges can be a source of frustration, but they’re really not that hard. The halves that bolt to the body are for adjusting the height and the fore and aft movement. They also allow you to level the door with the rocker panel.
The door half of the hinges also have some up and down adjustment, but they should be primarily used to move the door in and out.
Of course, the top and bottom can be moved in or out separately. Again, begin by lining up with the rocker panel and then put a straightedge across the door to the quarter gap at the top, middle, and bottom.
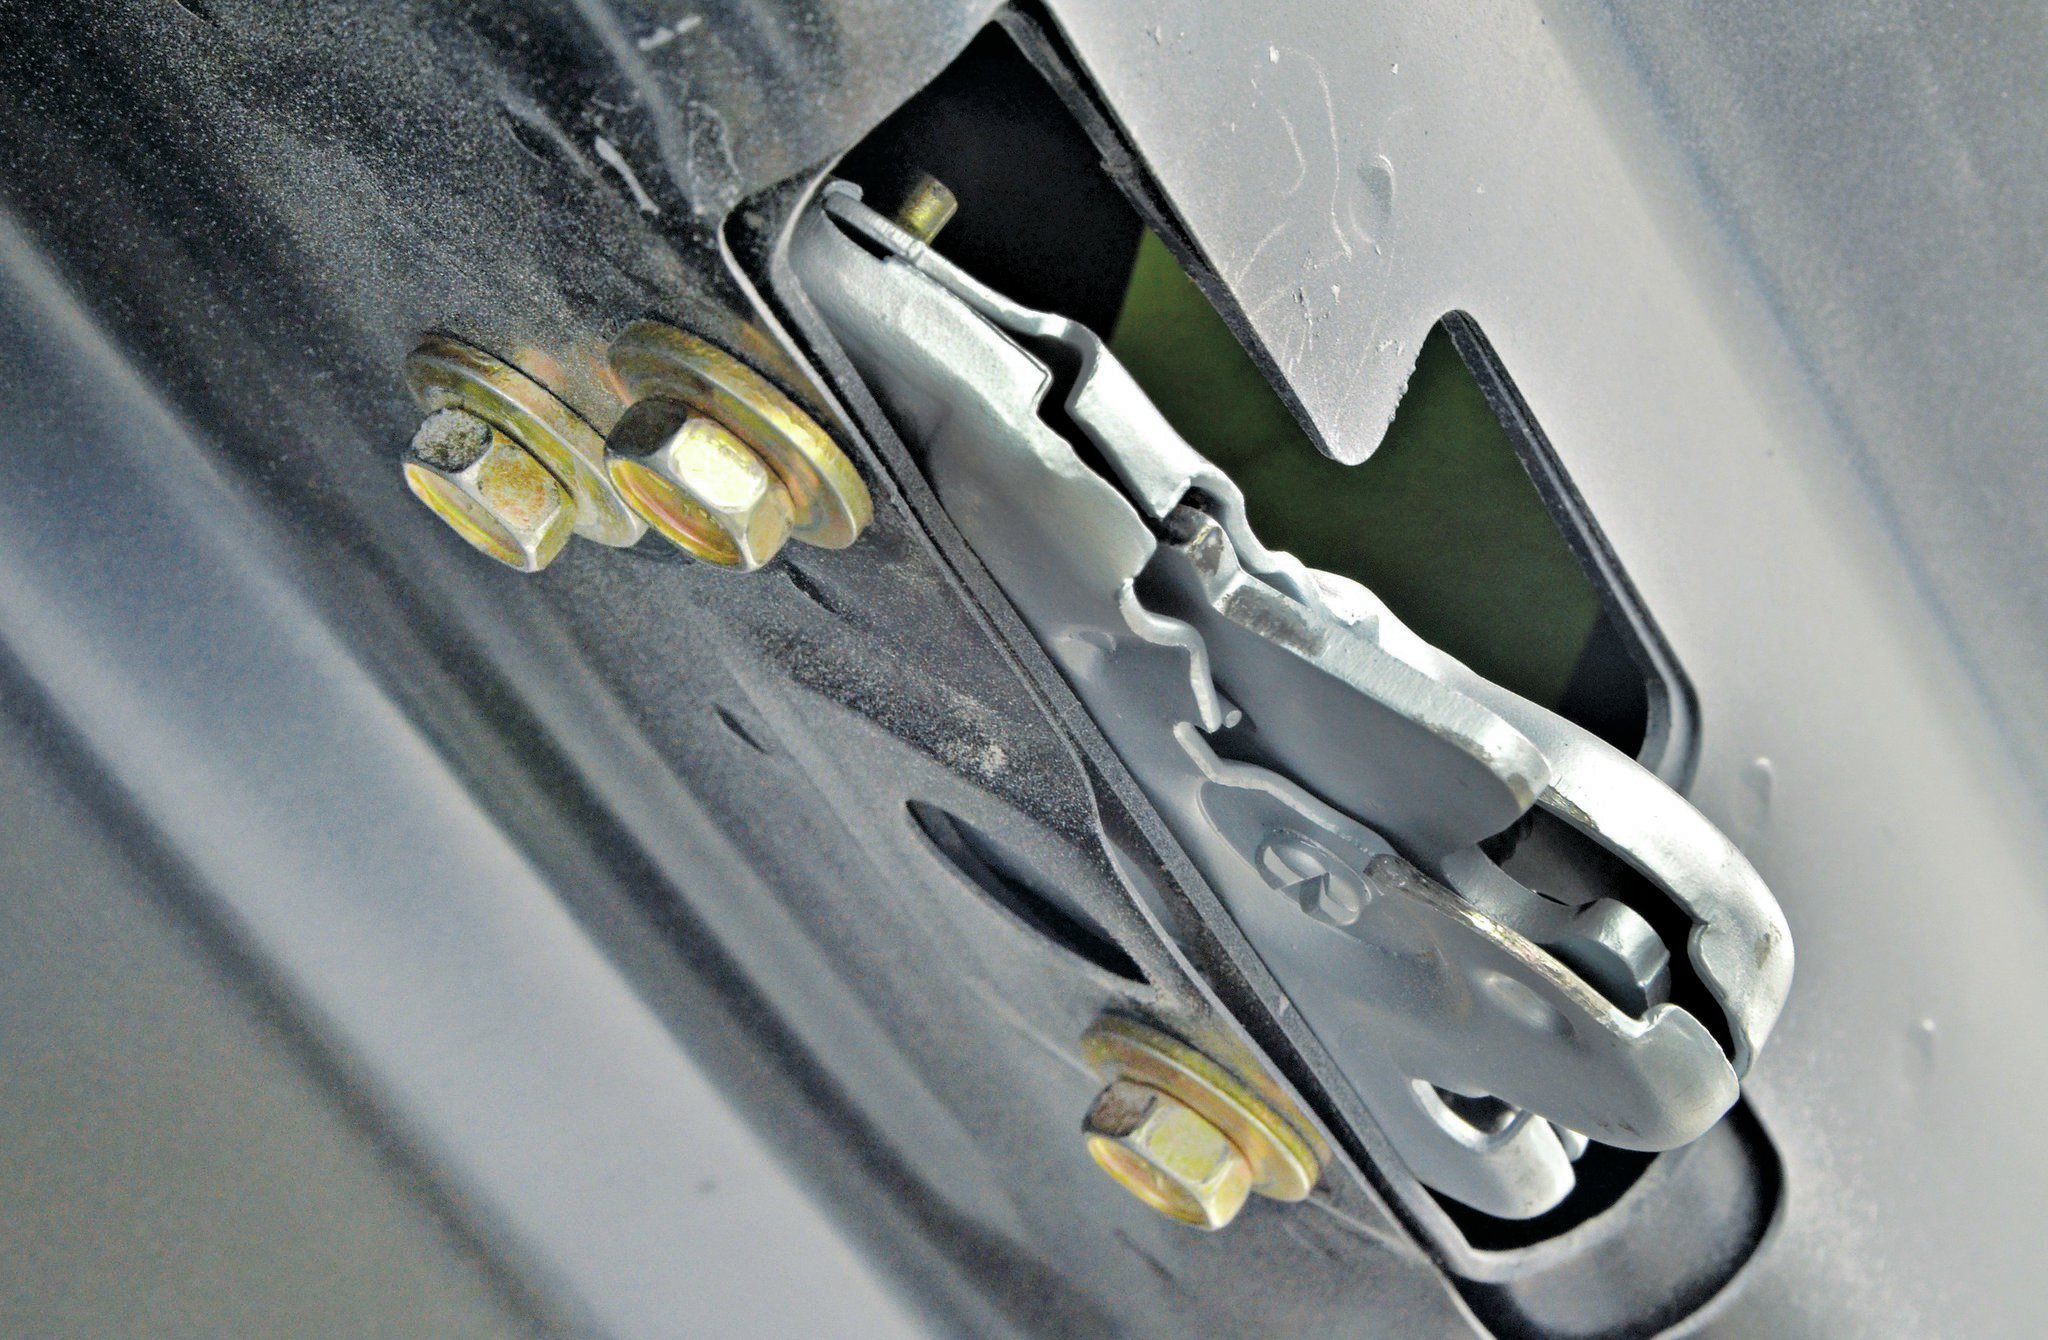
Set the door-latch pin after you have the hinges set. It will move up and down to properly align with the latch inside the door, but its primary function is to align the rear edge of the door with the leading edge of the quarter. This adjustment must be made with the weatherstrip in place.
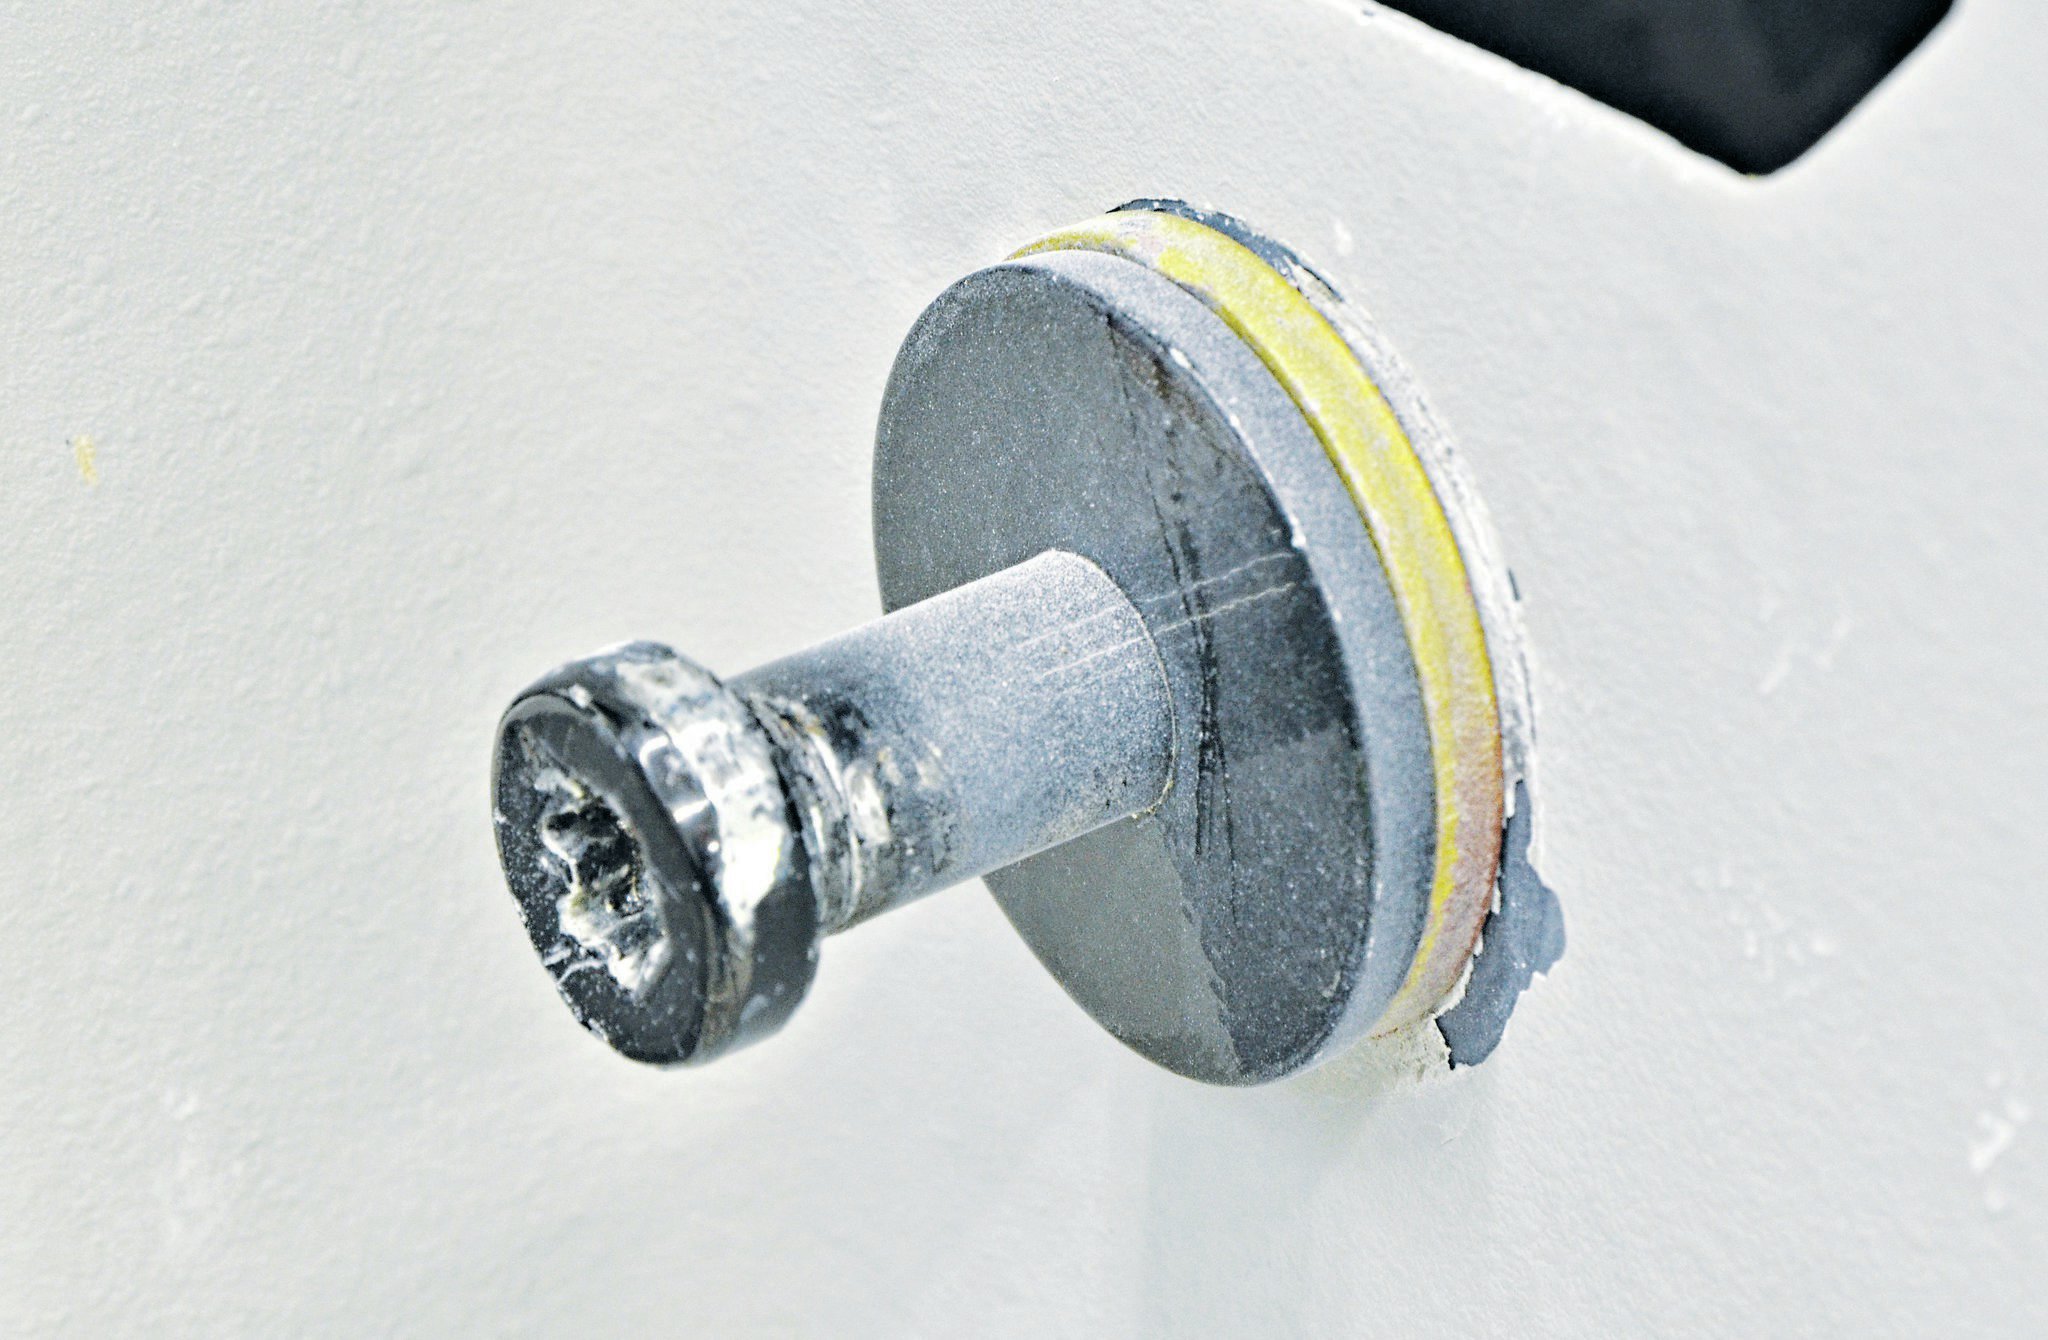
The front fenders are moved around by using various-size shims between the fender and its attachment point on the car. Keep in mind that you can’t adjust and tighten down one at a time since making an adjustment to one will often require loosening others.
By varying the number of shims under the bolt located above the top door hinge, the top of the fender can be moved in or out.
These two fender bolts allow the bottom of the fender to move in and out. Together with the one above the door hinge, these will let you line up the rear edge of the front fender with the front edge of the door and the rocker panel.
The adjustment is actually made using slots in the fender lip. The shims, in this case, simply prevent you from drawing up and bowing out the lower part of the fender.
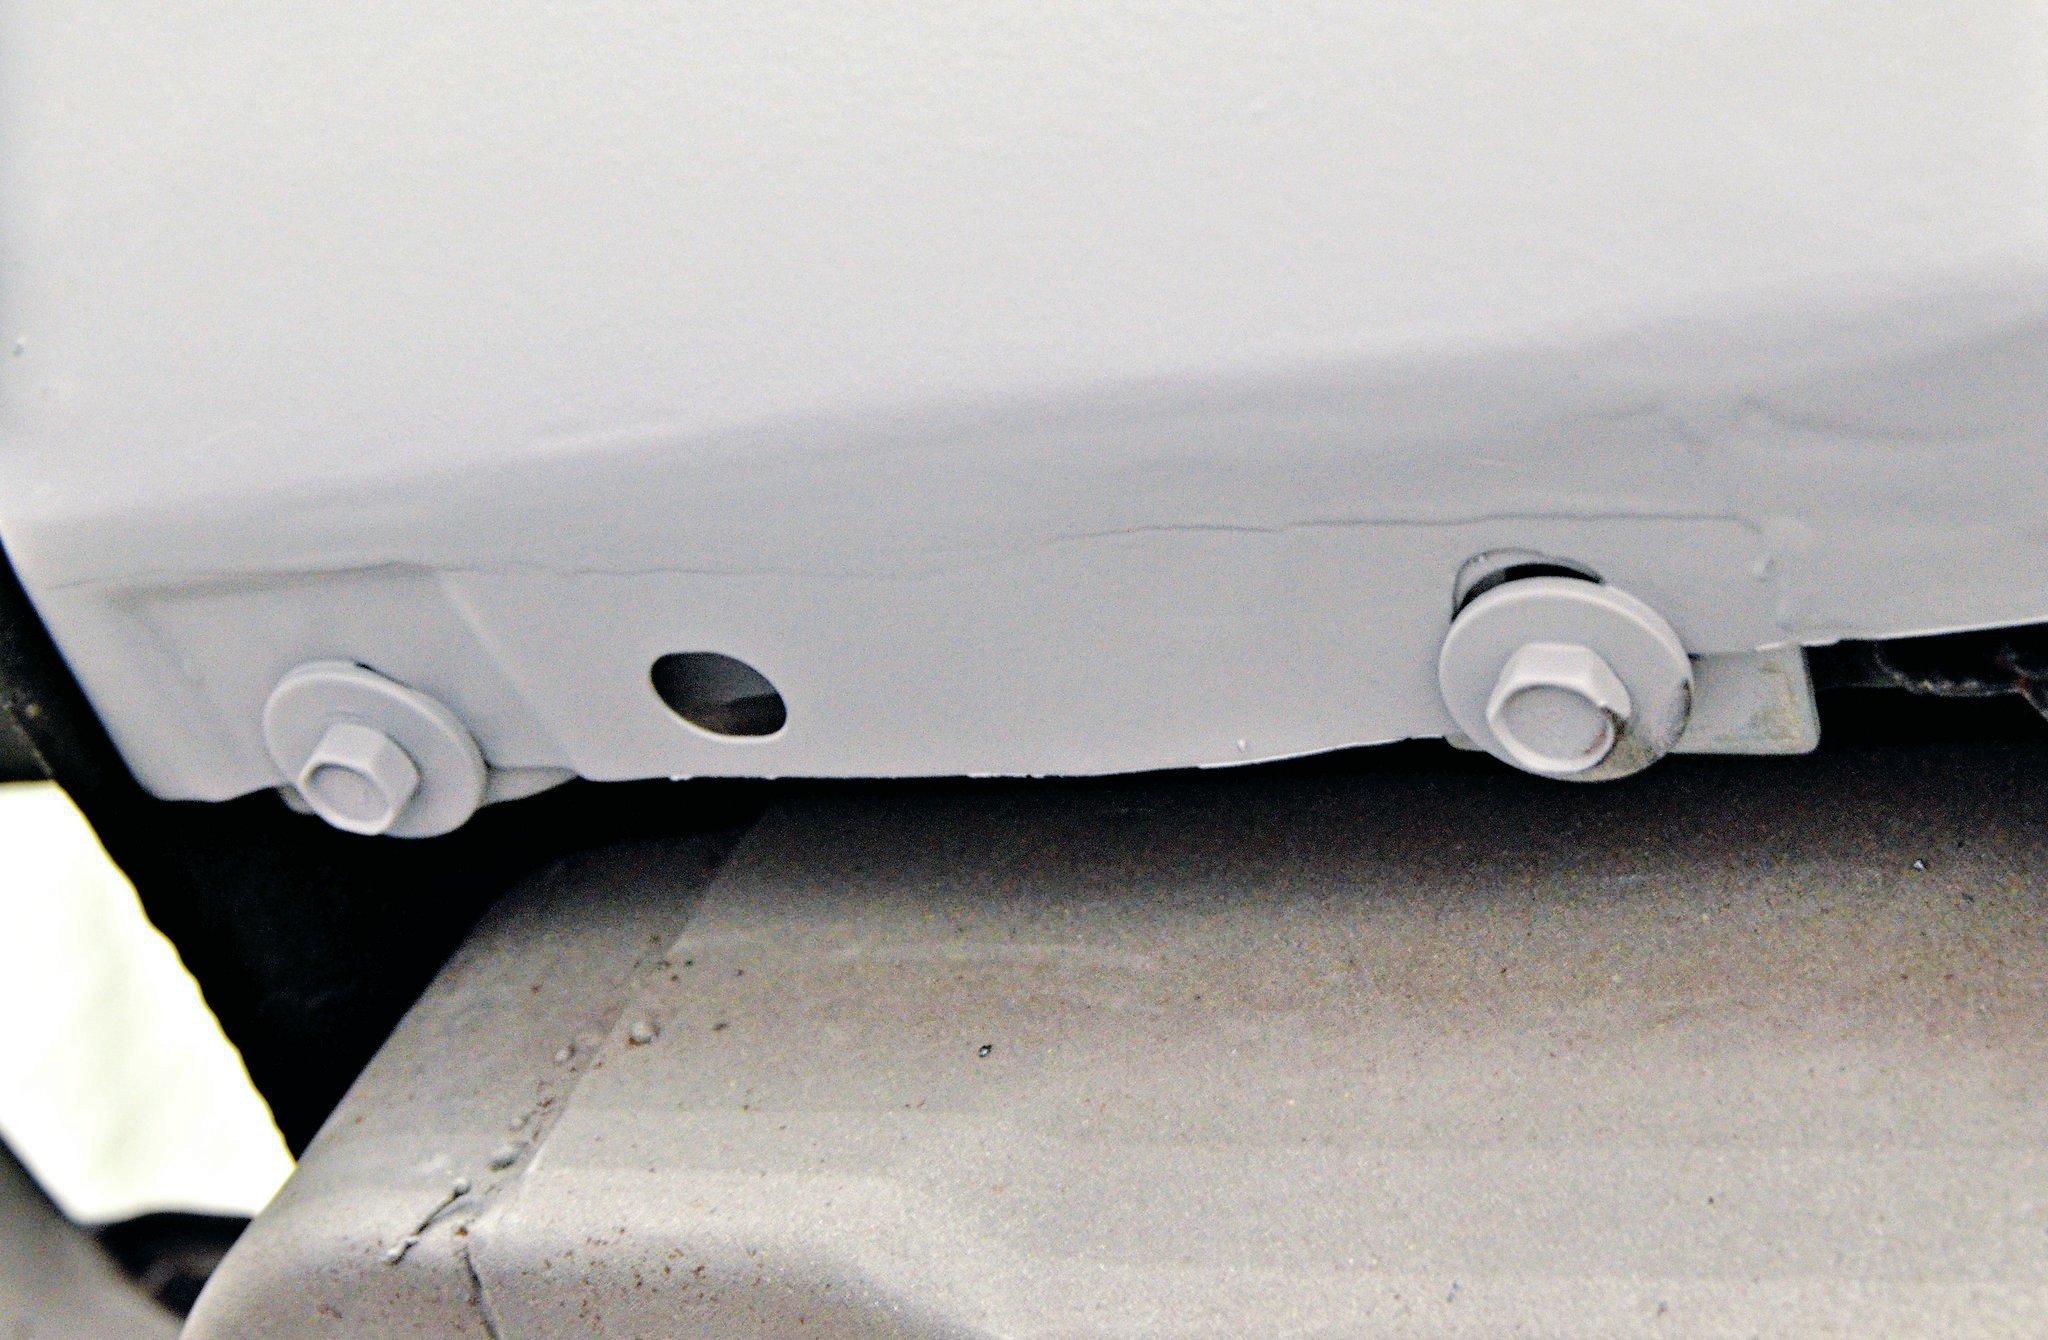
Shims under the bolt on top will raise or lower the rear of the fender, while shimming the one facing forward will move the fender fore and aft. Note the bumper in the upper left that sets the height of the hood’s rear corner.

A slot under the bolt highlighted in red allows the front of the fender to move in and out, setting the fender-to-hood gap. Shims under this one can also move it up and down. Note the bumper at the far left that controls the height of this corner of the hood.

Since the Chevelle’s body mounts on a frame, adding or removing shims under the radiator support will raise or lower either corner of the entire front clip. This can help with straightening out the fender-to-door gap.
The MCR crew doesn’t stop with just the body panels and trim, it also mocks up all of the glass.
A full quarter replacement often includes part of the rear-window opening, so mocking up the back window can be critical. Even the door glass gets installed to be absolutely sure that it will function and fit correctly. Of course, this means the weatherstripping must be pre-fitted up too. Balow has found that the load from compressed weatherstripping can slightly deform a panel like a trunk lid just enough to affect the final block-sanding they do across the panel gaps.
The panel alignment process demonstrated
We’re going to show you the process for a 1970 Chevrolet Chevelle SS that MCR recently had in the shop. Other makes and models will differ somewhat in procedure, but the goal is the same: everything fitting together the way it was originally meant to.
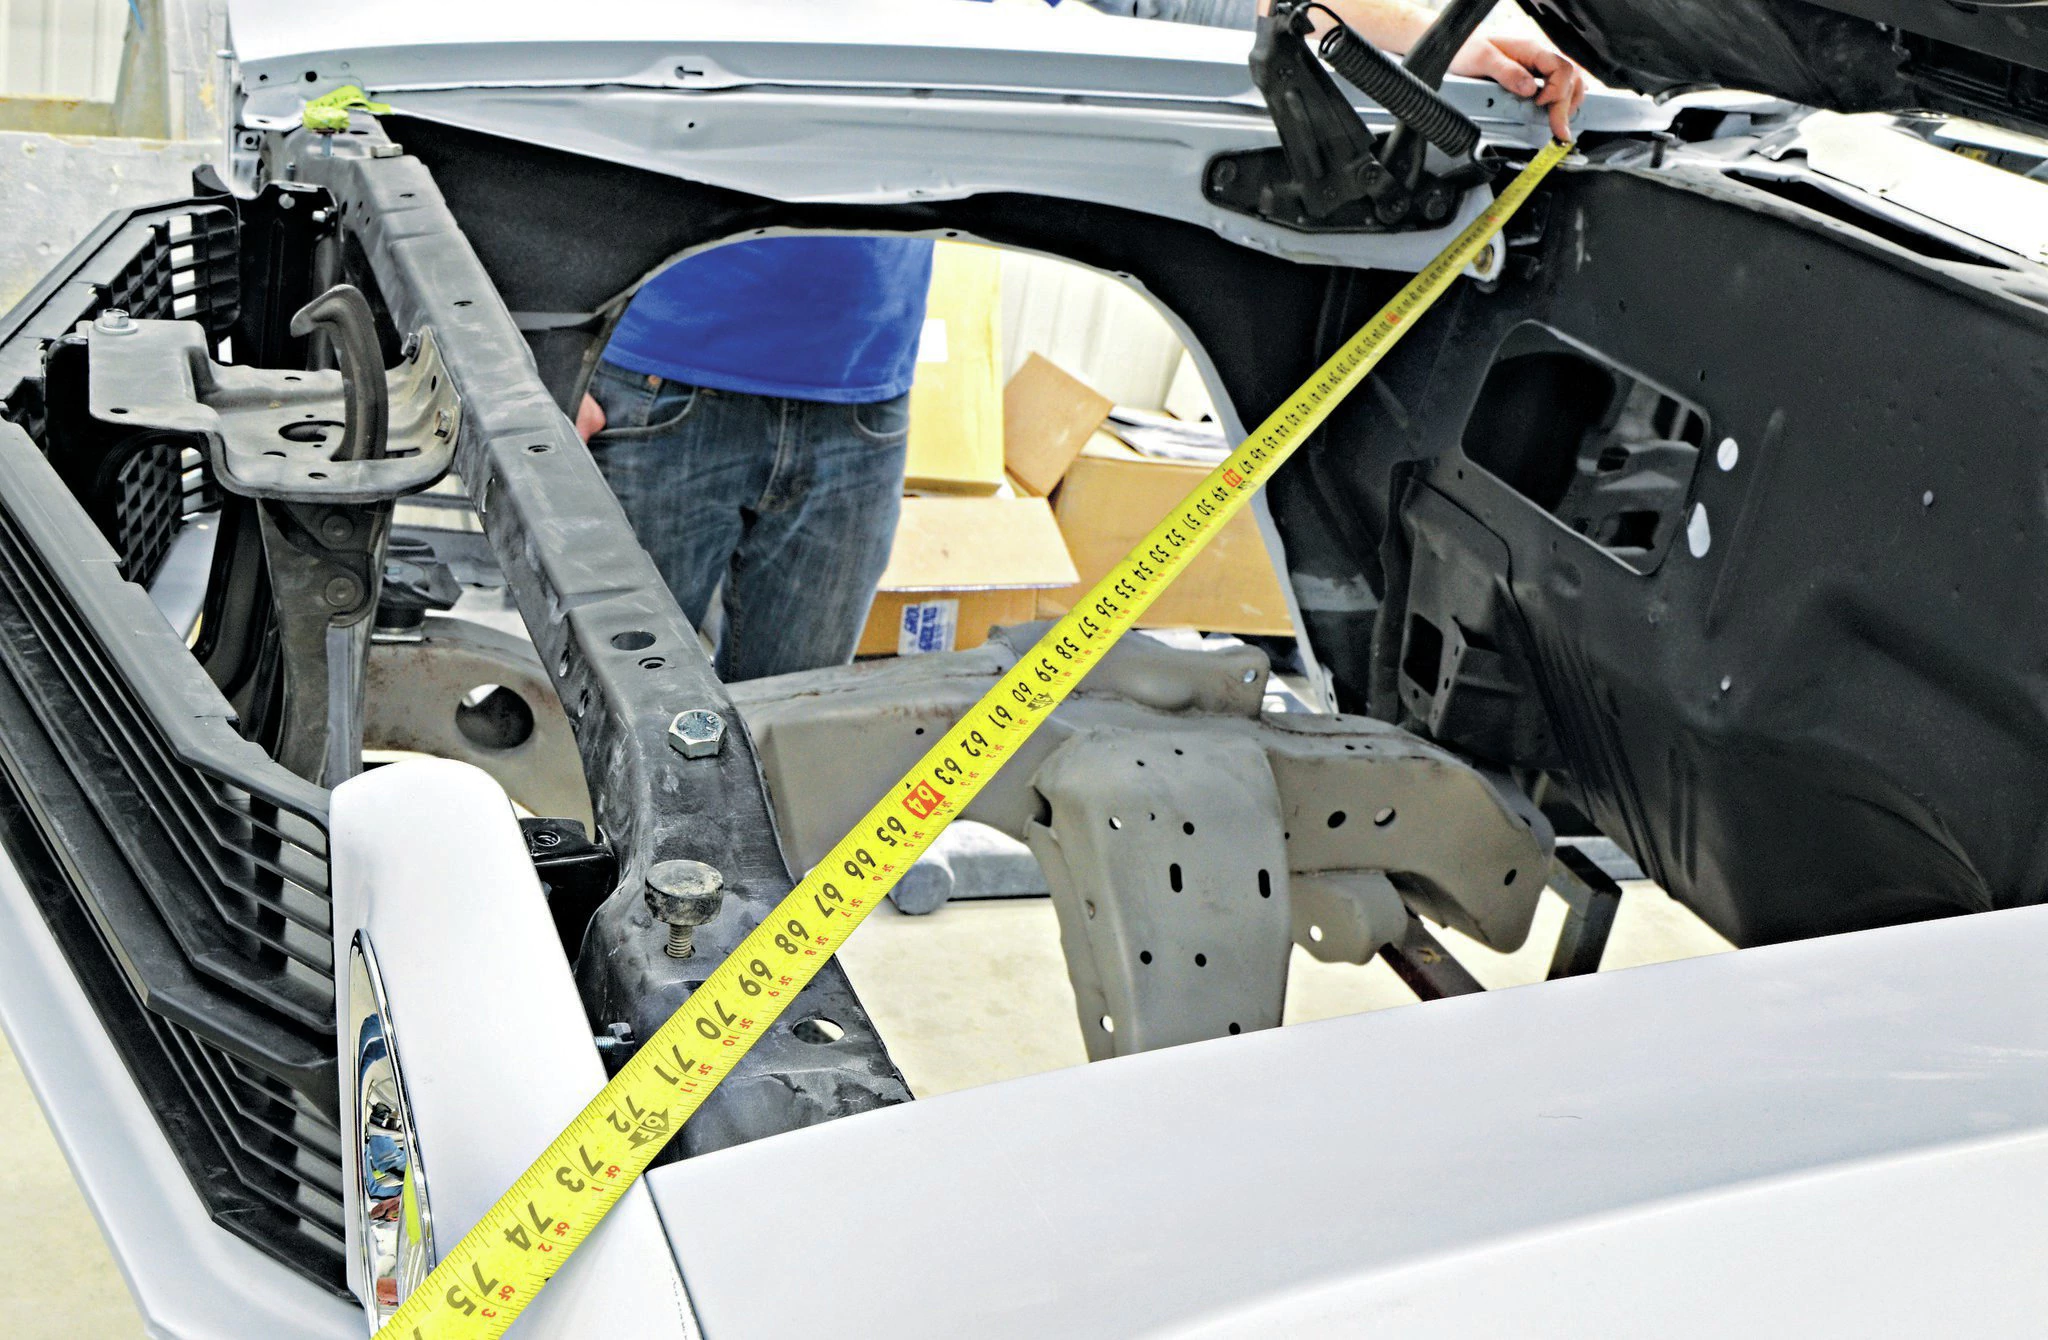
Measuring the front clip from corner to corner will tell you if the clip is raked to one side or the other. Loosening the radiator-support mounts will allow you to slide the whole clip side to side. This also helps even out hood-to-fender gaps.
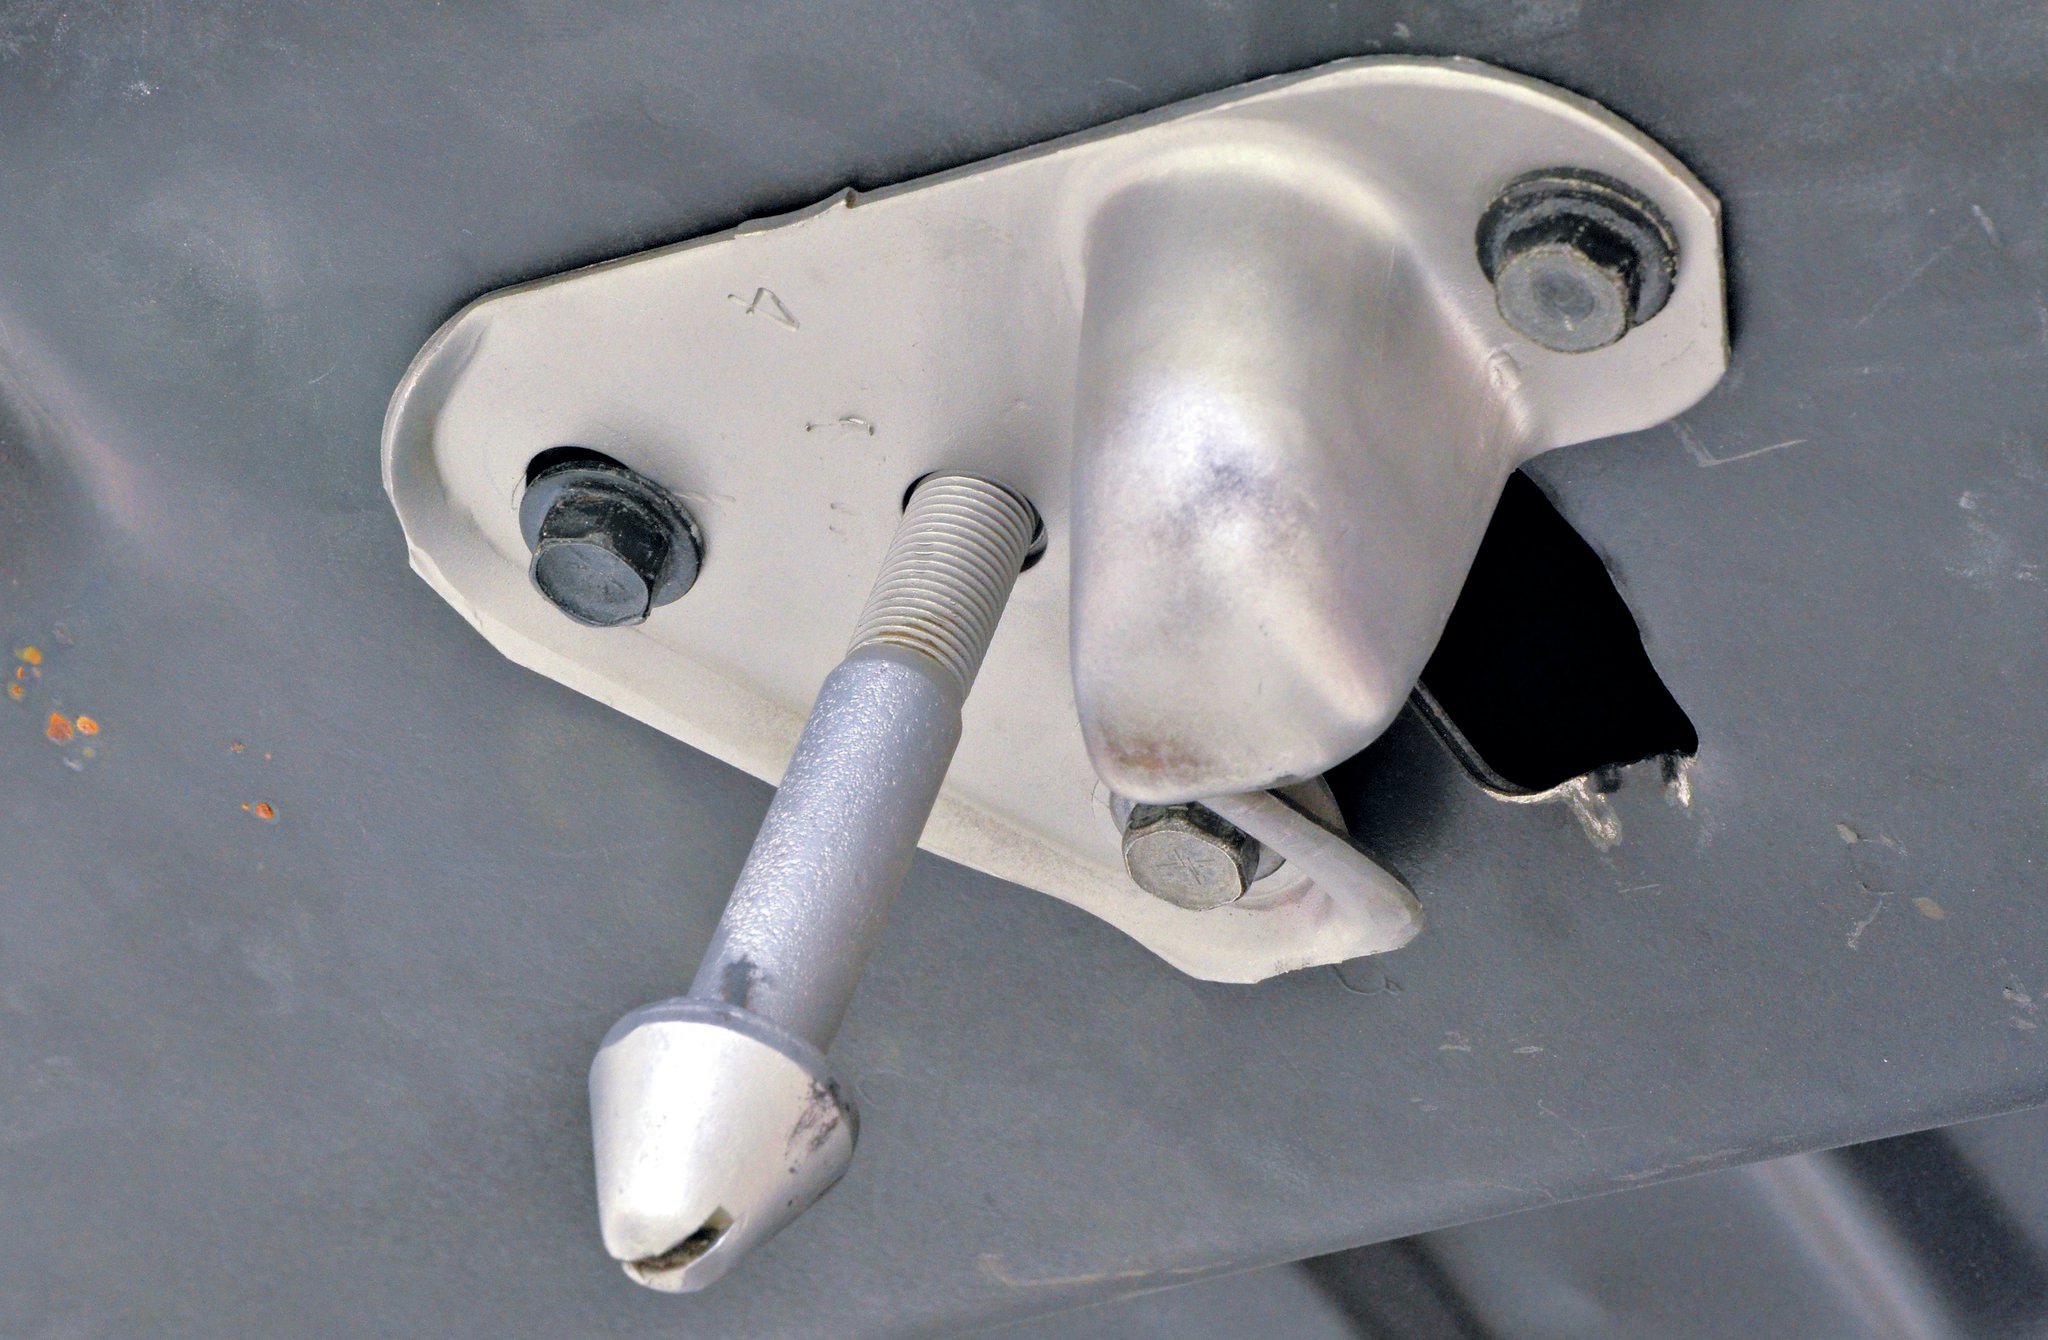
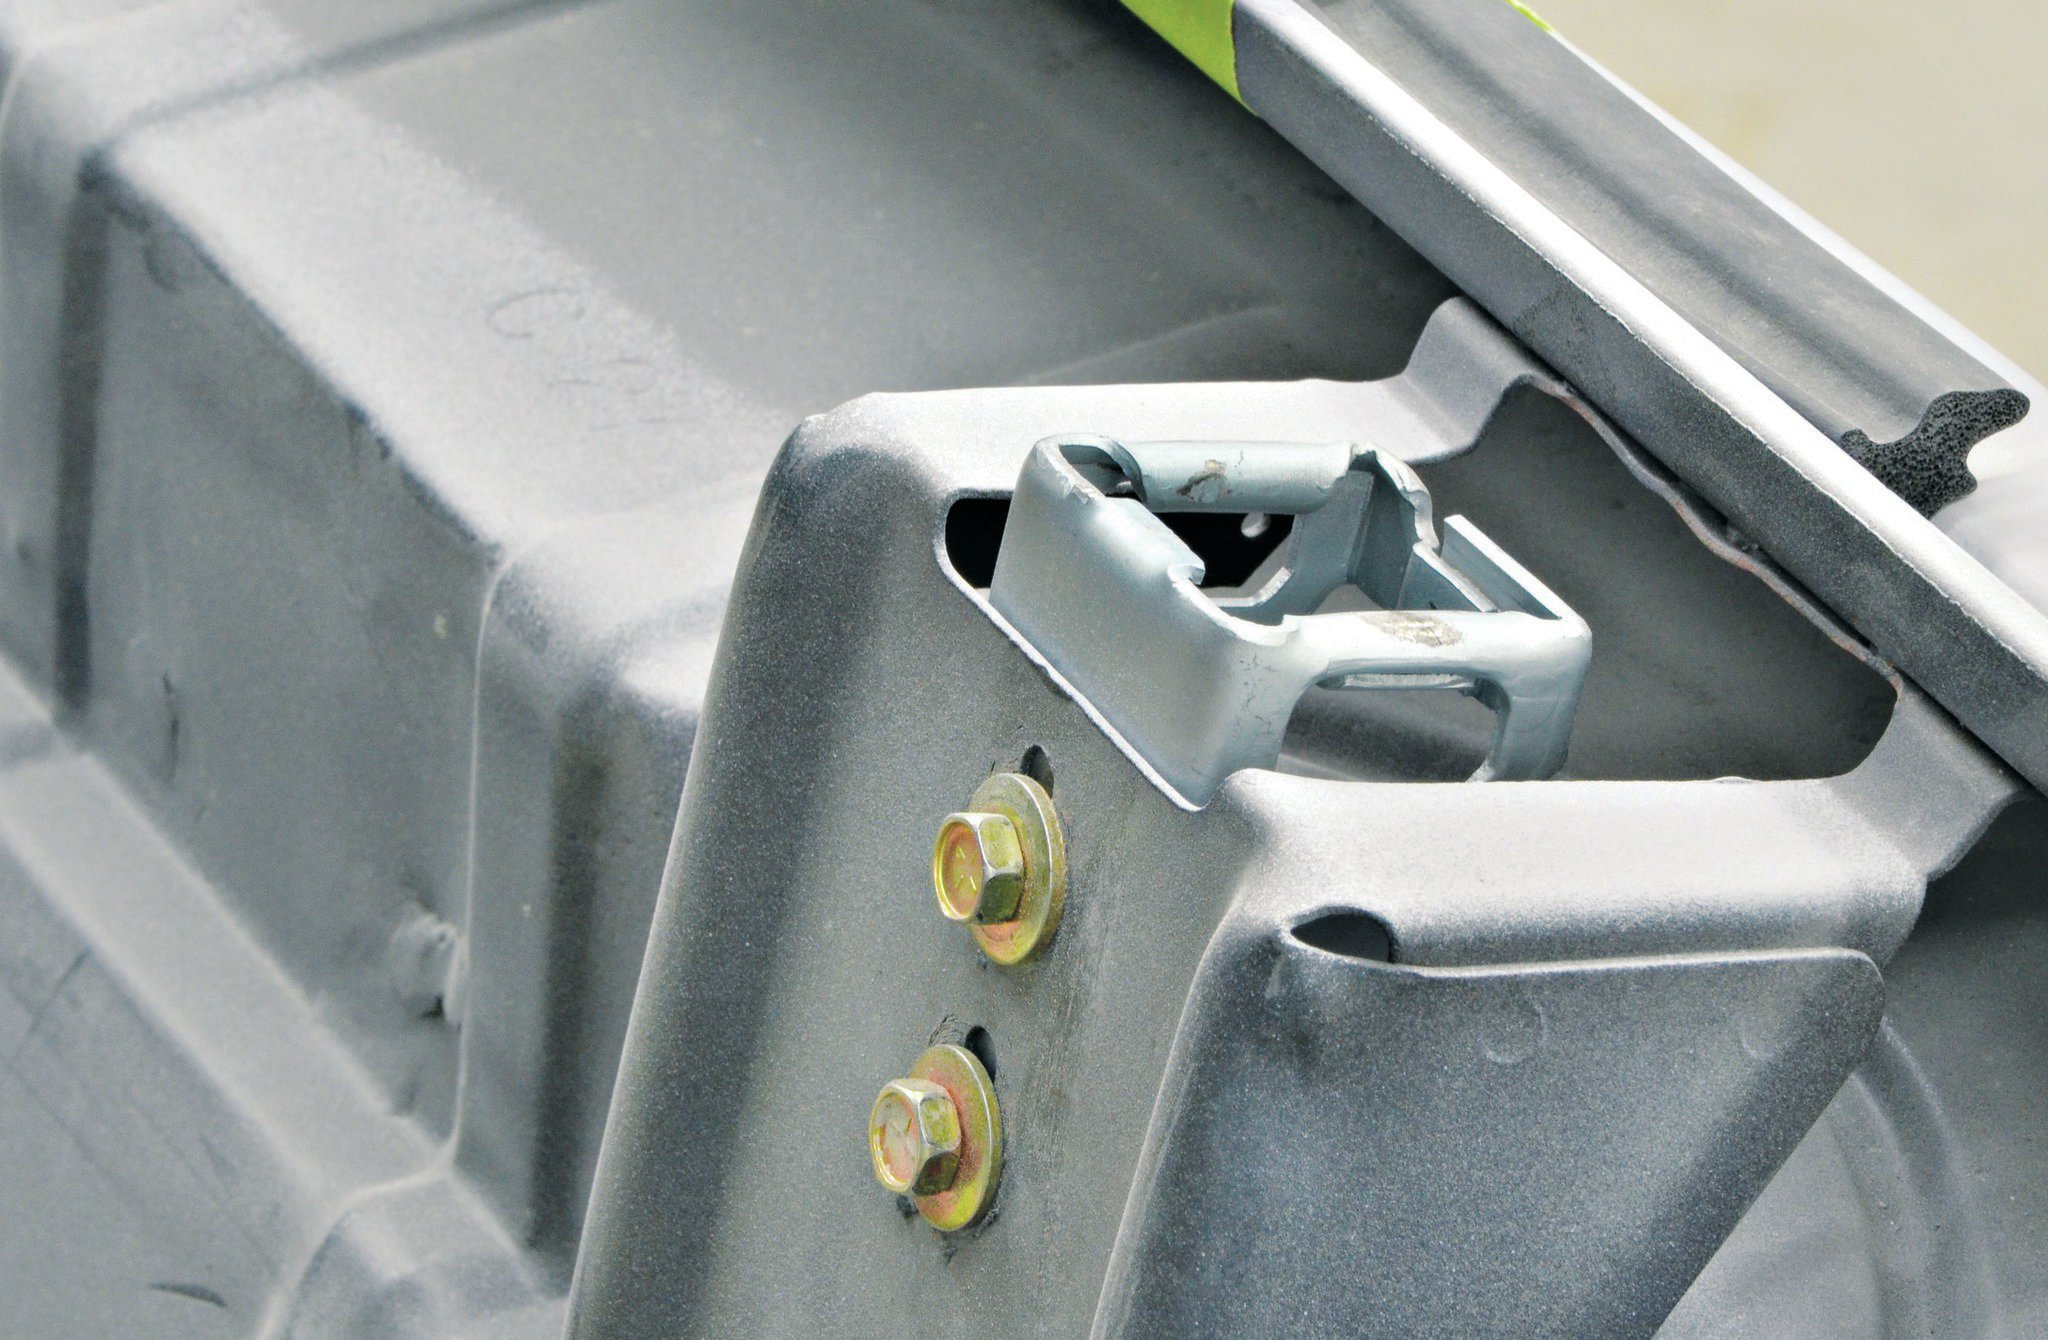
The hood-latch pin can be screwed up and down, and along with an adjustable bumper on either end of the core support, can set the front hood’s height.
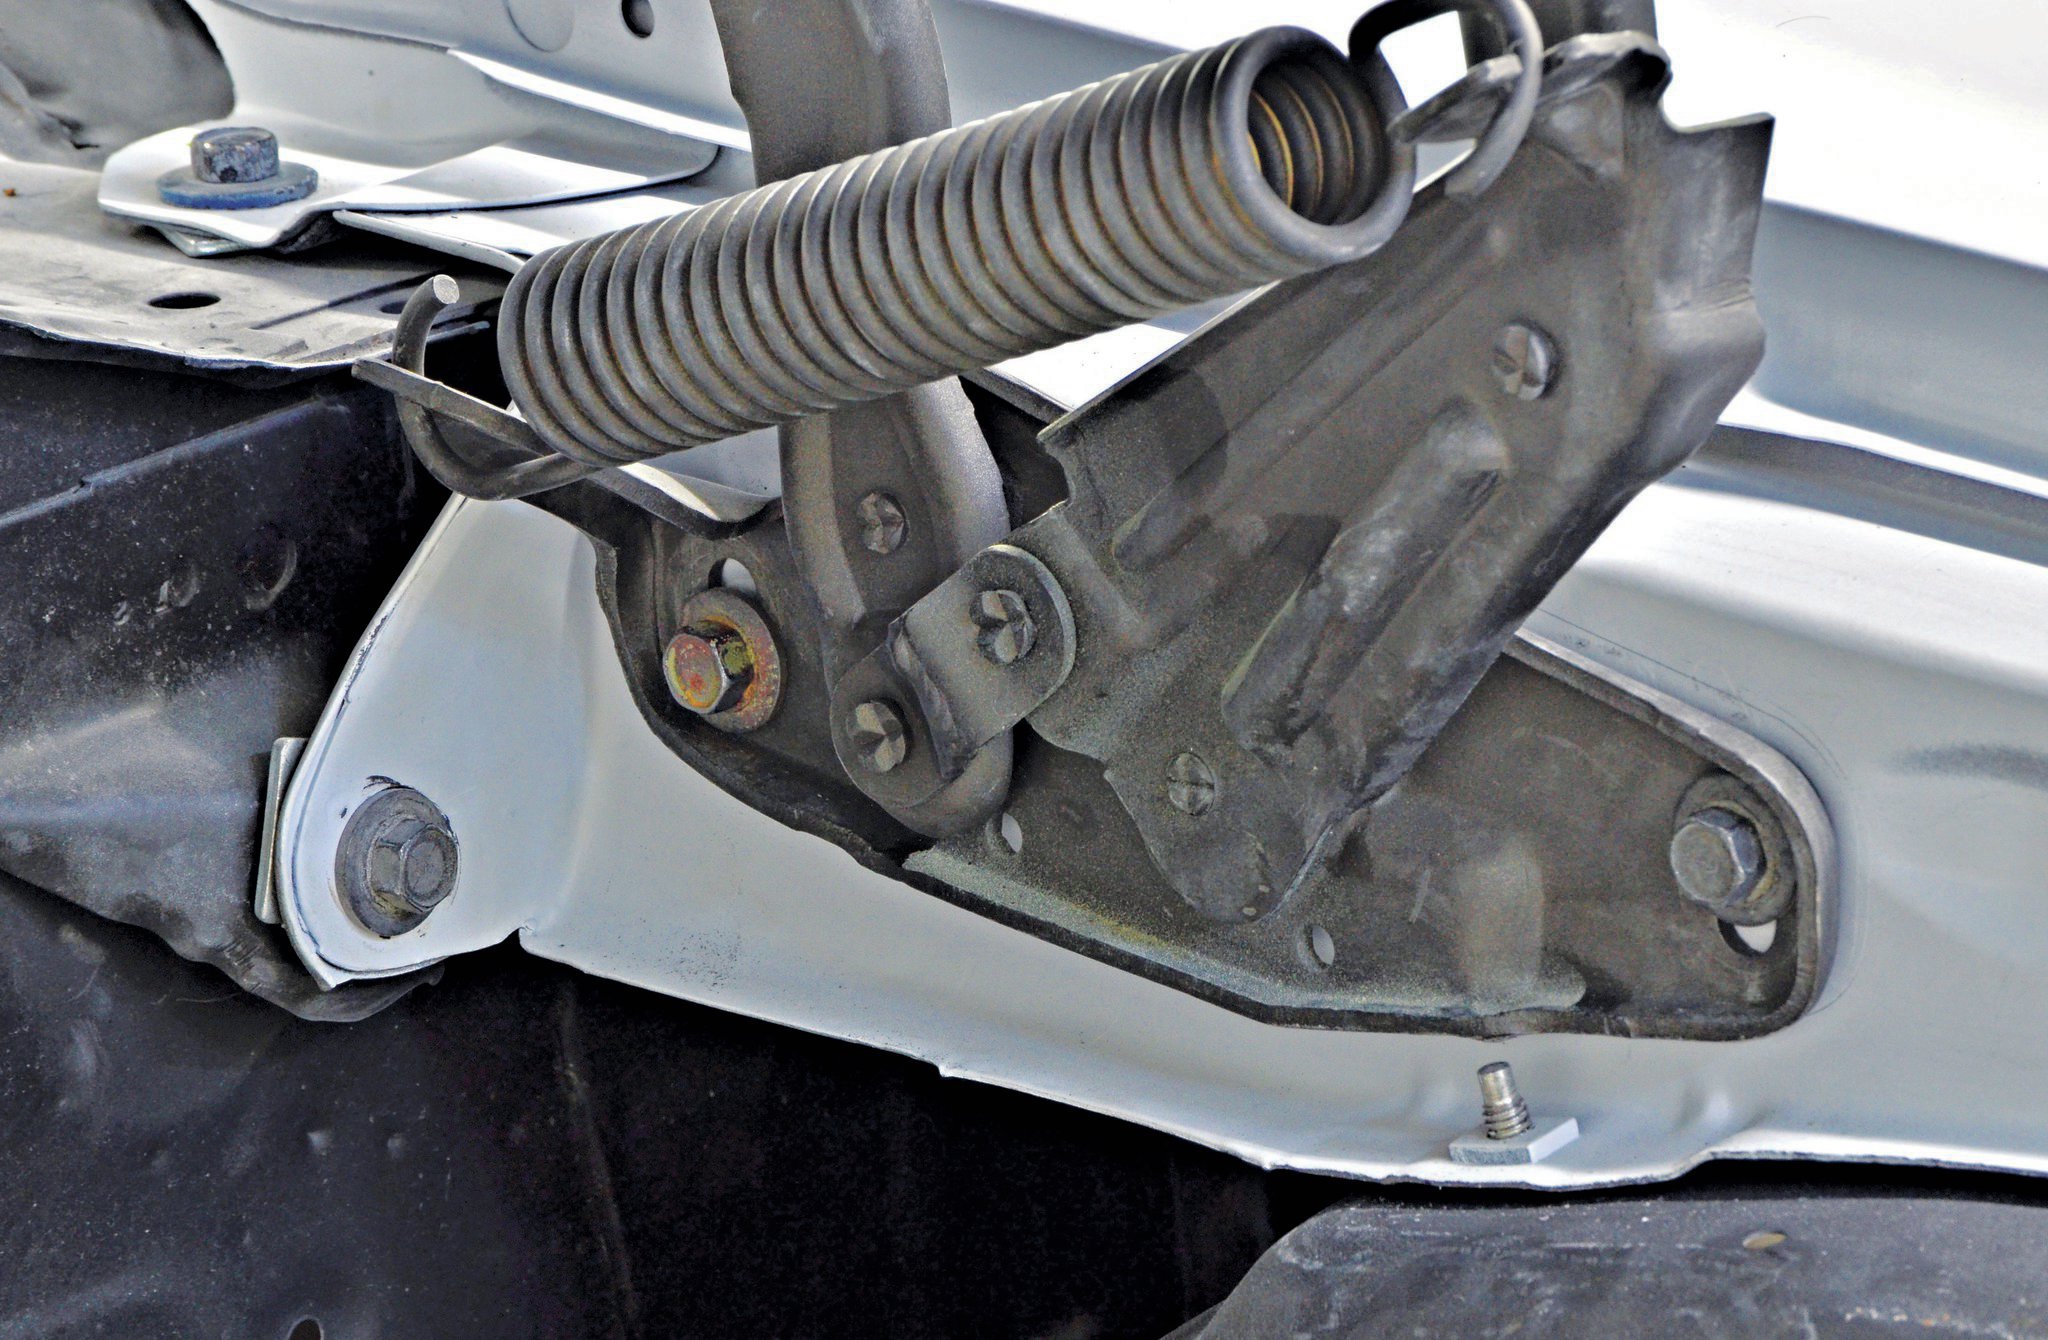
Rotating the hood hinge on the inner fender effectively raises or lowers the back of the hood when closed.
The hood can only be moved forward or backward on its hinges. For side-to-side adjustments, you’ll need to tweak the hinges themselves slightly.
The trunklid adjusts similarly to the hood. Just be sure to adjust the latch with the gasket set in place because that can load the lid enough to slightly alter its shape. MCR prefers to do its final block-sanding across all panel gaps for the most uniform look possible.
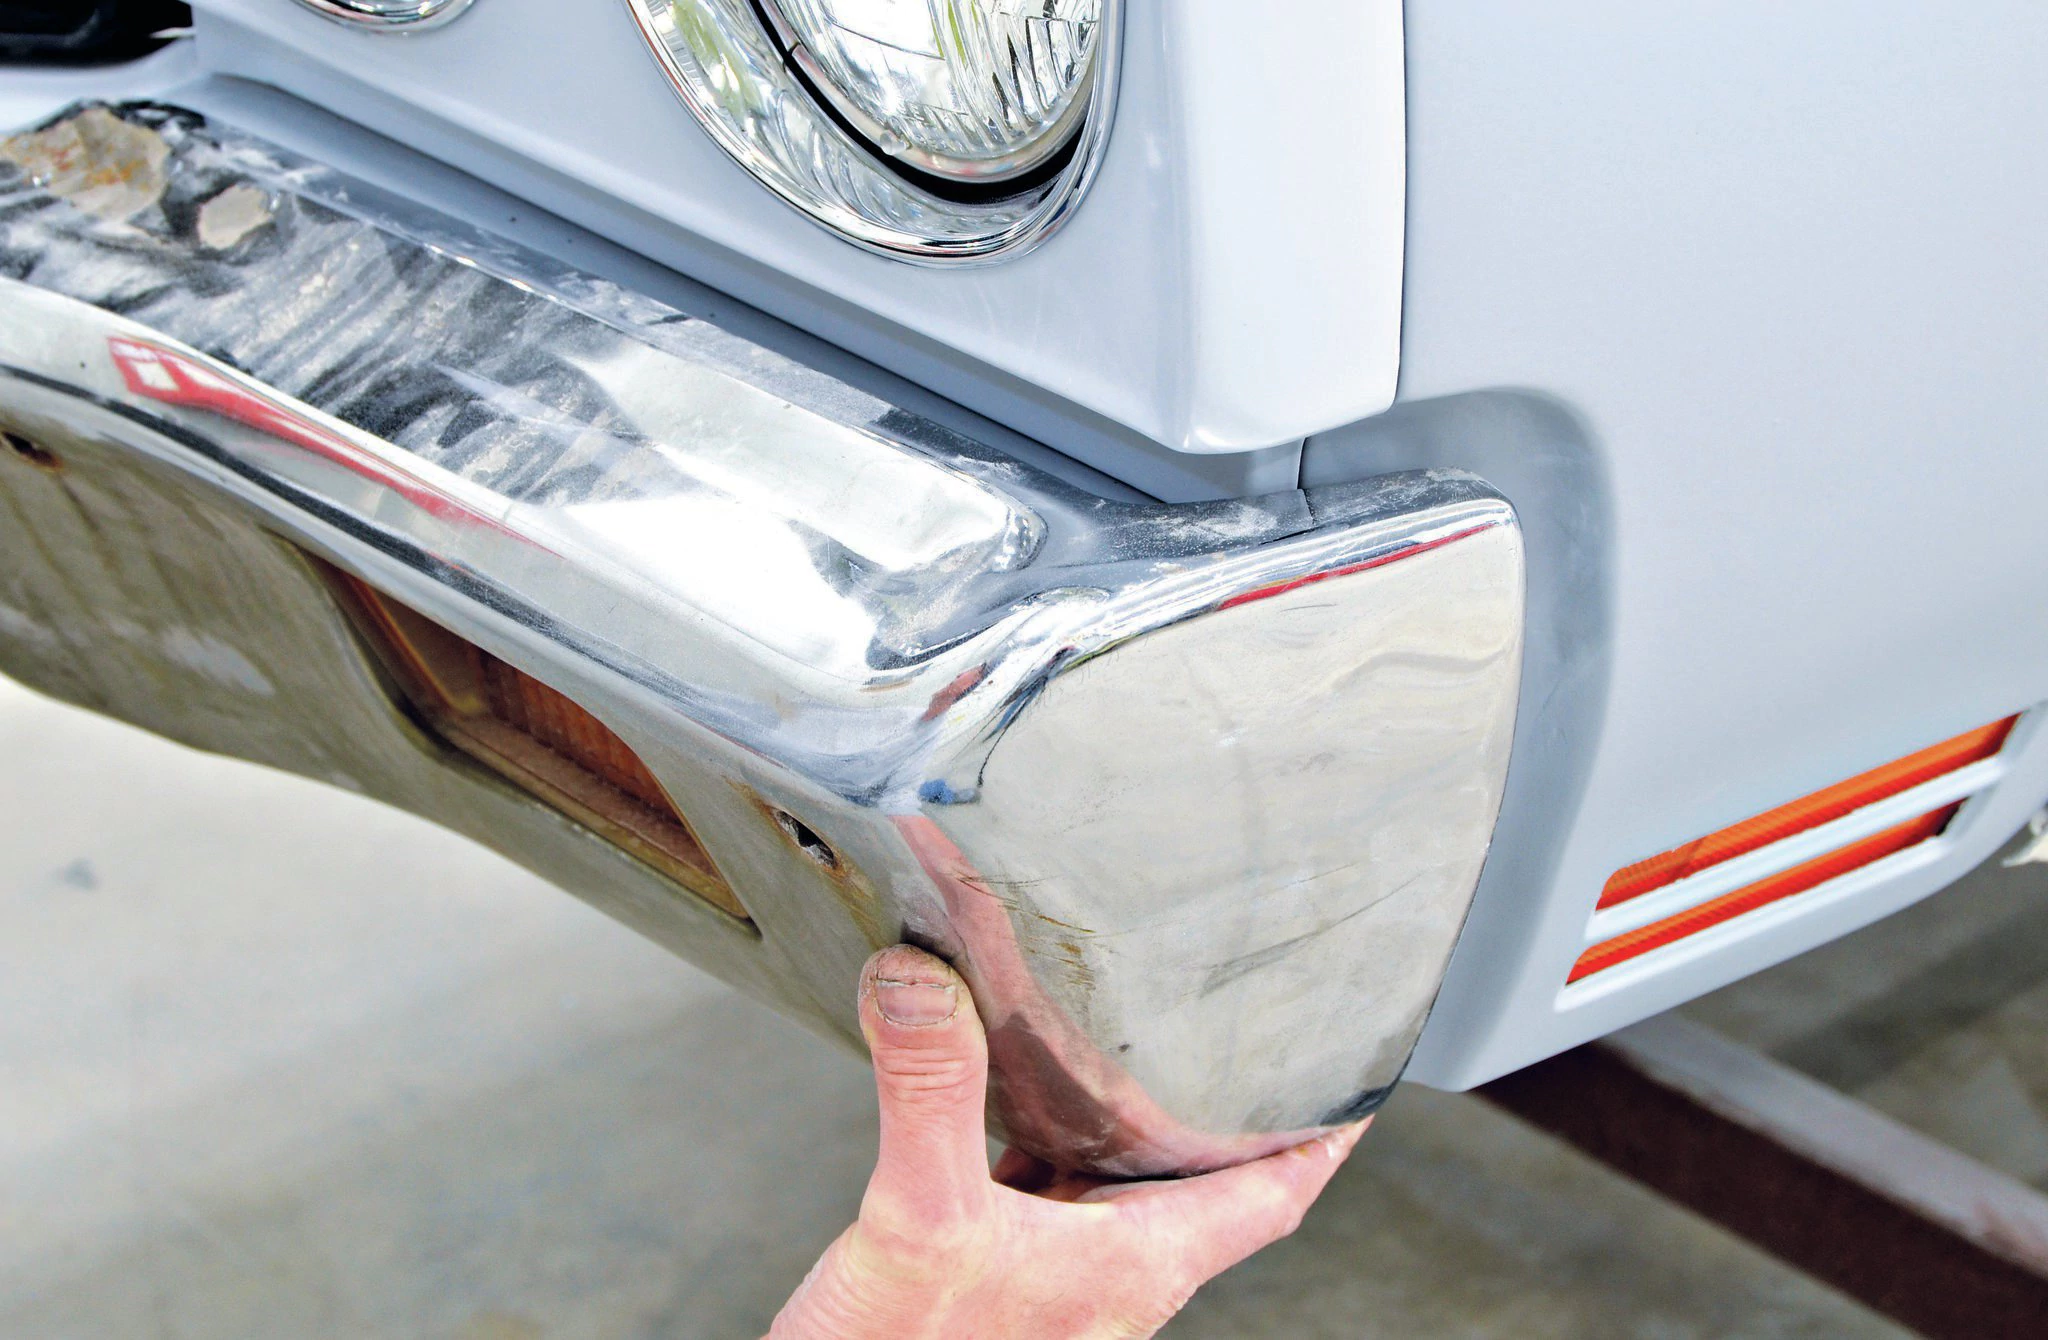
Install the bumpers after you have the sheetmetal fitted. There is generally plenty of play in the bumper brackets to get them lined up. If the bumpers need to be re-chromed, be sure they’re not bent or twisted.
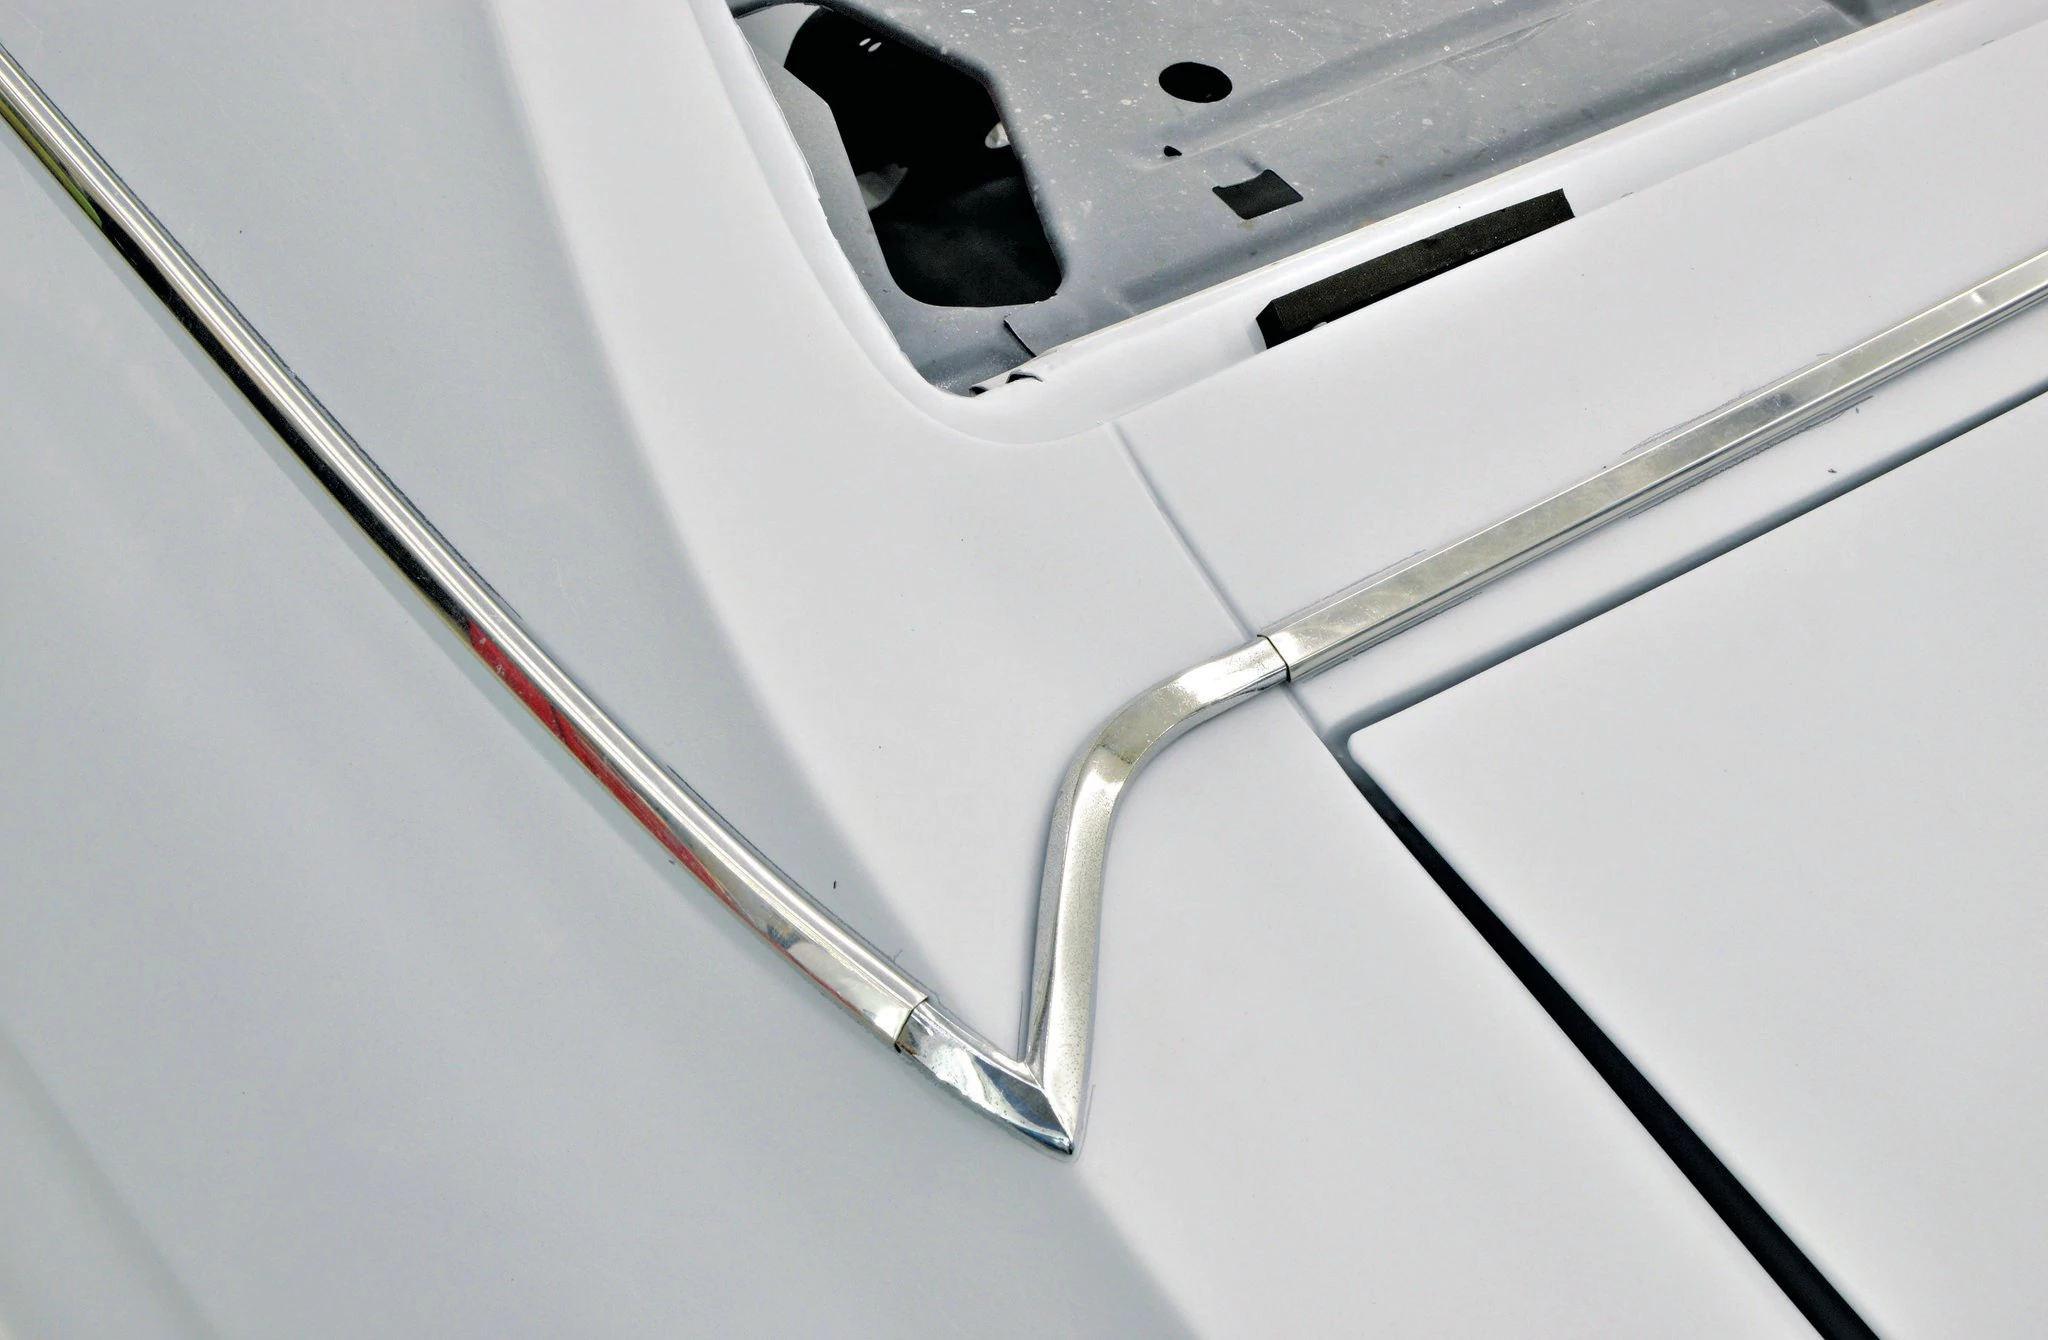
Install all of the chrome parts on the body to make sure the parts are good and that there’s nothing in your bodywork that prevents them from laying flat against the panel.
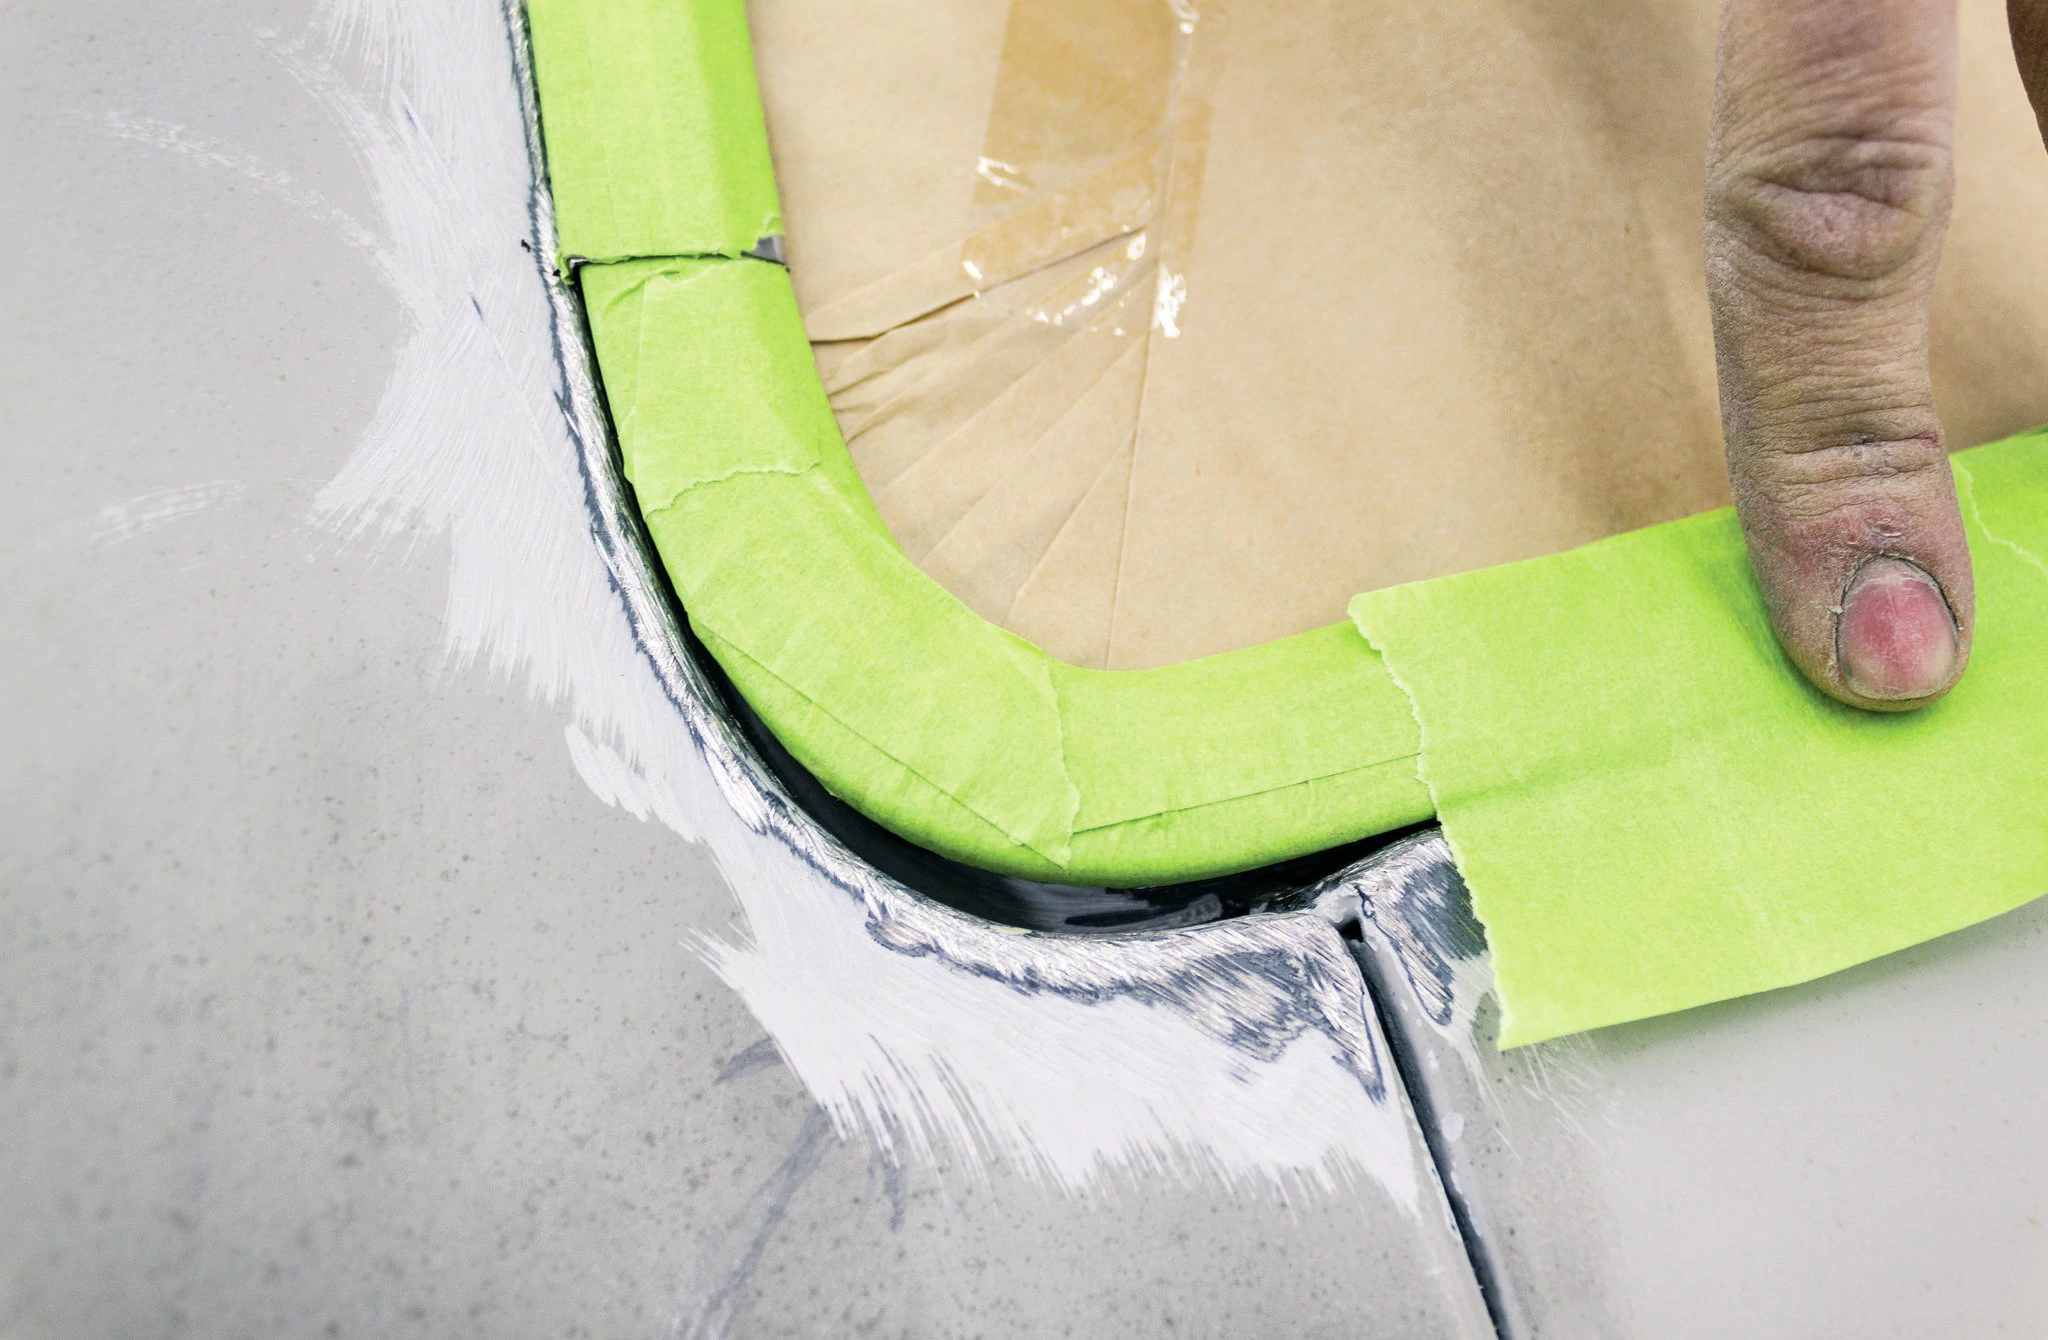
Setting the rear-window trim in place clearly shows that this previously installed quarter-panel is not positioned correctly. Since moving the quarter is impractical at this point, MCR will have to fix this with some cutting-wheel and welding techniques. It would be shame to discover something like this after the car was already painted.
Not everyone will think to check this, but a straightedge held along the rear of the rocker panel reveals that the rear part of the quarter is sticking out too far. Metal will have to be removed from the inner structure to put this back into place.
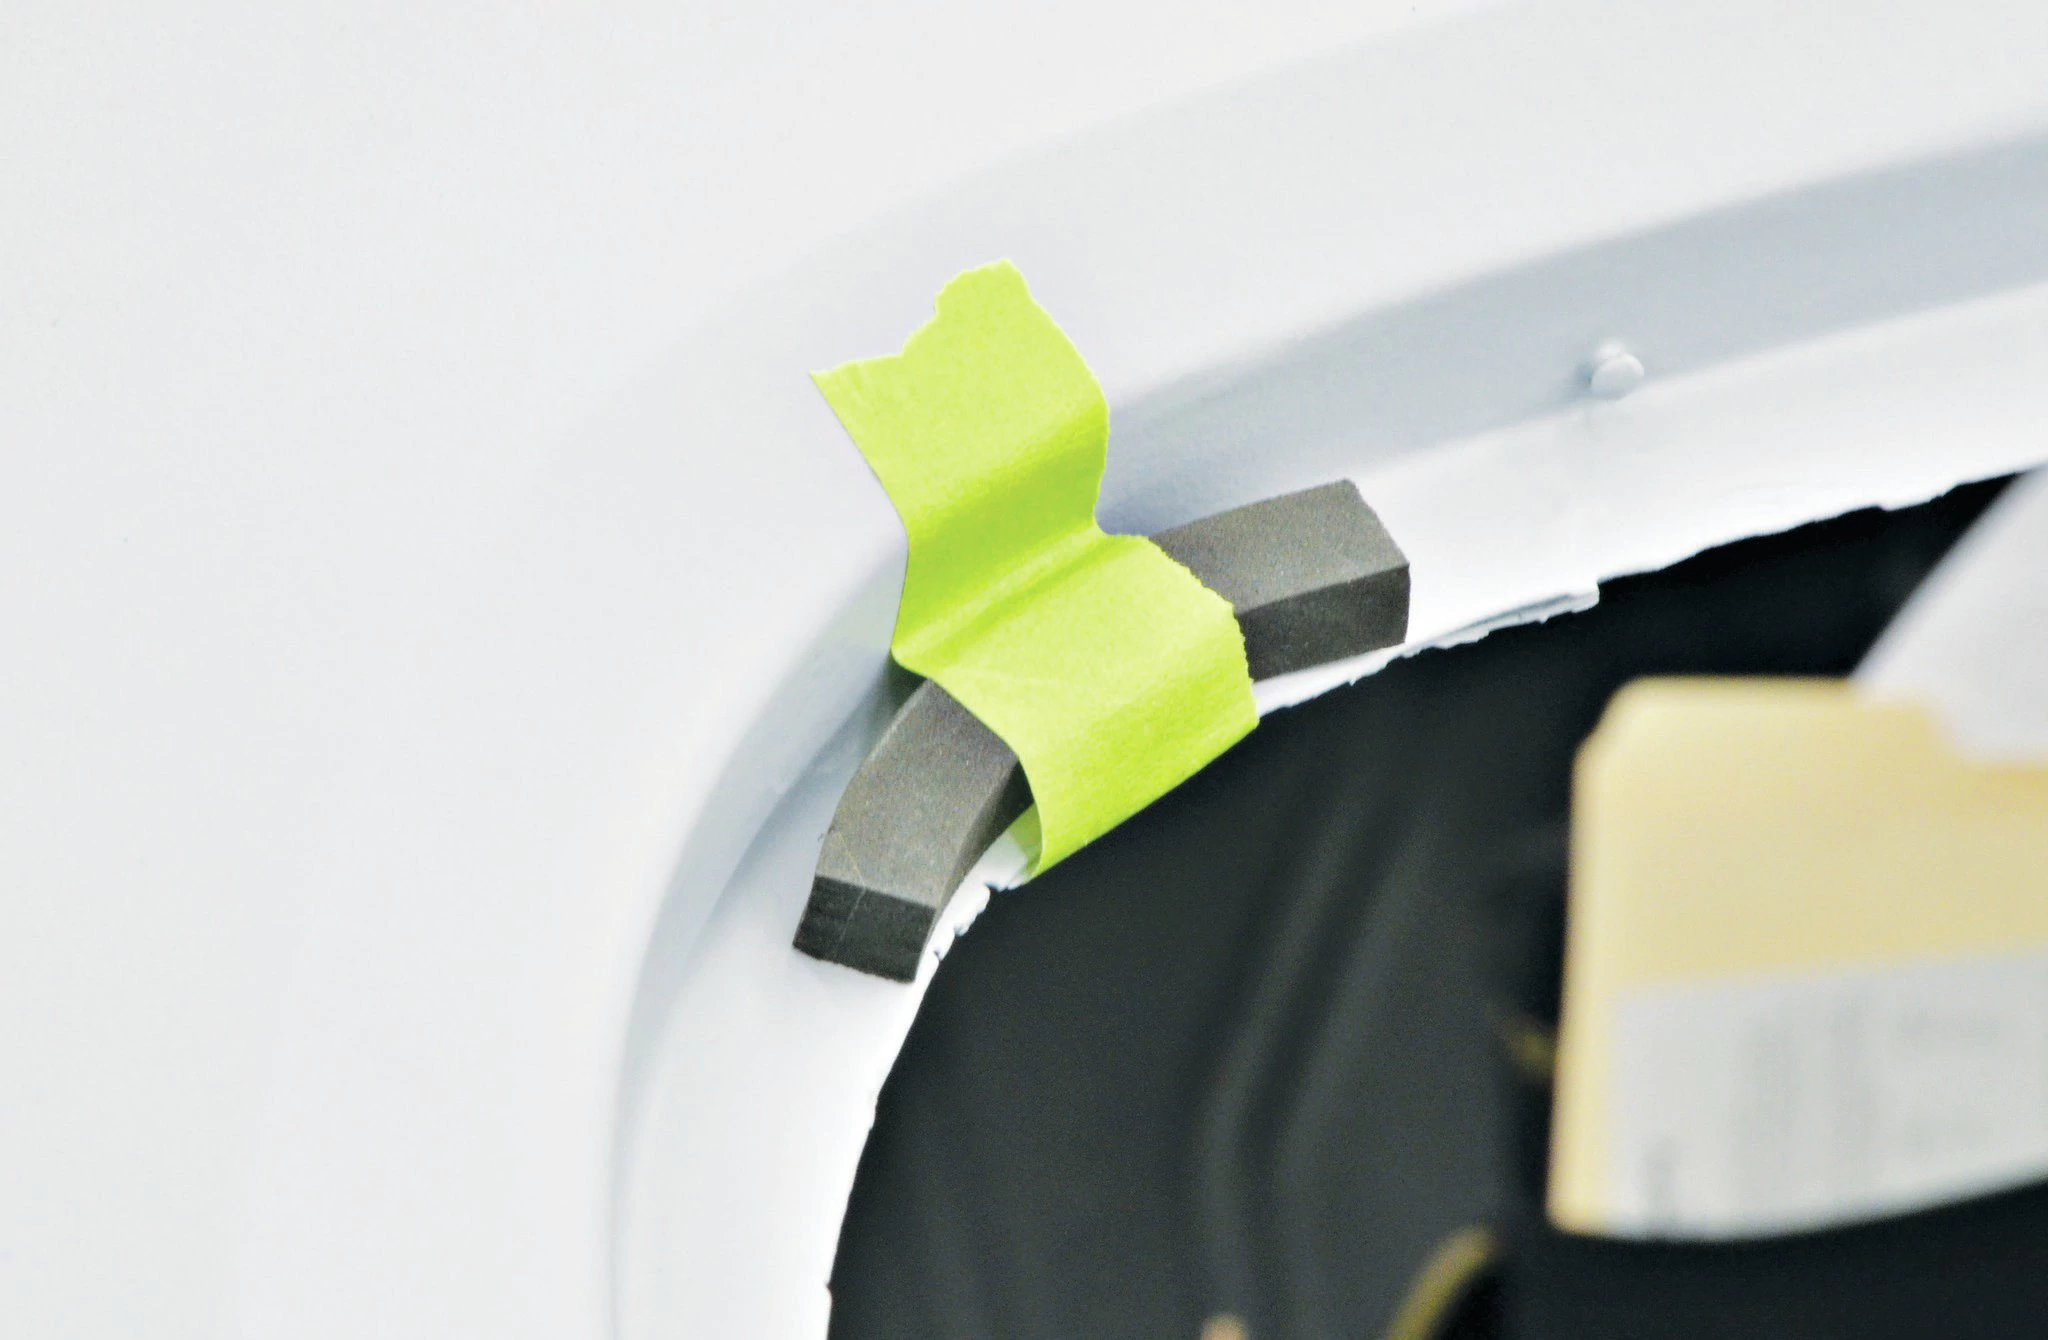
Small foam strips allow the rear window to be set in place to ensure it lay perfectly flat in the opening. MCR prefers to use urethane to mount windows over butyl tape.
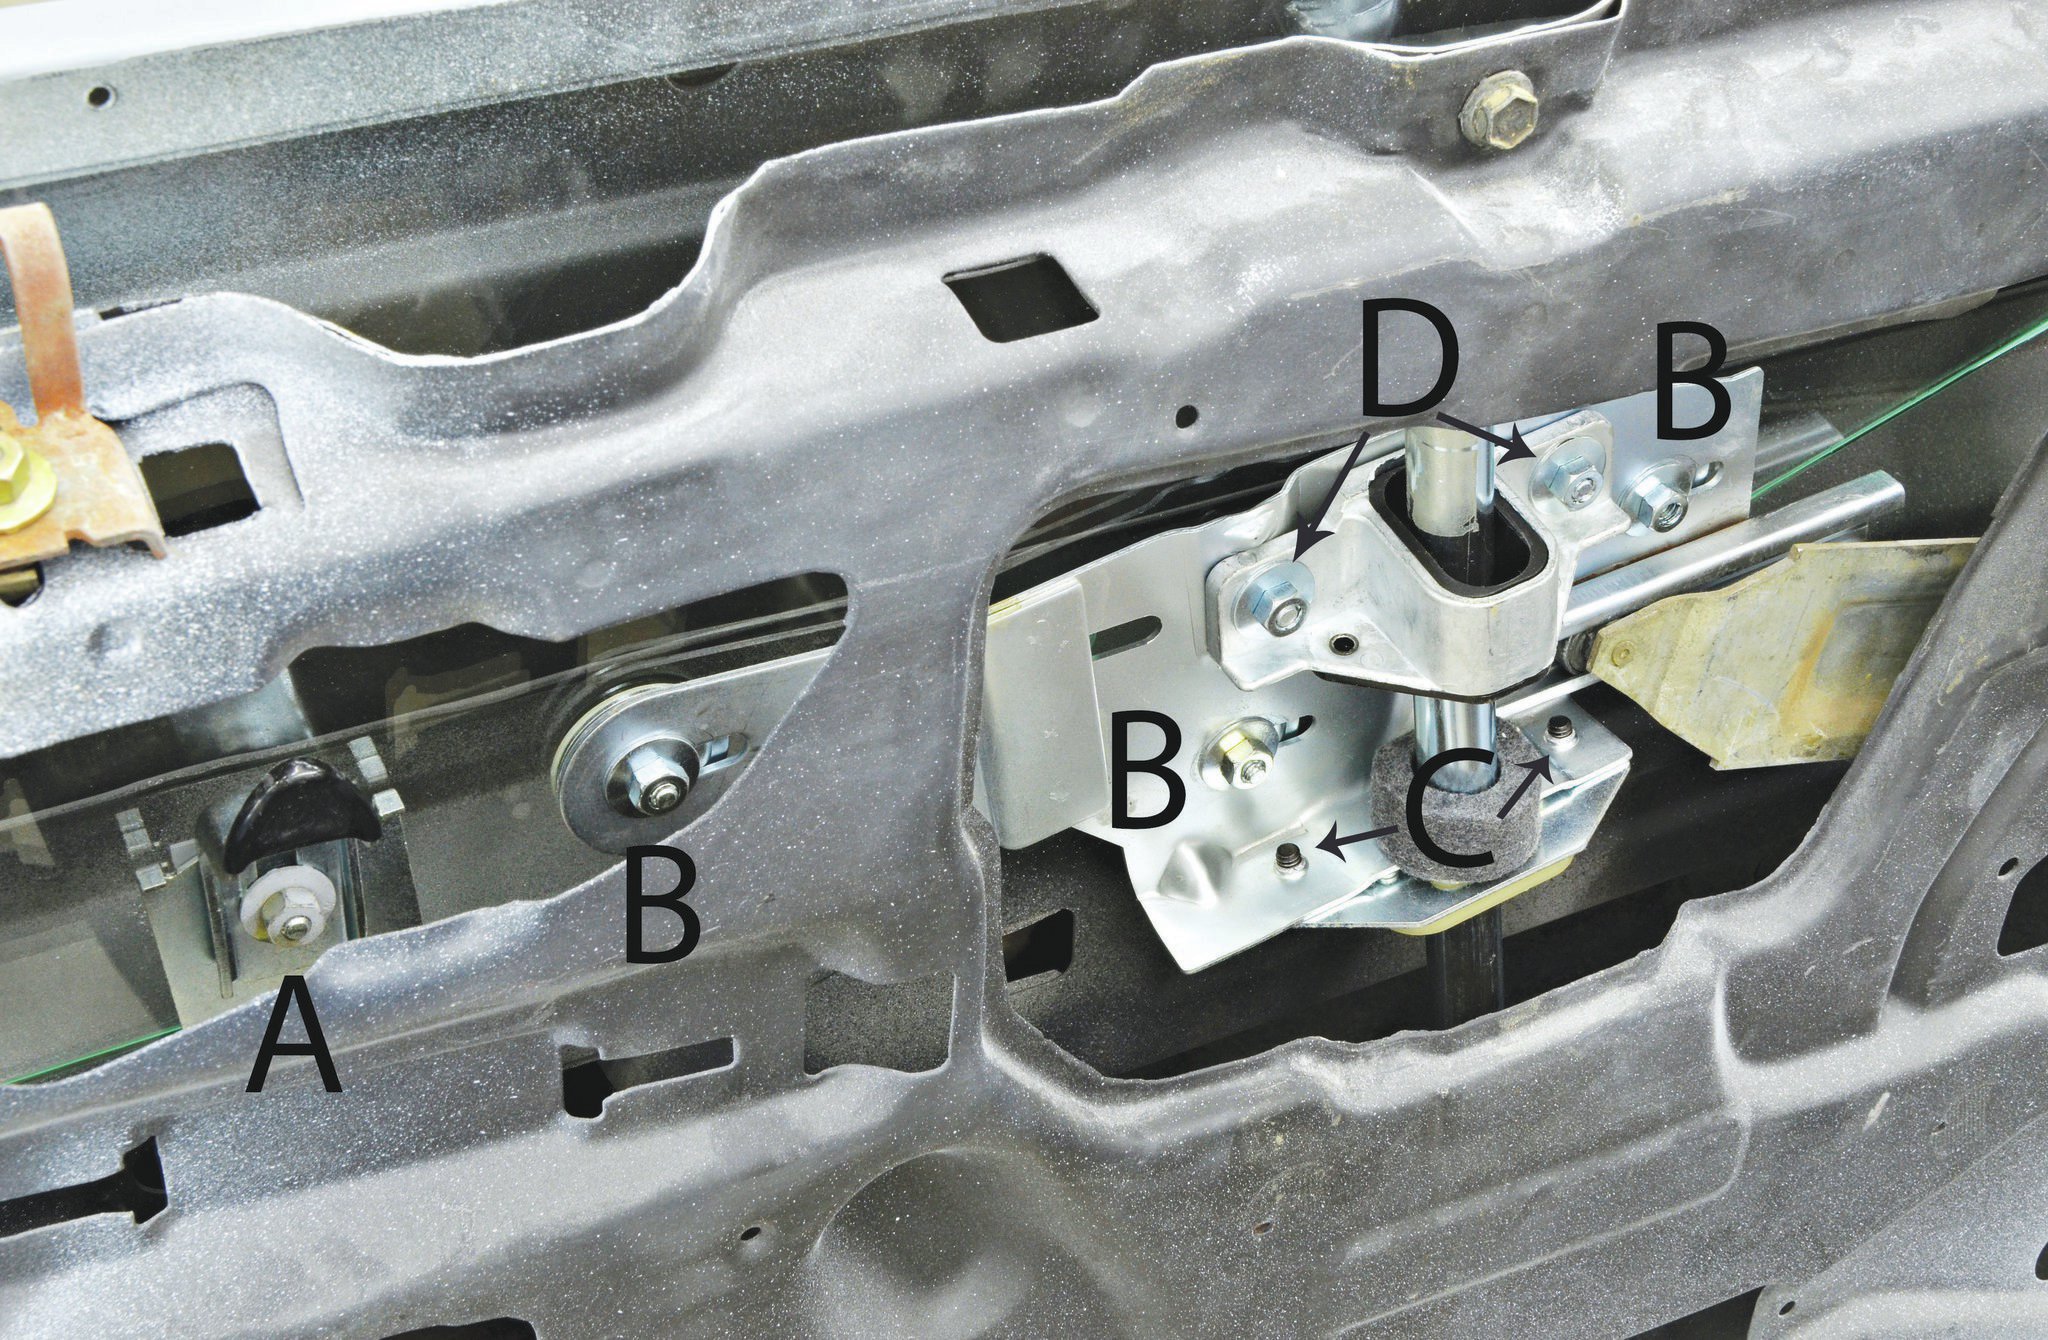
There are a lot of different styles of window mechanisms, but the adjustments are generally the same:
(A) window-height stops, there are two of these that limit how far the window can rise;
(B) the fore and aft adjustments;
(C) the tilt adjustment, which moves the top of the glass in or out; and the (D) rotation adjustment, which aligns the top of the window with the roof and also, in this case, the quarter window.
Consider leaving the window mechanism in place during paint, then you can simply reinstall the glass, assuming you put the door back in exactly the same place.
Though it’s rare, MCR has encountered glass that was too short or even had the wrong curvature. A full mockup is the time to confirm that your aftermarket glass is good.
Mark Ehlen, Car Craft